Using Spinnaker for Kubernetes Deployments
We’re Earthly. We make building software simpler and therefore faster using containerization. Pair it with Spinnaker for even smoother Kubernetes deployments. Check it out.
Kubernetes has become the standard for deploying and managing containerized applications, but there are a lot of questions to be answered in the cloud native space. And they all seem to center around a single theme:
How do you constantly release software with speed, quality, and confidence?
This is where Spinnaker comes in. Spinnaker is an open-source continuous delivery platform that offers an automated and repeatable process for releasing changes to major cloud platforms. In this article, you’ll learn what Spinnaker is, its use cases, and how to deploy a sample application to your Kubernetes cluster using Spinnaker.
So…What Does Spinnaker Do?
As a continuous delivery platform, Spinnaker gives development teams the ability to rapidly release software updates without worrying too much about the underlying cloud infrastructure. Teams can focus on writing code and developing features and leave Spinnaker to deal with:
- Automating and standardizing releases.
- Responding to deployment triggers. A deployment trigger could be a commit in GitHub or a job in Jenkins, for example.
- Easy integration with monitoring software like Prometheus, Stackdriver, or Datadog for data collection and analysis.
Implementing Spinnaker
Before you dive in, there are a few prerequisites you need to have installed:
Step 1—Set Up Halyard
Halyard is a CLI tool that manages the lifecycle of your Spinnaker deployment. You’ll use it to write, validate and update deployment configurations.
There are two ways to set up Halyard:
This tutorial uses a local installation of Halyard on macOS.
Get the latest version of Halyard:
curl -O https://raw.githubusercontent.com/spinnaker/halyard/master/install/macos/InstallHalyard.shThen, install it:
sudo bash InstallHalyard.shAnd verify installation run:
hal -vStep 2—Set Up a Cluster
This article uses Elastic Kubernetes Service (EKS) for the Kubernetes cluster. You’ll need to create a Kubernetes cluster or use an existing one.
Spinnaker uses a service account to communicate with the cluster, so set up a service account, a cluster role, and cluster role binding. Note that if you wish to allow Spinnaker access to specific namespaces, then you can use a role and role binding instead of a cluster role.
Create the Amazon EKS cluster for Spinnaker. eksctl is used for managing EKS clusters from the command line:
eksctl create cluster --name=eks-spinnaker --nodes=2 --region=us-west-2 --write-kubeconfig=falseLet’s break down the previous code snippet:
--namespecifies the name of the cluster.--nodesspecifies how many worker nodes to set up.--regionchooses a region where the cluster should be deployed.--write-kubeconfigdisables writing the cluster config to the Kubernetes config file locally.
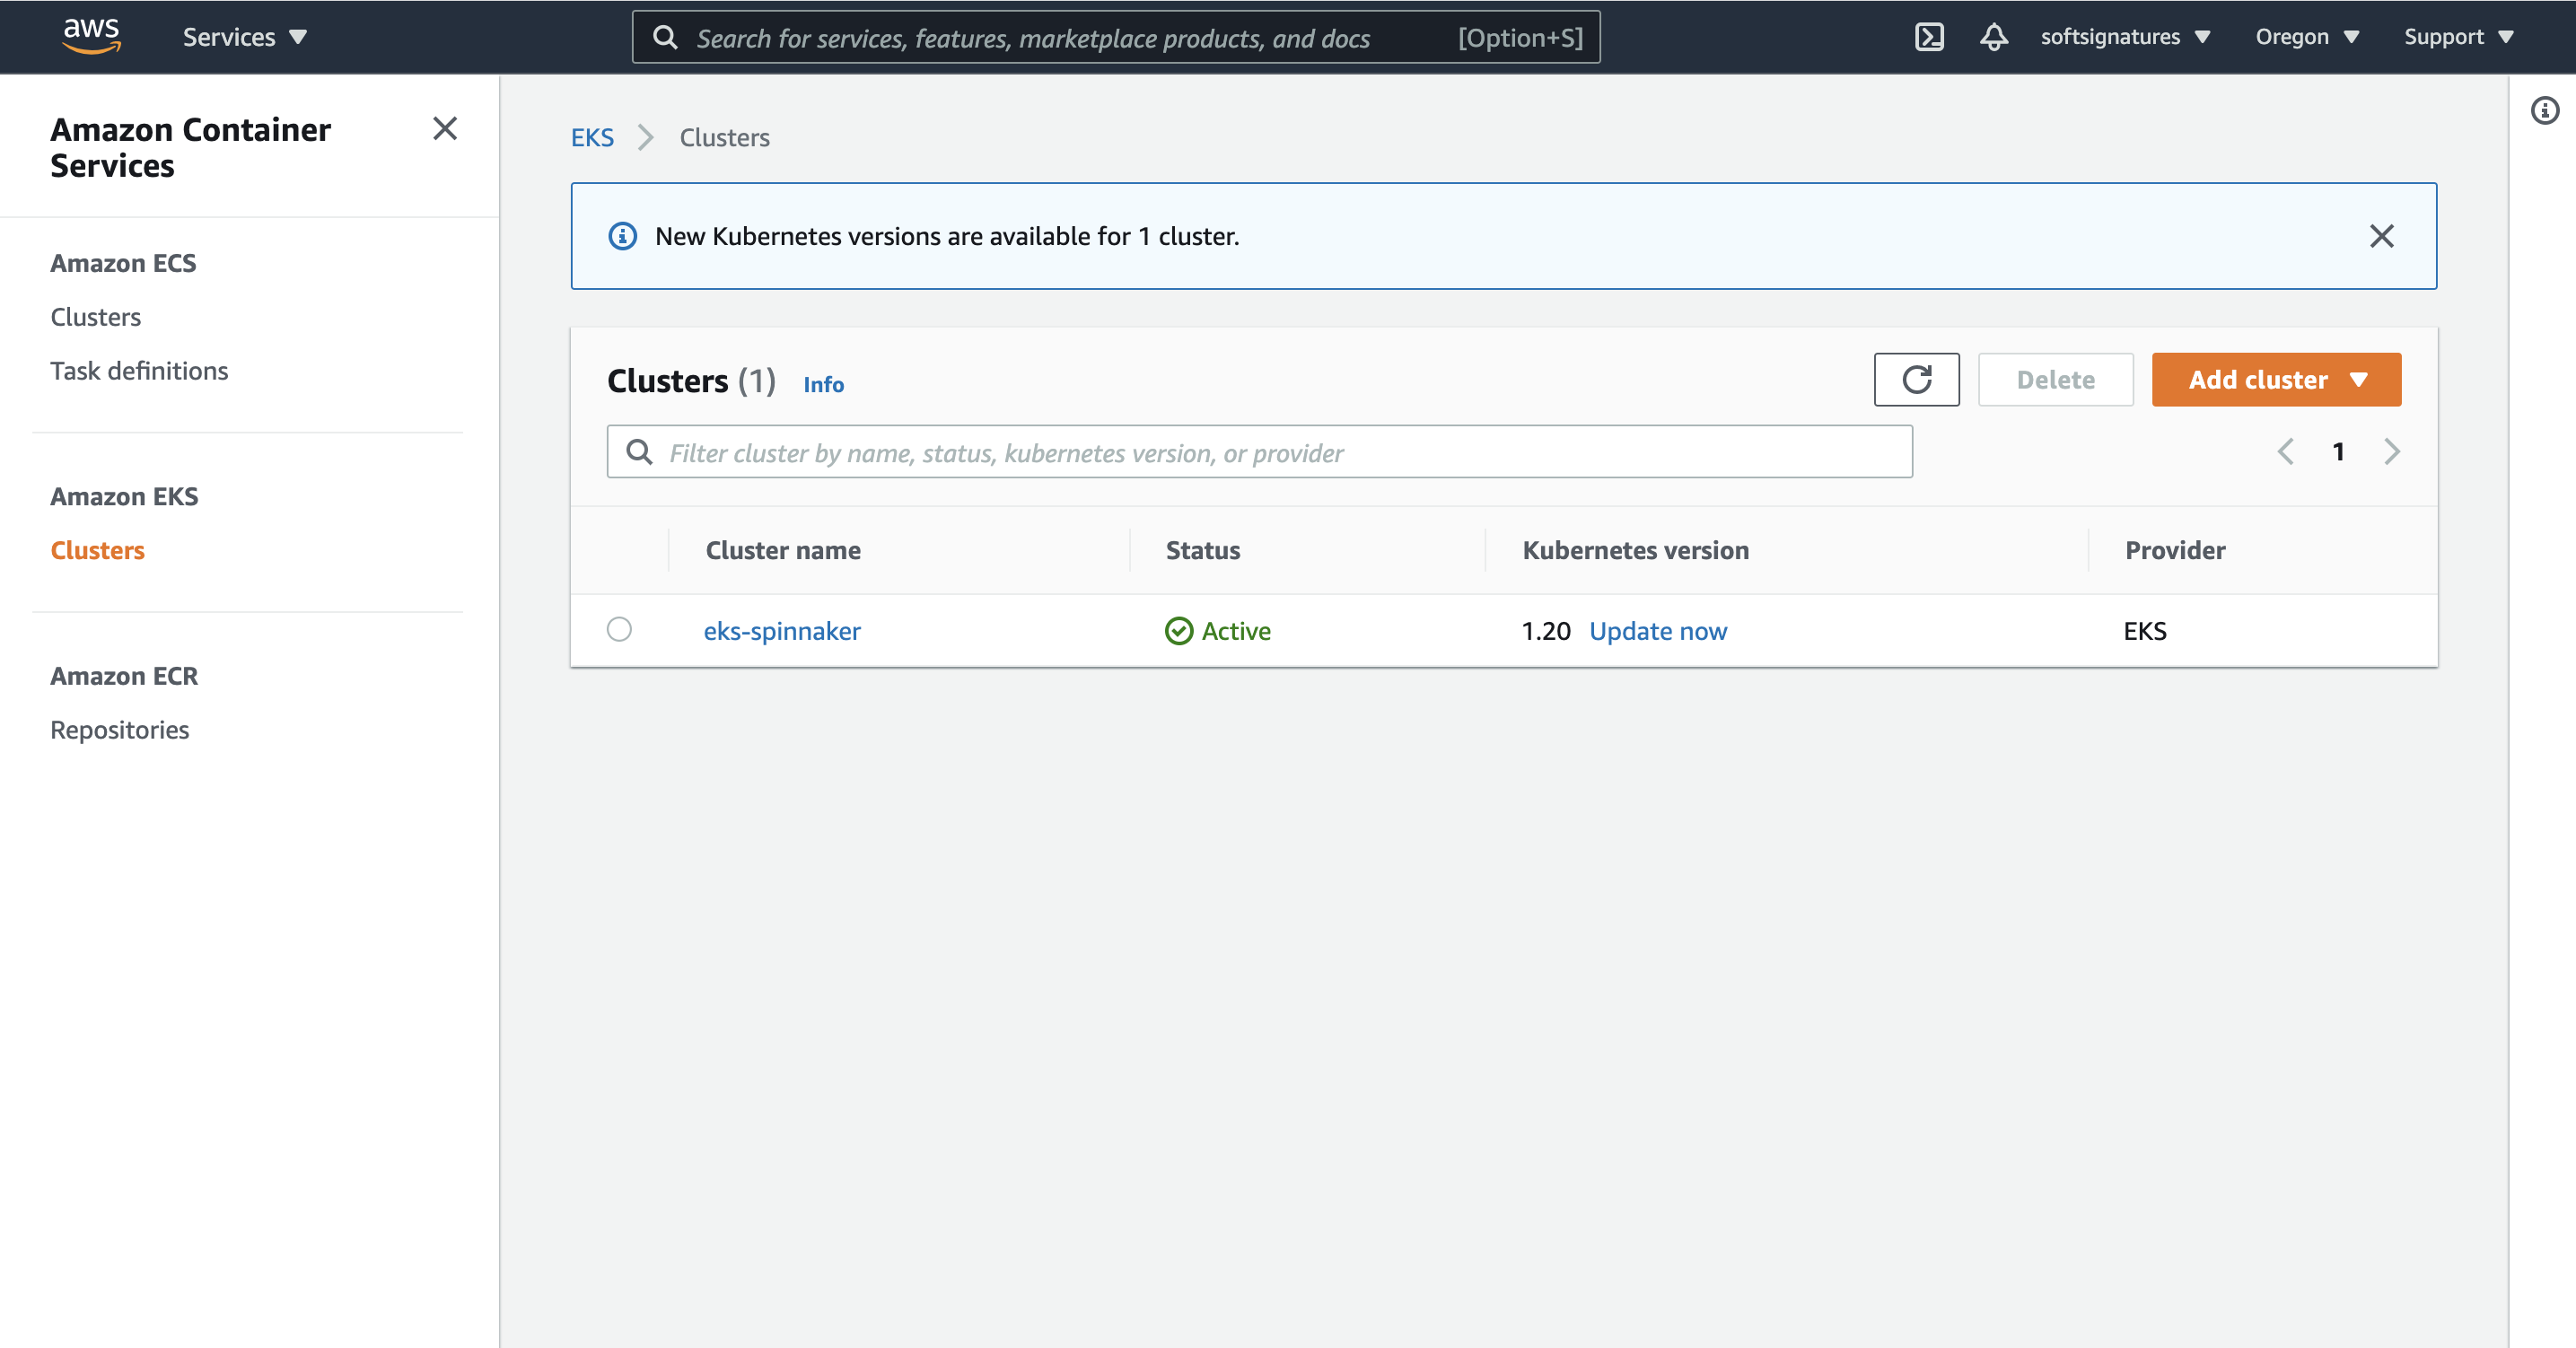
This takes around twenty minutes, so you might need to grab a cup of coffee. Once it’s done, you should see something like this :
Retrieve the EKS cluster config and contexts:
aws eks update-kubeconfig --name eks-spinnaker --region us-west-2 --alias eks-spinnakerThis command obtains the cluster config and contexts and appends them to your local kubeconfig file at ~/.kube/config.
Set the current kubectl context to the cluster for Spinnaker:
kubectl config use-context eks-spinnakerTo create a service account, cluster role, and cluster binding, first create a service-account.yaml file and paste this in:
apiVersion: rbac.authorization.k8s.io/v1
kind: Role
metadata:
 name: spinnaker-role
 namespace: spinnaker
rules:
- apiGroups: [""]
  resources: ["namespaces", "configmaps", "events", "replicationcontrollers", "serviceaccounts", "pods/logs"]
  verbs: ["get", "list"]
- apiGroups: [""]
  resources: ["pods", "services", "secrets"]
  verbs: ["*"]
- apiGroups: ["autoscaling"]
  resources: ["horizontalpodautoscalers"]
  verbs: ["list", "get"]
- apiGroups: ["apps"]
  resources: ["controllerrevisions", "statefulsets"]
  verbs: ["list"]
- apiGroups: ["extensions", "app"]
  resources: ["deployments", "replicasets", "ingresses"]
  verbs: ["*"]

---
apiVersion: rbac.authorization.k8s.io/v1
kind: RoleBinding
metadata:
 name: spinnaker-role-binding
 namespace: spinnaker
roleRef:
 apiGroup: rbac.authorization.k8s.io
 kind: Role
 name: spinnaker-role
subjects:
- namespace: spinnaker
  kind: ServiceAccount
  name: spinnaker-service-account

---
apiVersion: v1
kind: ServiceAccount
metadata:
  name: spinnaker-service-account
  namespace: default
Then, execute the manifest:
kubectl apply -f service-account.yamlThis will create the accounts and roles necessary for Spinnaker to be able to communicate with your cluster. If you’d like a deeper dive, check out Spinnaker’s documentation.
Extract the service account secret and add it to your current Kubernetes context:
TOKEN=$(kubectl get secret --context $CONTEXT \
   $(kubectl get serviceaccount spinnaker-service-account \
       --context $CONTEXT \
       -n default \
       -o jsonpath='{.secrets[0].name}') \
   -n default \
   -o jsonpath='{.data.token}' | base64 --decode)
Set the user entry in kubeconfig:
kubectl config set-credentials ${CONTEXT}-token-user --token $TOKEN

kubectl config set-context $CONTEXT --user ${CONTEXT}-token-user
Step 3—Choose Your Provider
Spinnaker allows you to define providers that are integrated into the cloud platforms you deploy your applications to. There are several providers you can choose from, including:
- Google App Engine
- AWS
- Azure
- Cloud Foundry
- DC/OS
- Google Compute Engine
- Kubernetes
- Oracle
This article uses Kubernetes as the provider. To enable it, run:
hal config provider kubernetes enableAdd an eks-spinnaker cluster as a Kubernetes provider:
CONTEXT=$(kubectl config current-context)
hal config provider kubernetes account add eks-spinnaker --context $CONTEXT
Step 4—Enable Spinnaker Artifacts
A Spinnaker artifact is a “named JSON object that refers to an external resource.” An artifact can reference several different external resources, such as:
- A Docker image
- A file stored in GitHub
- An Amazon Machine Image (AMI)
- A binary blob in Amazon S3 or Google Cloud Storage
To enable artifacts, run:
hal config features edit --artifacts trueStep 5—Choose Your Environment
There are several ways to deploy Spinnaker on a Kubernetes cluster. For example:
- As a distributed installation on Kubernetes. Halyard deploys each of Spinnaker’s microservices separately. This is highly recommended for use in production.
- As a local installation of a Debian package. This is acceptable for smaller Spinnaker deployments.
- As a local Git installation.
To configure the distributed installation of Spinnaker on Kubernetes, run:
hal config deploy edit --type distributed --account-name eks-spinnakerNote that eks-spinnaker is the name you created when you configured the Kubernetes provider.
Step 6—Configure Spinnaker Storage
Spinnaker requires you to set up an external storage provider to use for persisting your application settings and configured pipelines. You’ve got several options for this provider, including:
- Azure Storage
- Google Cloud Storage
- MinIO
- Redis (not recommended for production environments)
- Amazon S3
- Oracle Object Storage
This tutorial makes use of AWS S3 for the storage option, but you can choose any other storage option depending on your requirements.
You will also need an AWS account, and a role or user configured with S3 permissions. To grant S3 permissions, refer to the AWS documentation for creating roles for a user, and make sure that both user and role policies grant access to s3:*.
To set S3 as your storage option, run:
hal config storage s3 edit \
    --access-key-id $YOUR_ACCESS_KEY_ID \
    --secret-access-key \
    --region $REGION
Where access-key-id and secret-access-key are the keys for the IAM user created on AWS.
Finally, set the storage source to S3:
hal config storage edit --type s3Step 7—Install Spinnaker
Choose a Spinnaker version to install:
hal version list
hal config version edit --version <desired-version>
Next, deploy Spinnaker in your Kubernetes cluster:
hal deploy applyVerify the Spinnaker installation:
kubectl -n spinnaker get svcThe command returns the Spinnaker services that are in the Spinnaker namespace.
Step 8—Expose Spinnaker Using Elastic Load Balancer
To access the Spinnaker dashboard, you need to make a couple of changes. First, edit the deck and gate components of your Spinnaker deployment. The deck is responsible for the UI while the gate is the API gateway.
Note that you can only access the Spinnaker components from the cluster. The service definition uses ClusterIP.
Then, expose gate and deck:
export NAMESPACE=spinnaker

kubectl -n ${NAMESPACE} expose service spin-gate --type LoadBalancer \
  --port 80 --target-port 8084 --name spin-gate-public

kubectl -n ${NAMESPACE} expose service spin-deck --type LoadBalancer \
  --port 80 --target-port 9000 --name spin-deck-public
Here, you create a service with the names spin-gate-public and spin-deck-public respectively. Both have a type of load balancer. The Spinnaker deck pod runs on port 9000 while the gate pod runs on port 8084. The --target-port flag targets the container port in the pod, and the --port flag is the port for accessing the service.
Obtain gate and deck URLs:
export API_URL=$(kubectl -n $NAMESPACE get svc spin-gate-public \
 -o jsonpath='{.status.loadBalancer.ingress[0].hostname}')

export UI_URL=$(kubectl -n $NAMESPACE get svc spin-deck-public \
 -o jsonpath='{.status.loadBalancer.ingress[0].hostname}')
This will expose the gate and deck services with the type of load balancer and generate a URL where you can access them.
Next, update Halyard to use the exposed gate and deck URLs:
# Configure the URL for gate
hal config security api edit --override-base-url http://${API_URL}

# Configure the URL for deck
hal config security ui edit --override-base-url http://${UI_URL}
Apply your changes to Spinnaker:
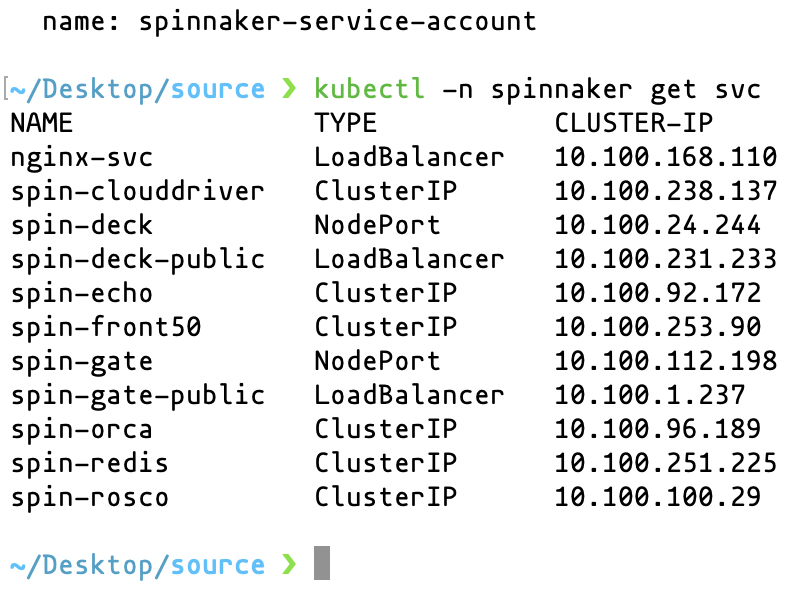
hal deploy applyVerify the exposed services:
kubectl get svc -n spinnakerAnd you should see something like this:
Get the deck URL and navigate to it in a browser to view it.
kubectl -n $NAMESPACE get svc spin-deck-public -o jsonpath='{.status.loadBalancer.ingress[0].hostname}'You should see something like:

Step 9—Create a New Application
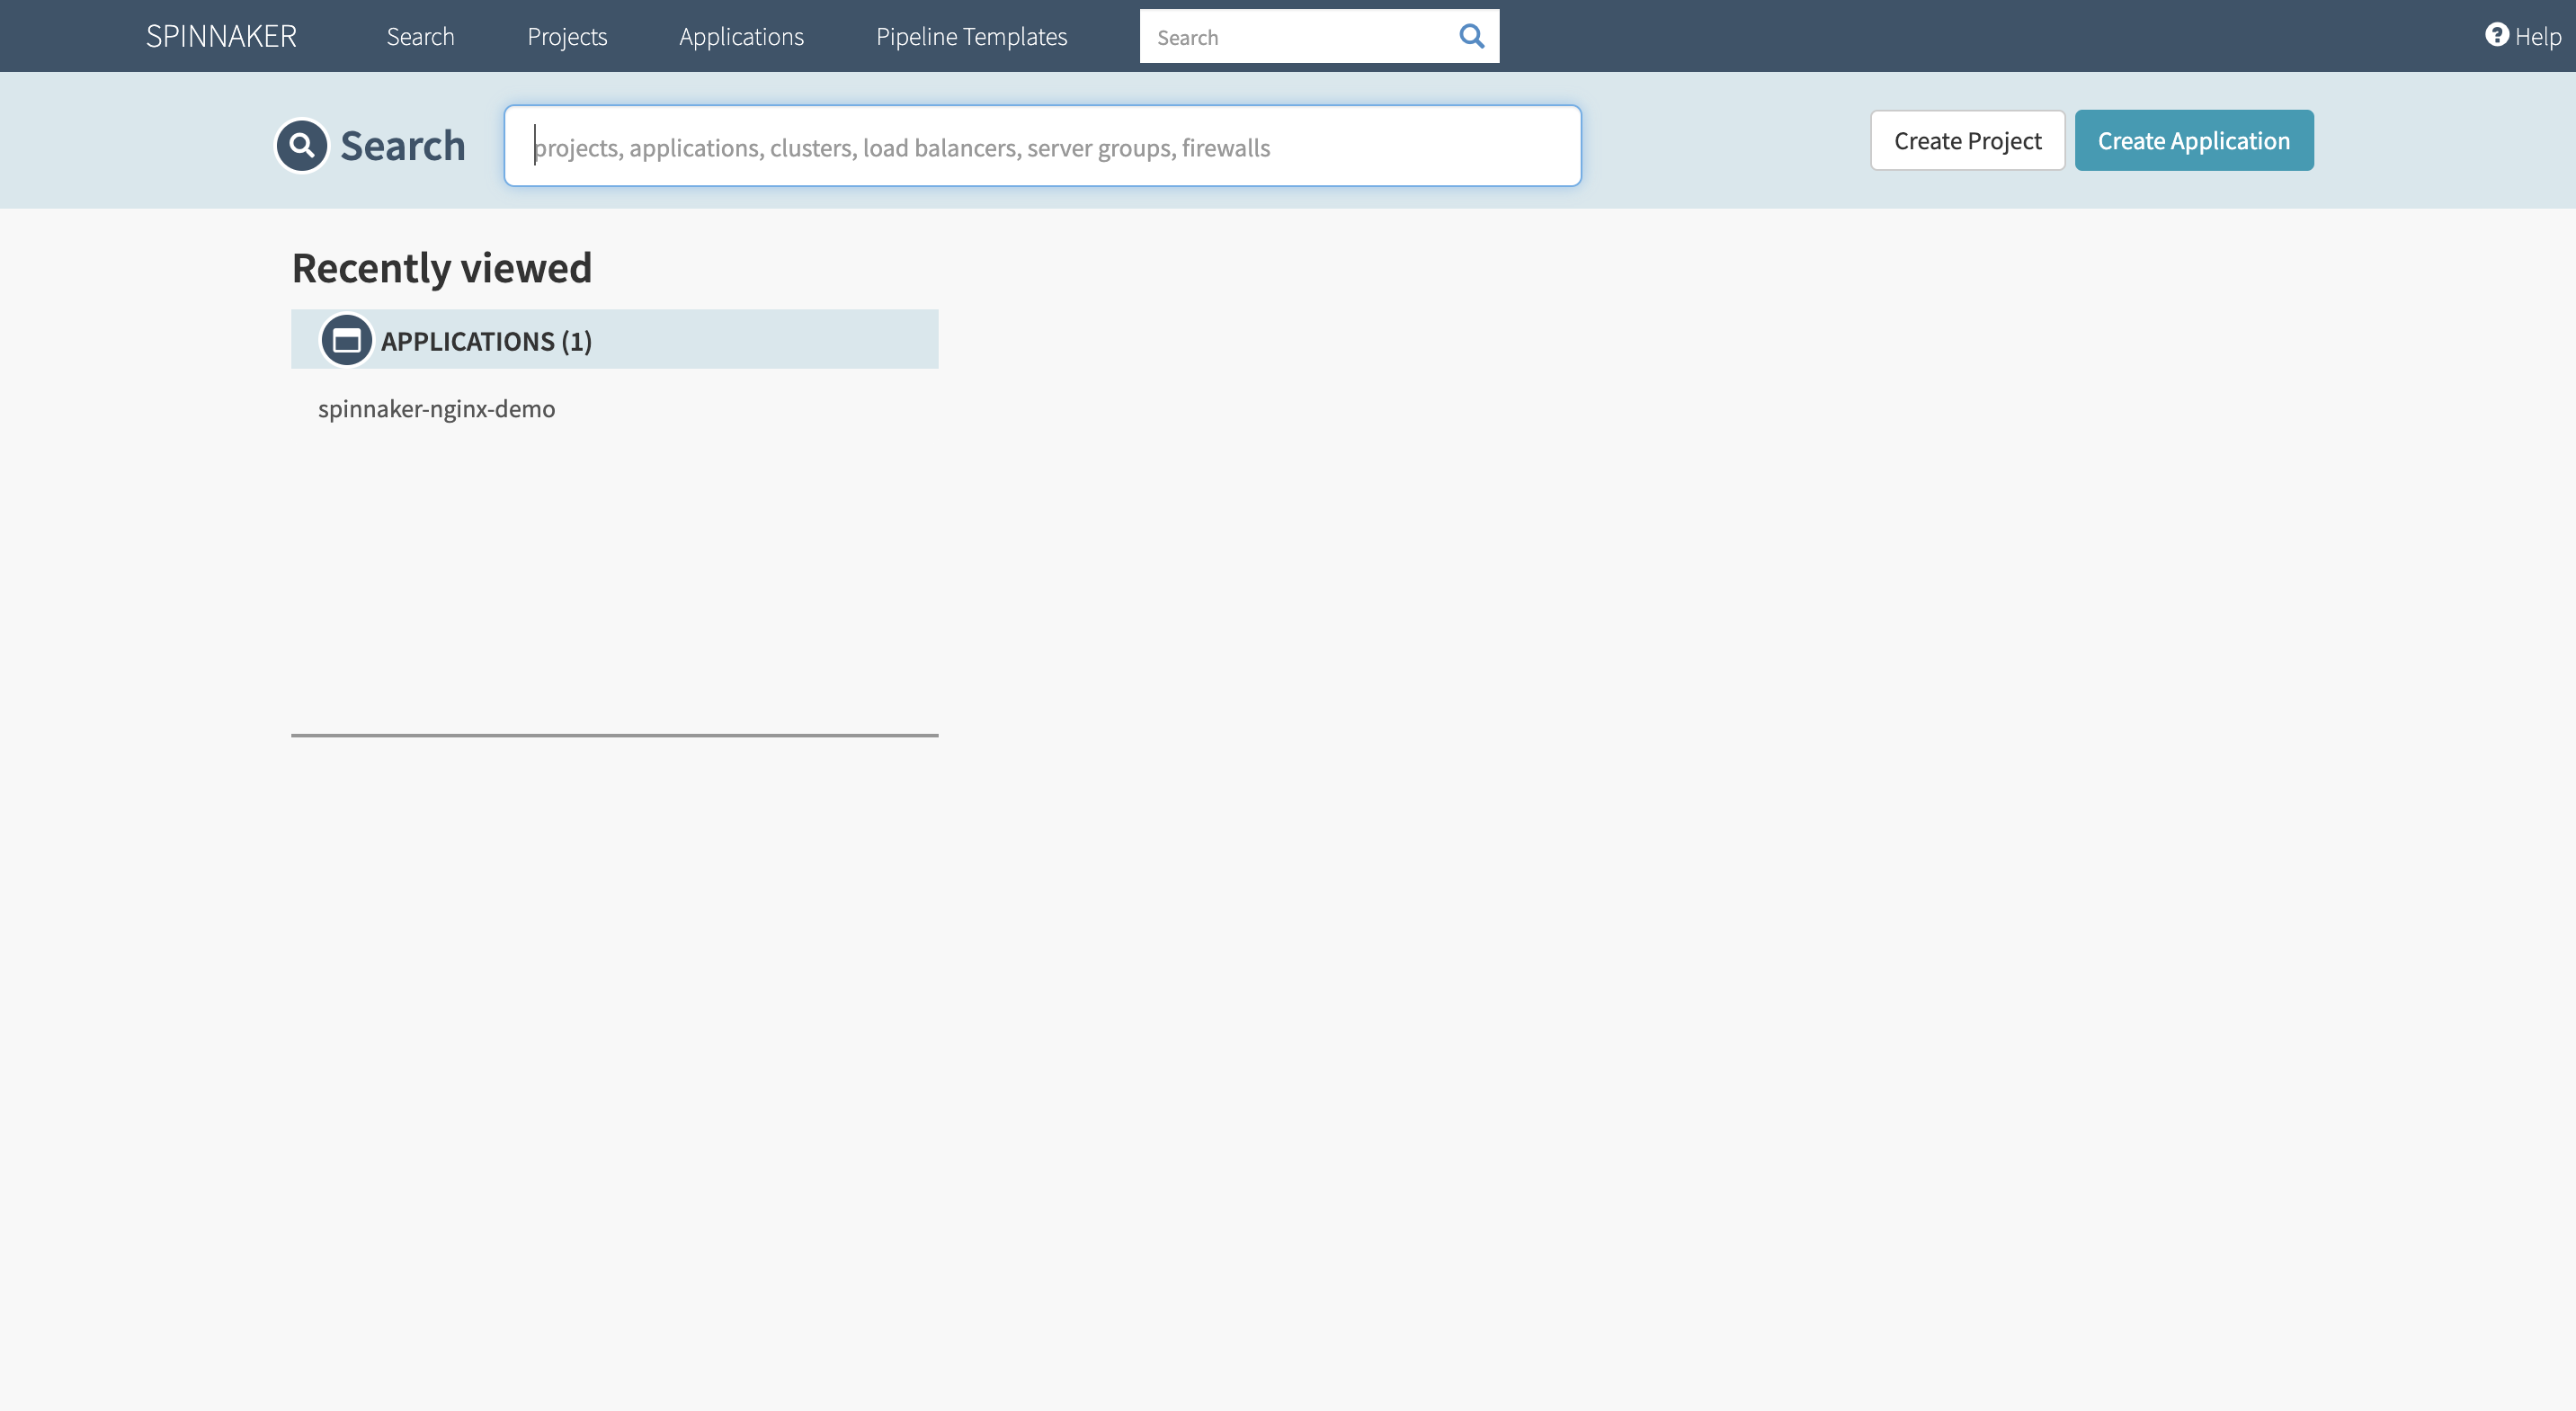
To create a new application, copy the exposed deck URL and paste it into the browser. If you’ve created an application before, it will show a list of created applications. A fresh installation should not show anything.
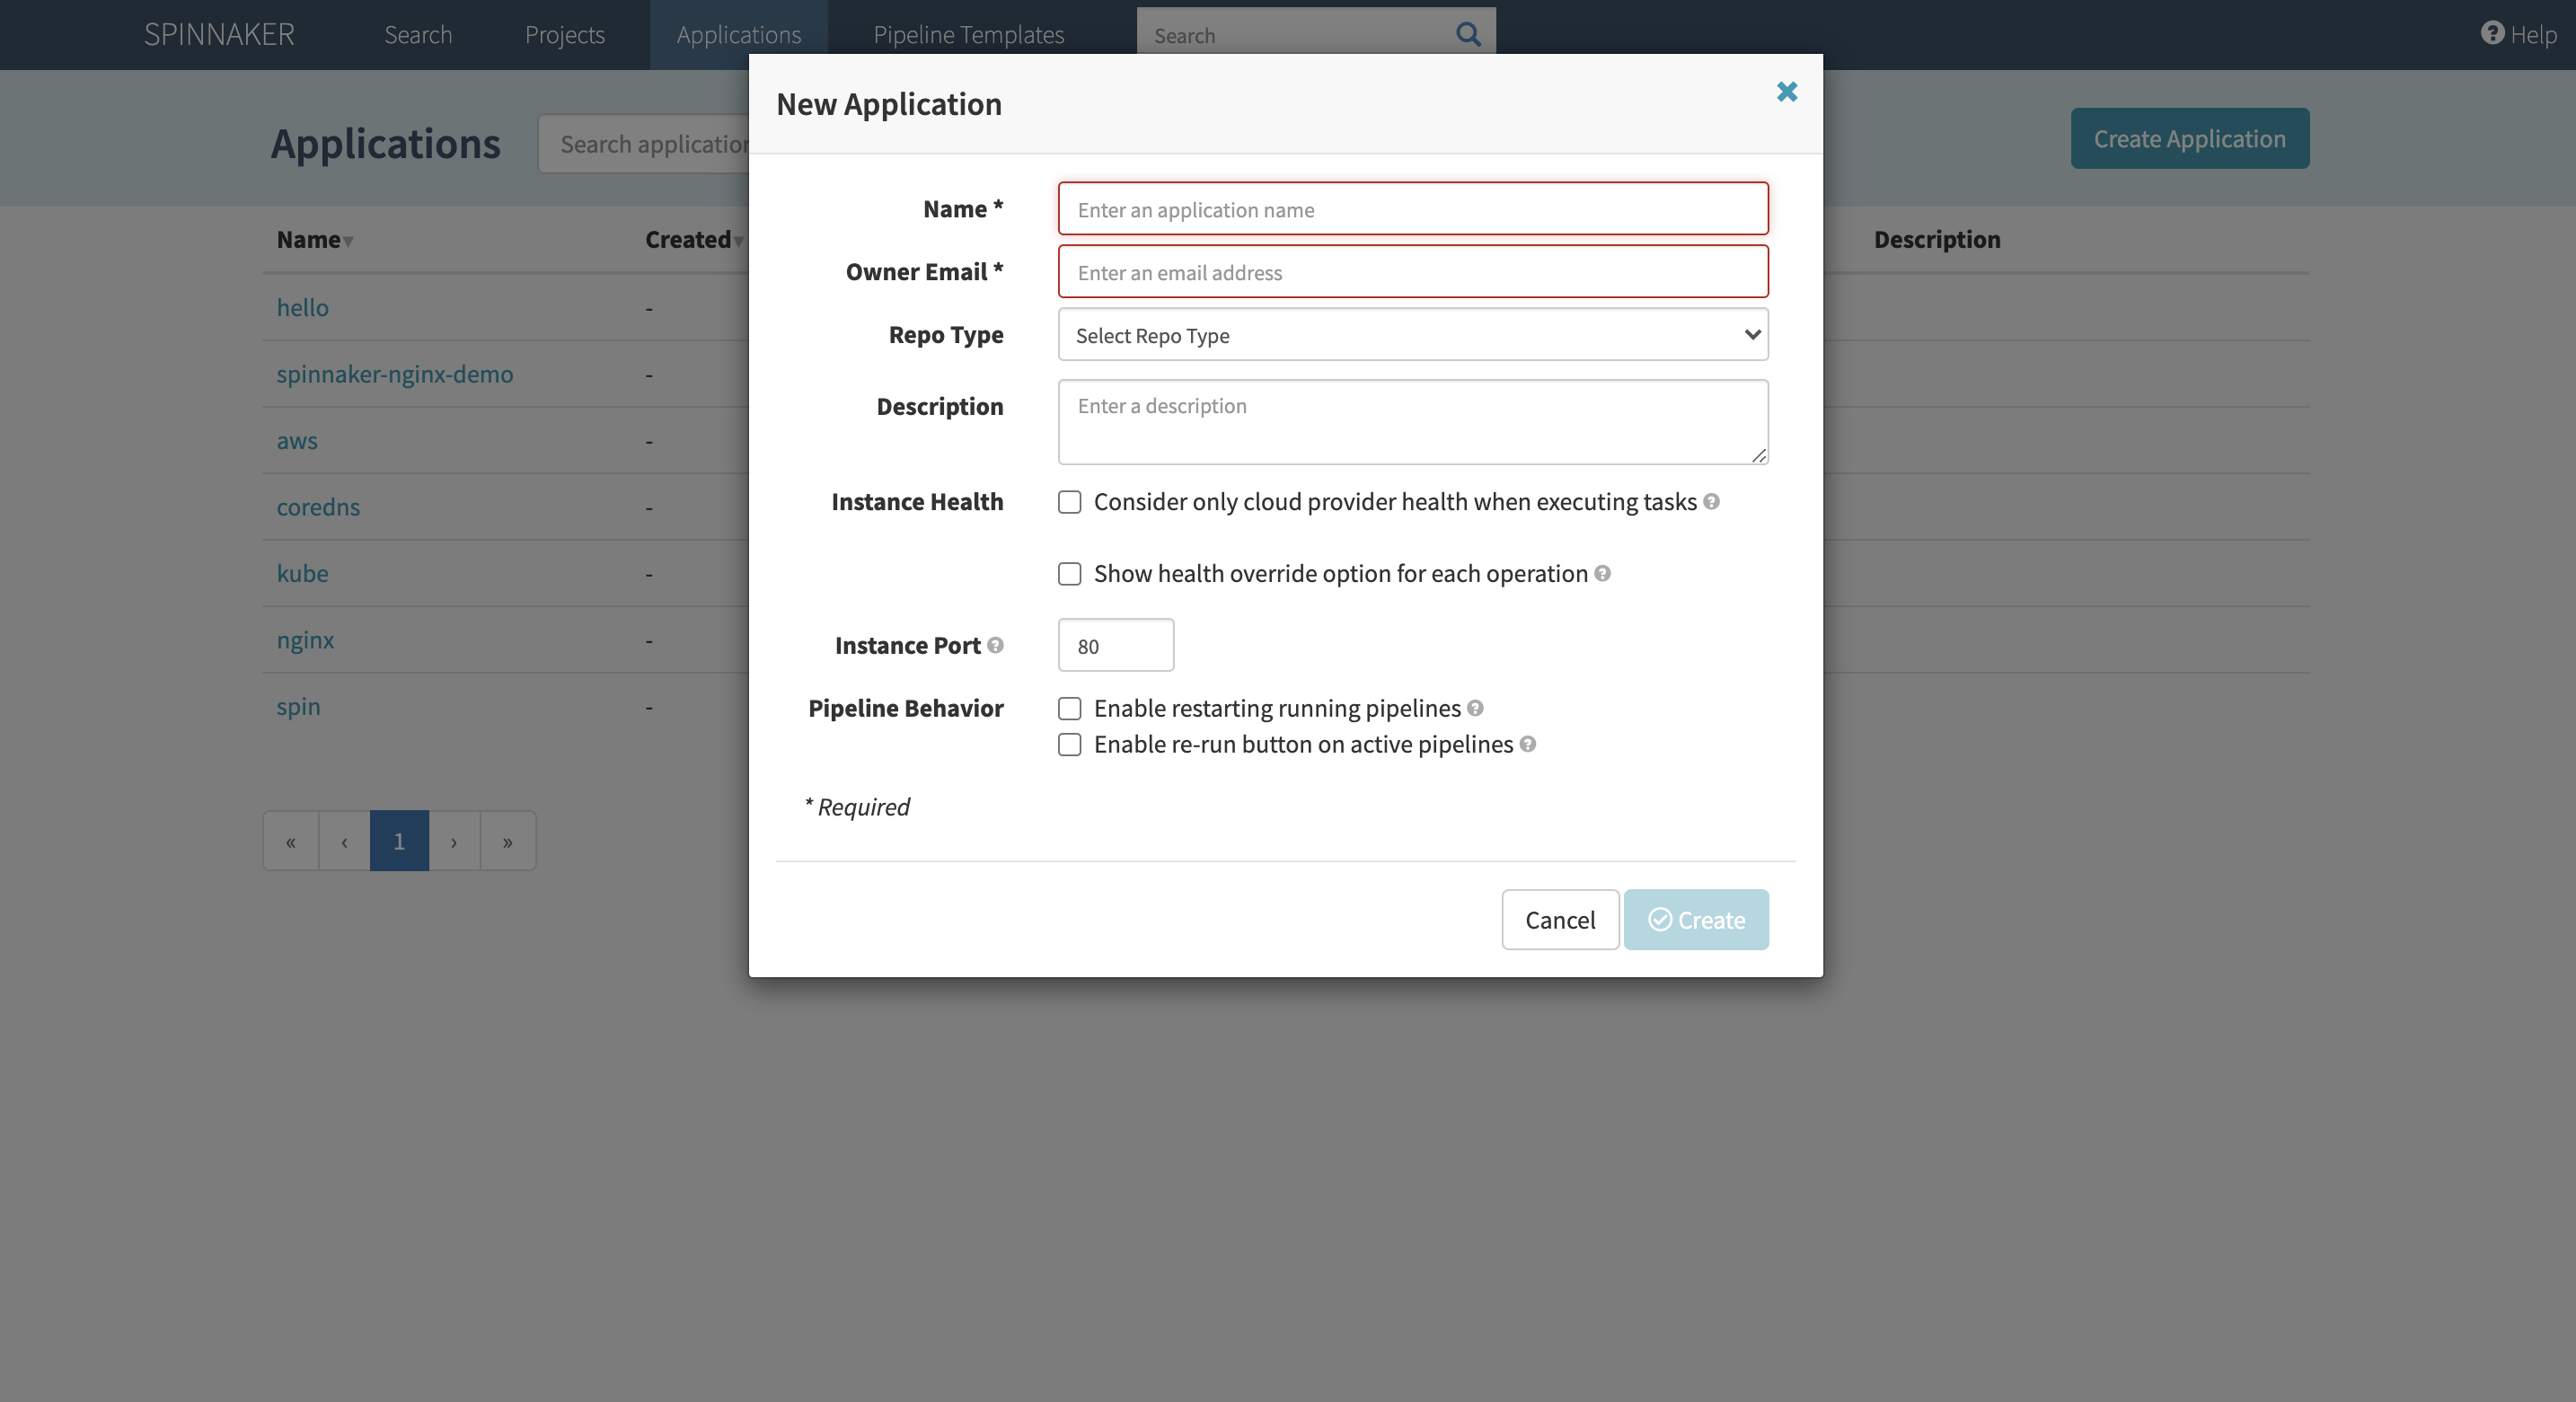
Click Create Application on the Spinnaker UI, then enter your name and email. For this tutorial, you’ll be deploying an NGINX server with Spinnaker for demo purposes.
Step 10—Create a Pipeline
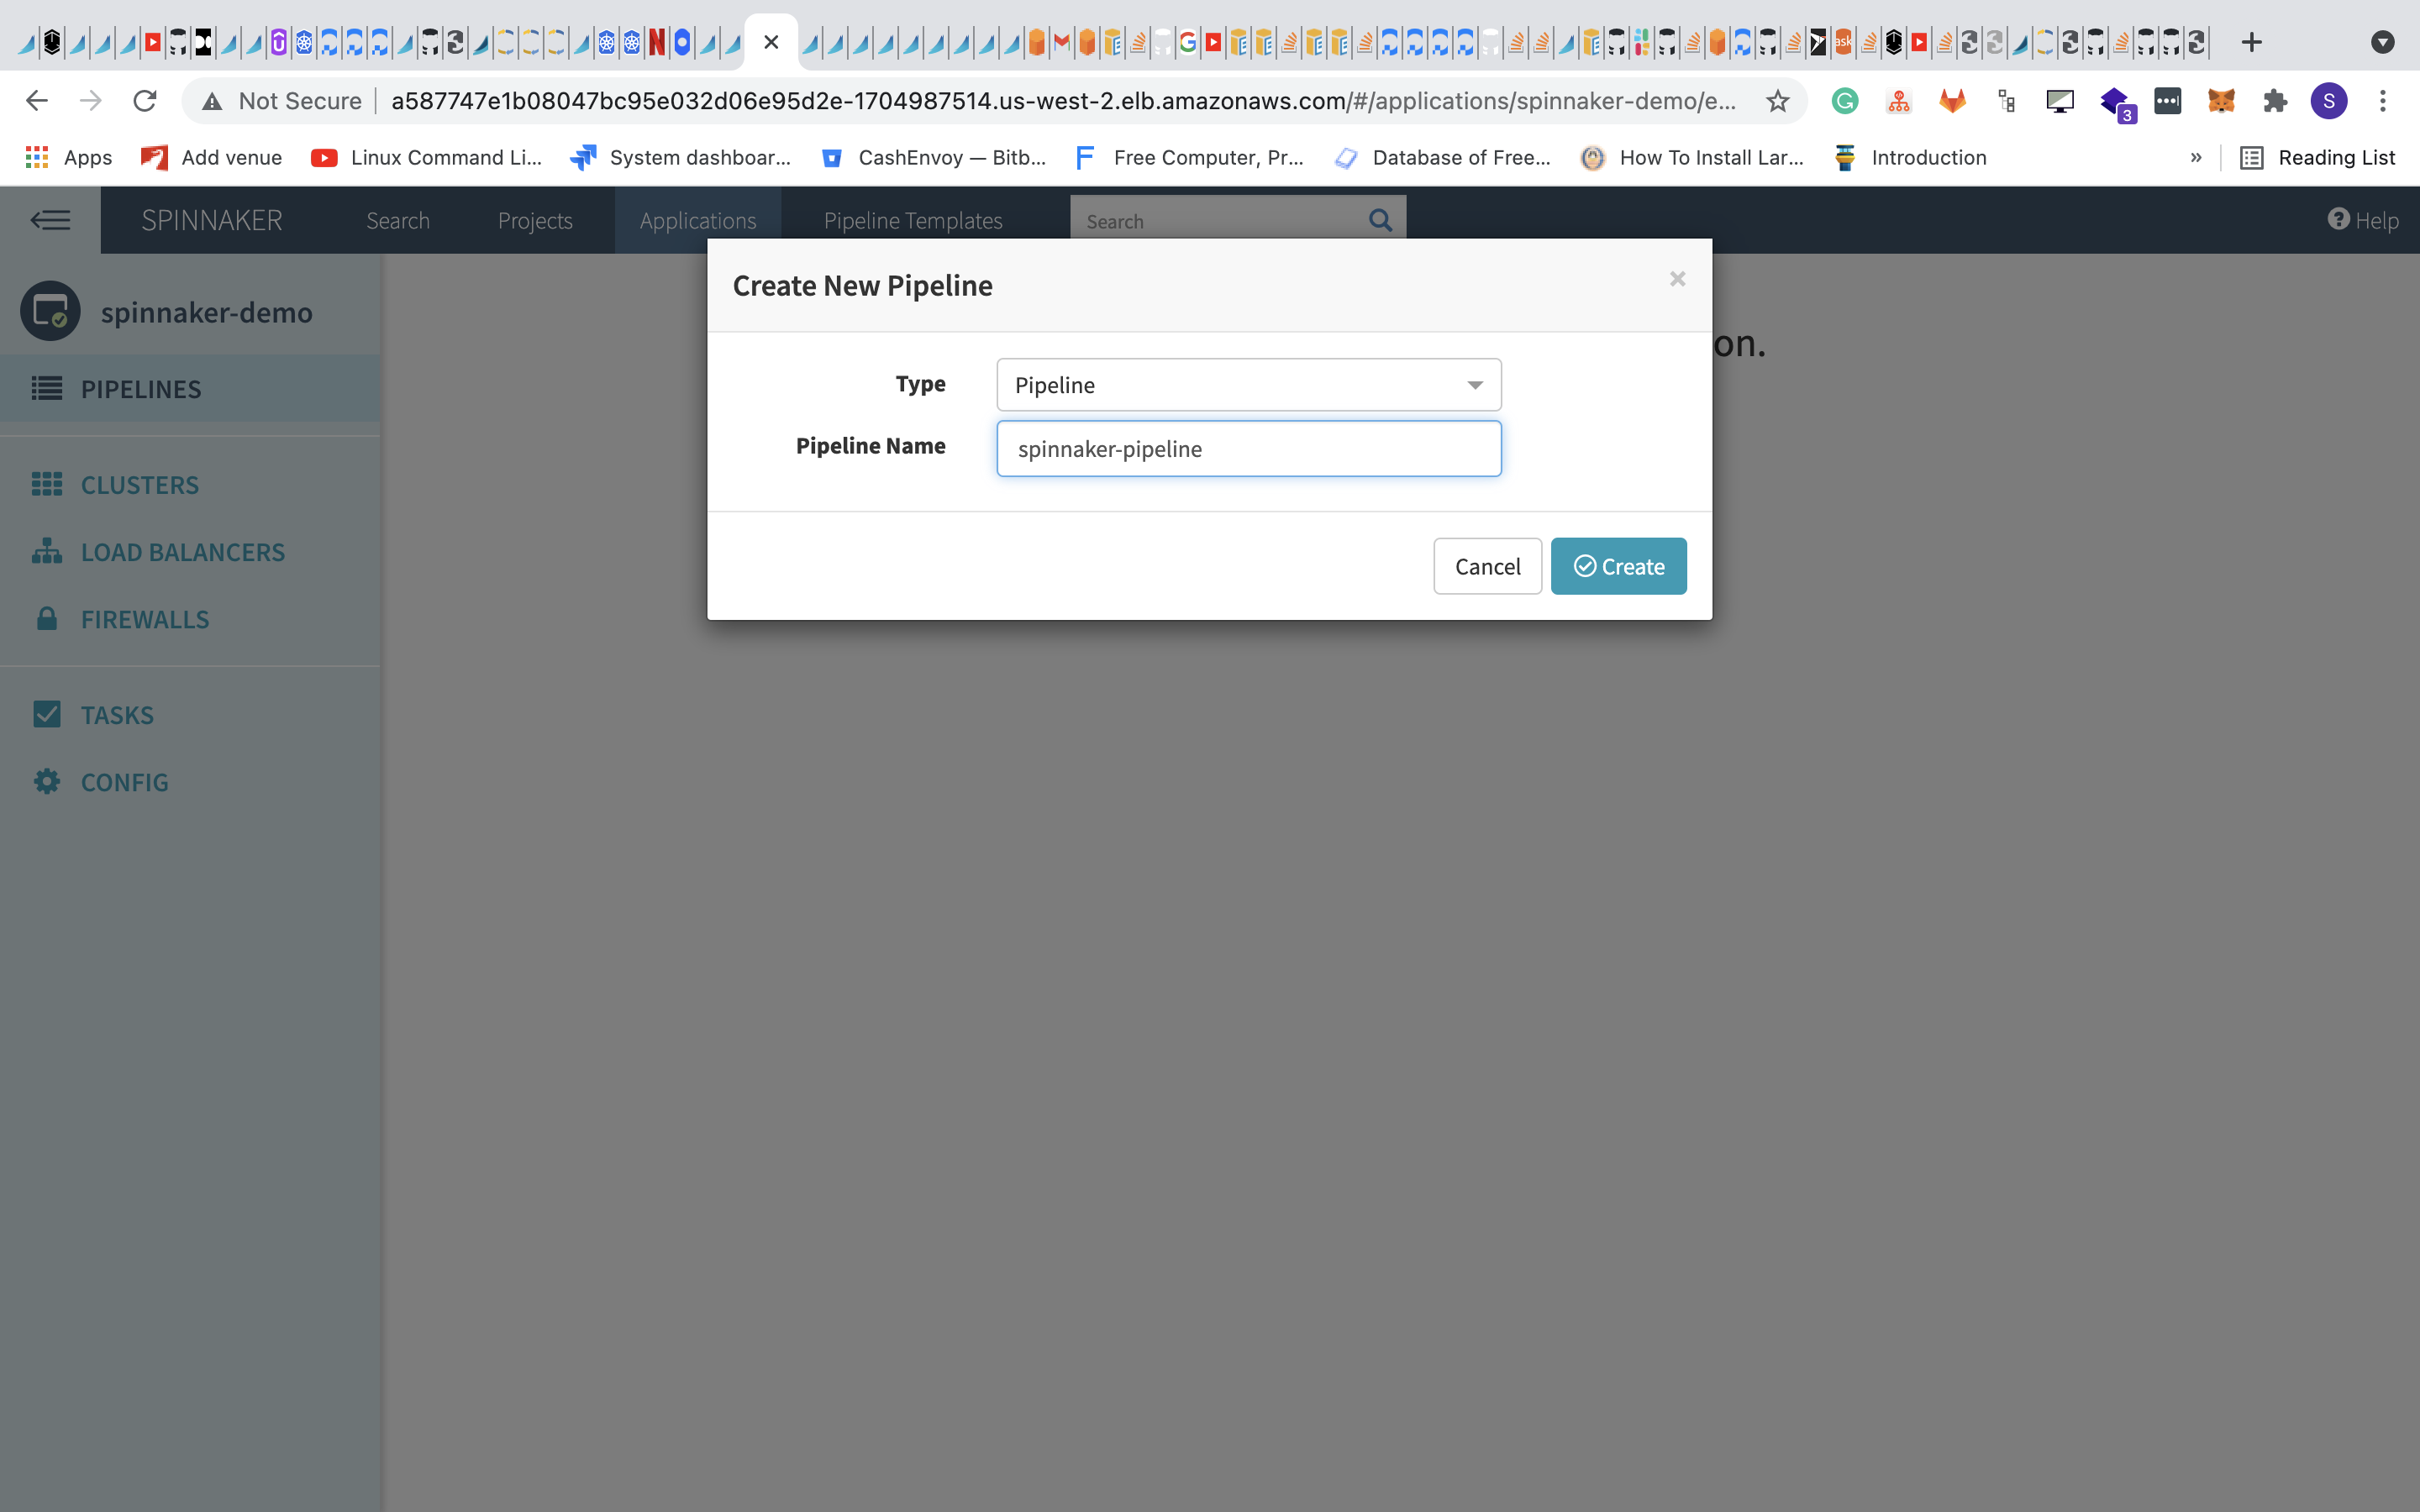
To create a new pipeline, click the pipeline at the top left and click Configure a new pipeline. A dialog will pop up where you can enter the pipeline’s name.
Step 11—Configure the Pipeline
Click Add a stage and select Deploy Manifest as the stage type. Then choose the service account as well as the namespace to deploy the application to.
In the manifest section, paste a sample manifest to deploy NGINX and expose it via a load balancer:
apiVersion: apps/v1
kind: Deployment
metadata:
  labels:
    app: nginx
  name: nginx-deployment-demo
spec:
  replicas: 1
  selector:
    matchLabels:
      app: nginx
  template:
    metadata:
      labels:
        app: nginx
    spec:
      containers:
        - image: 'nginx:1.14.2'
          name: nginx
          ports:
            - containerPort: 80
---
apiVersion: v1
kind: Service
metadata:
  labels:
    app: nginx
  name: nginx-svc-demo
spec:
  ports:
    - nodePort: 30800
      port: 80
      protocol: TCP
      targetPort: 80
  selector:
    app: nginx
  type: LoadBalancer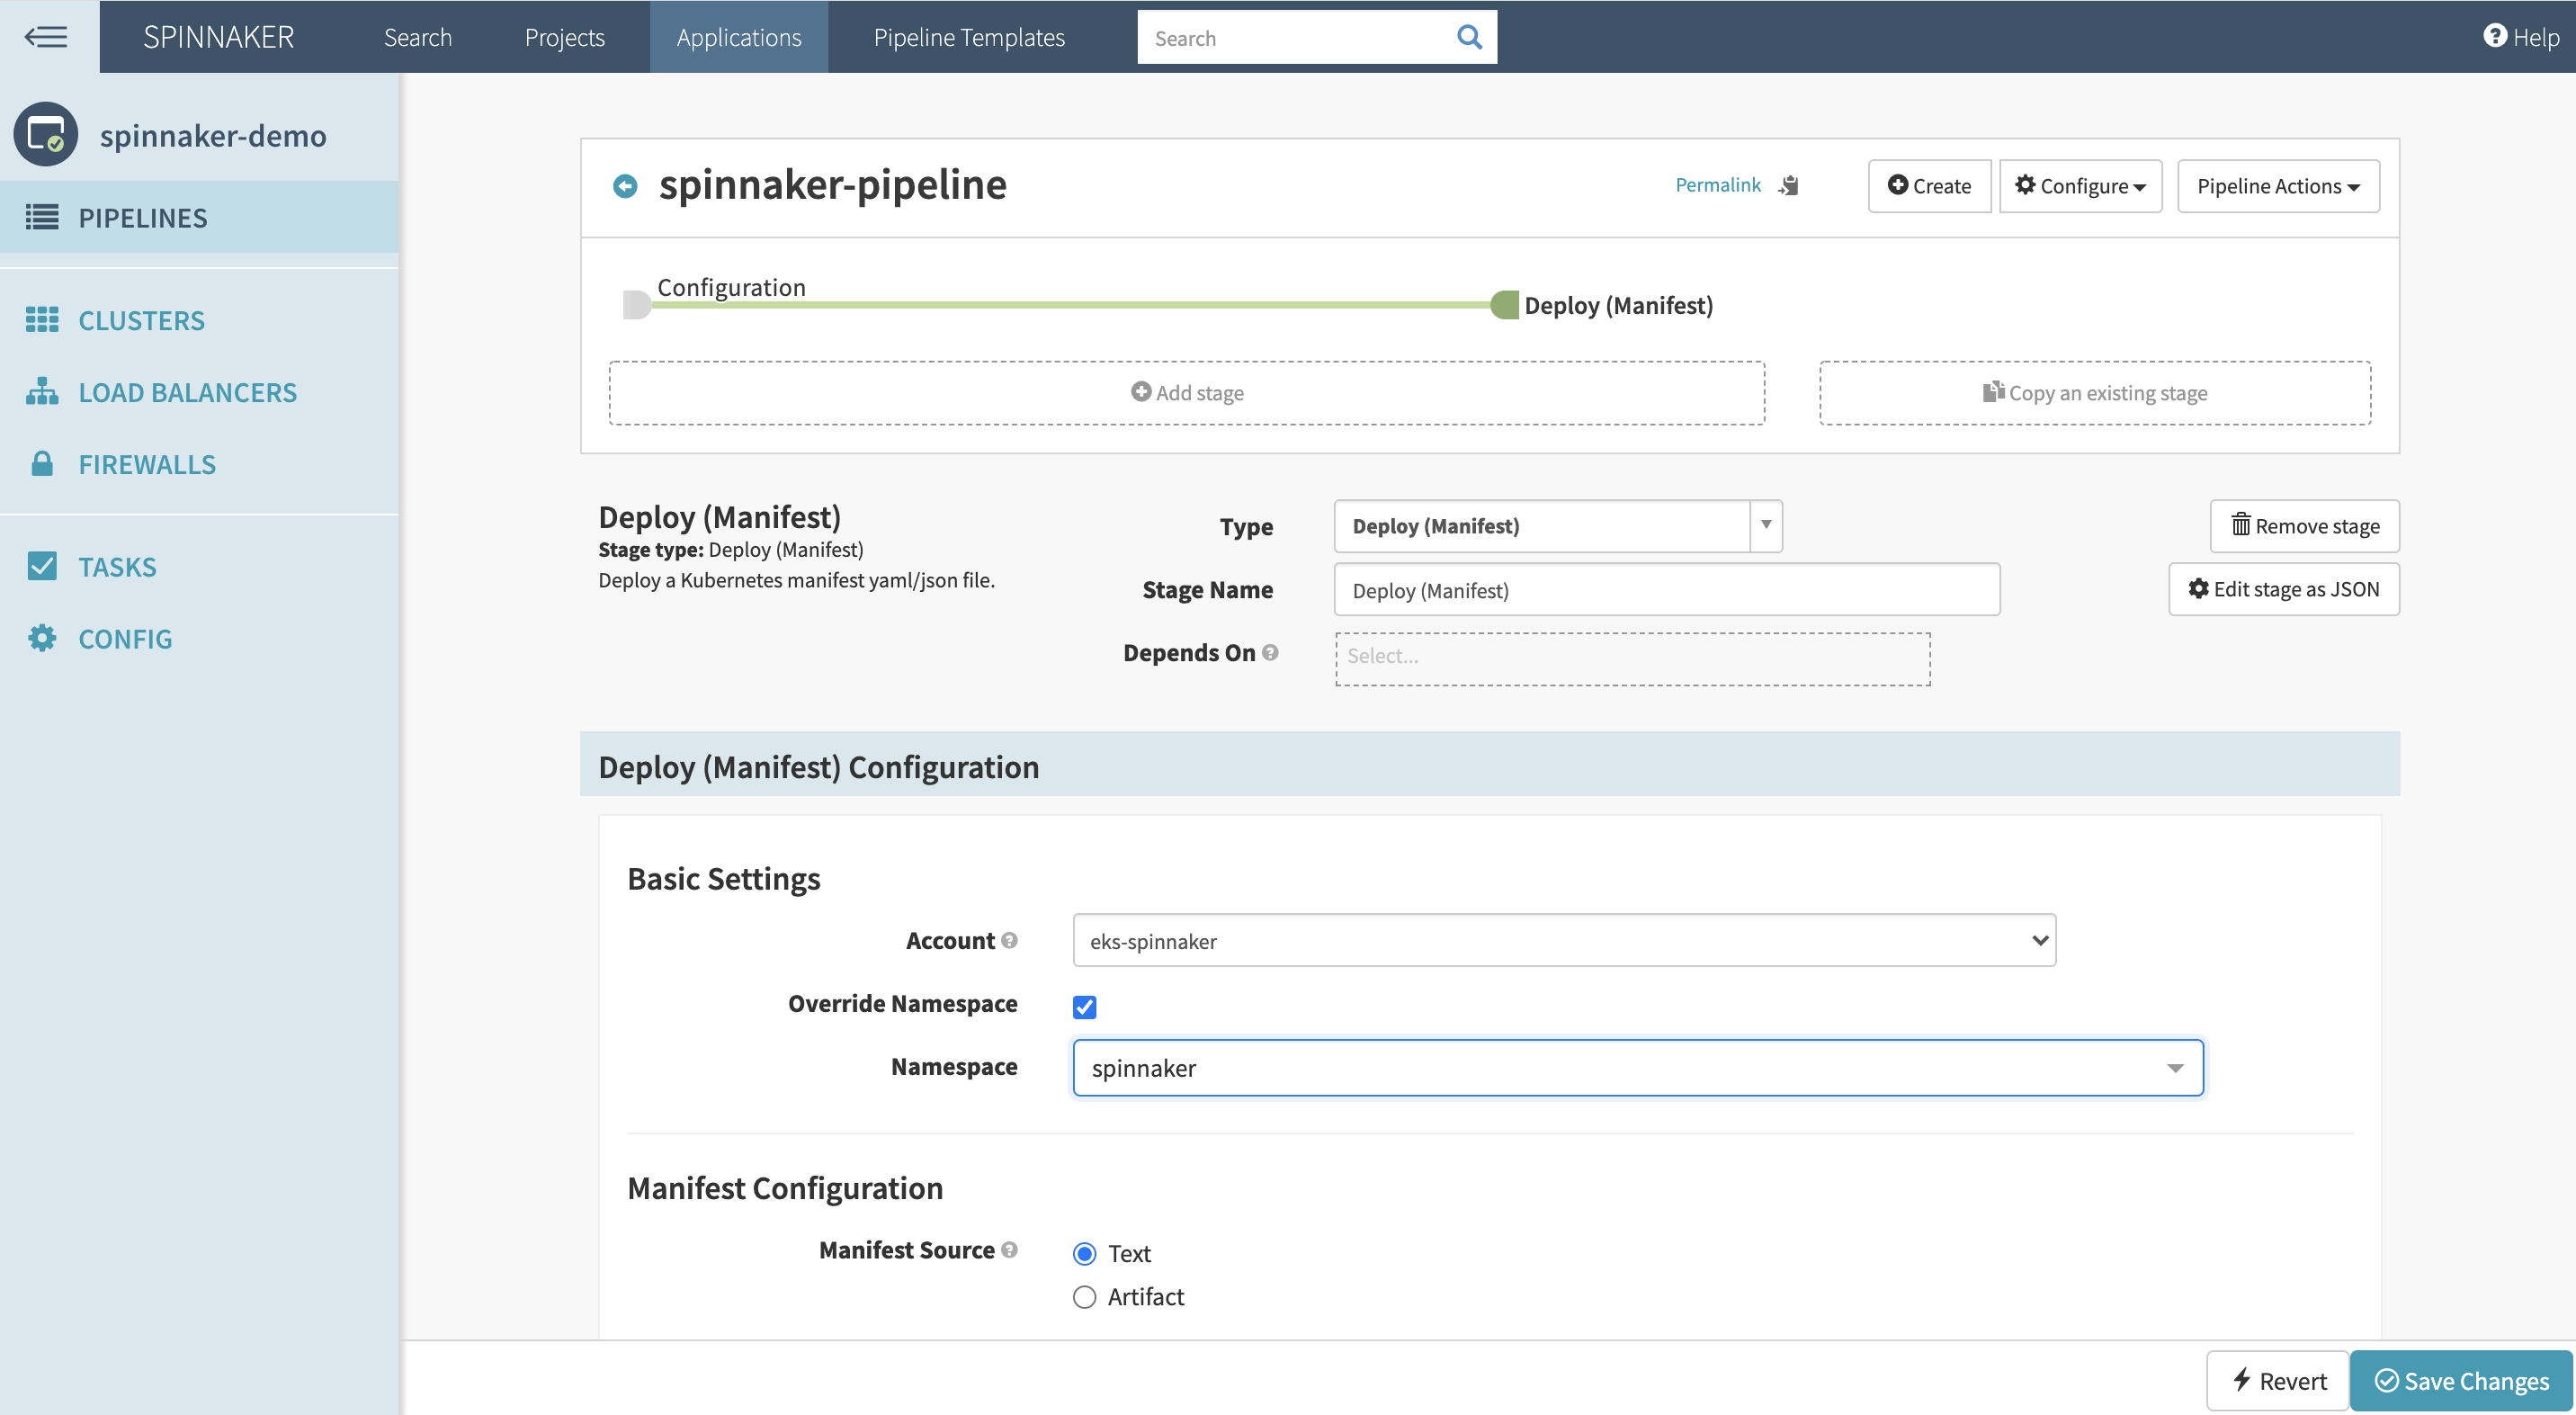
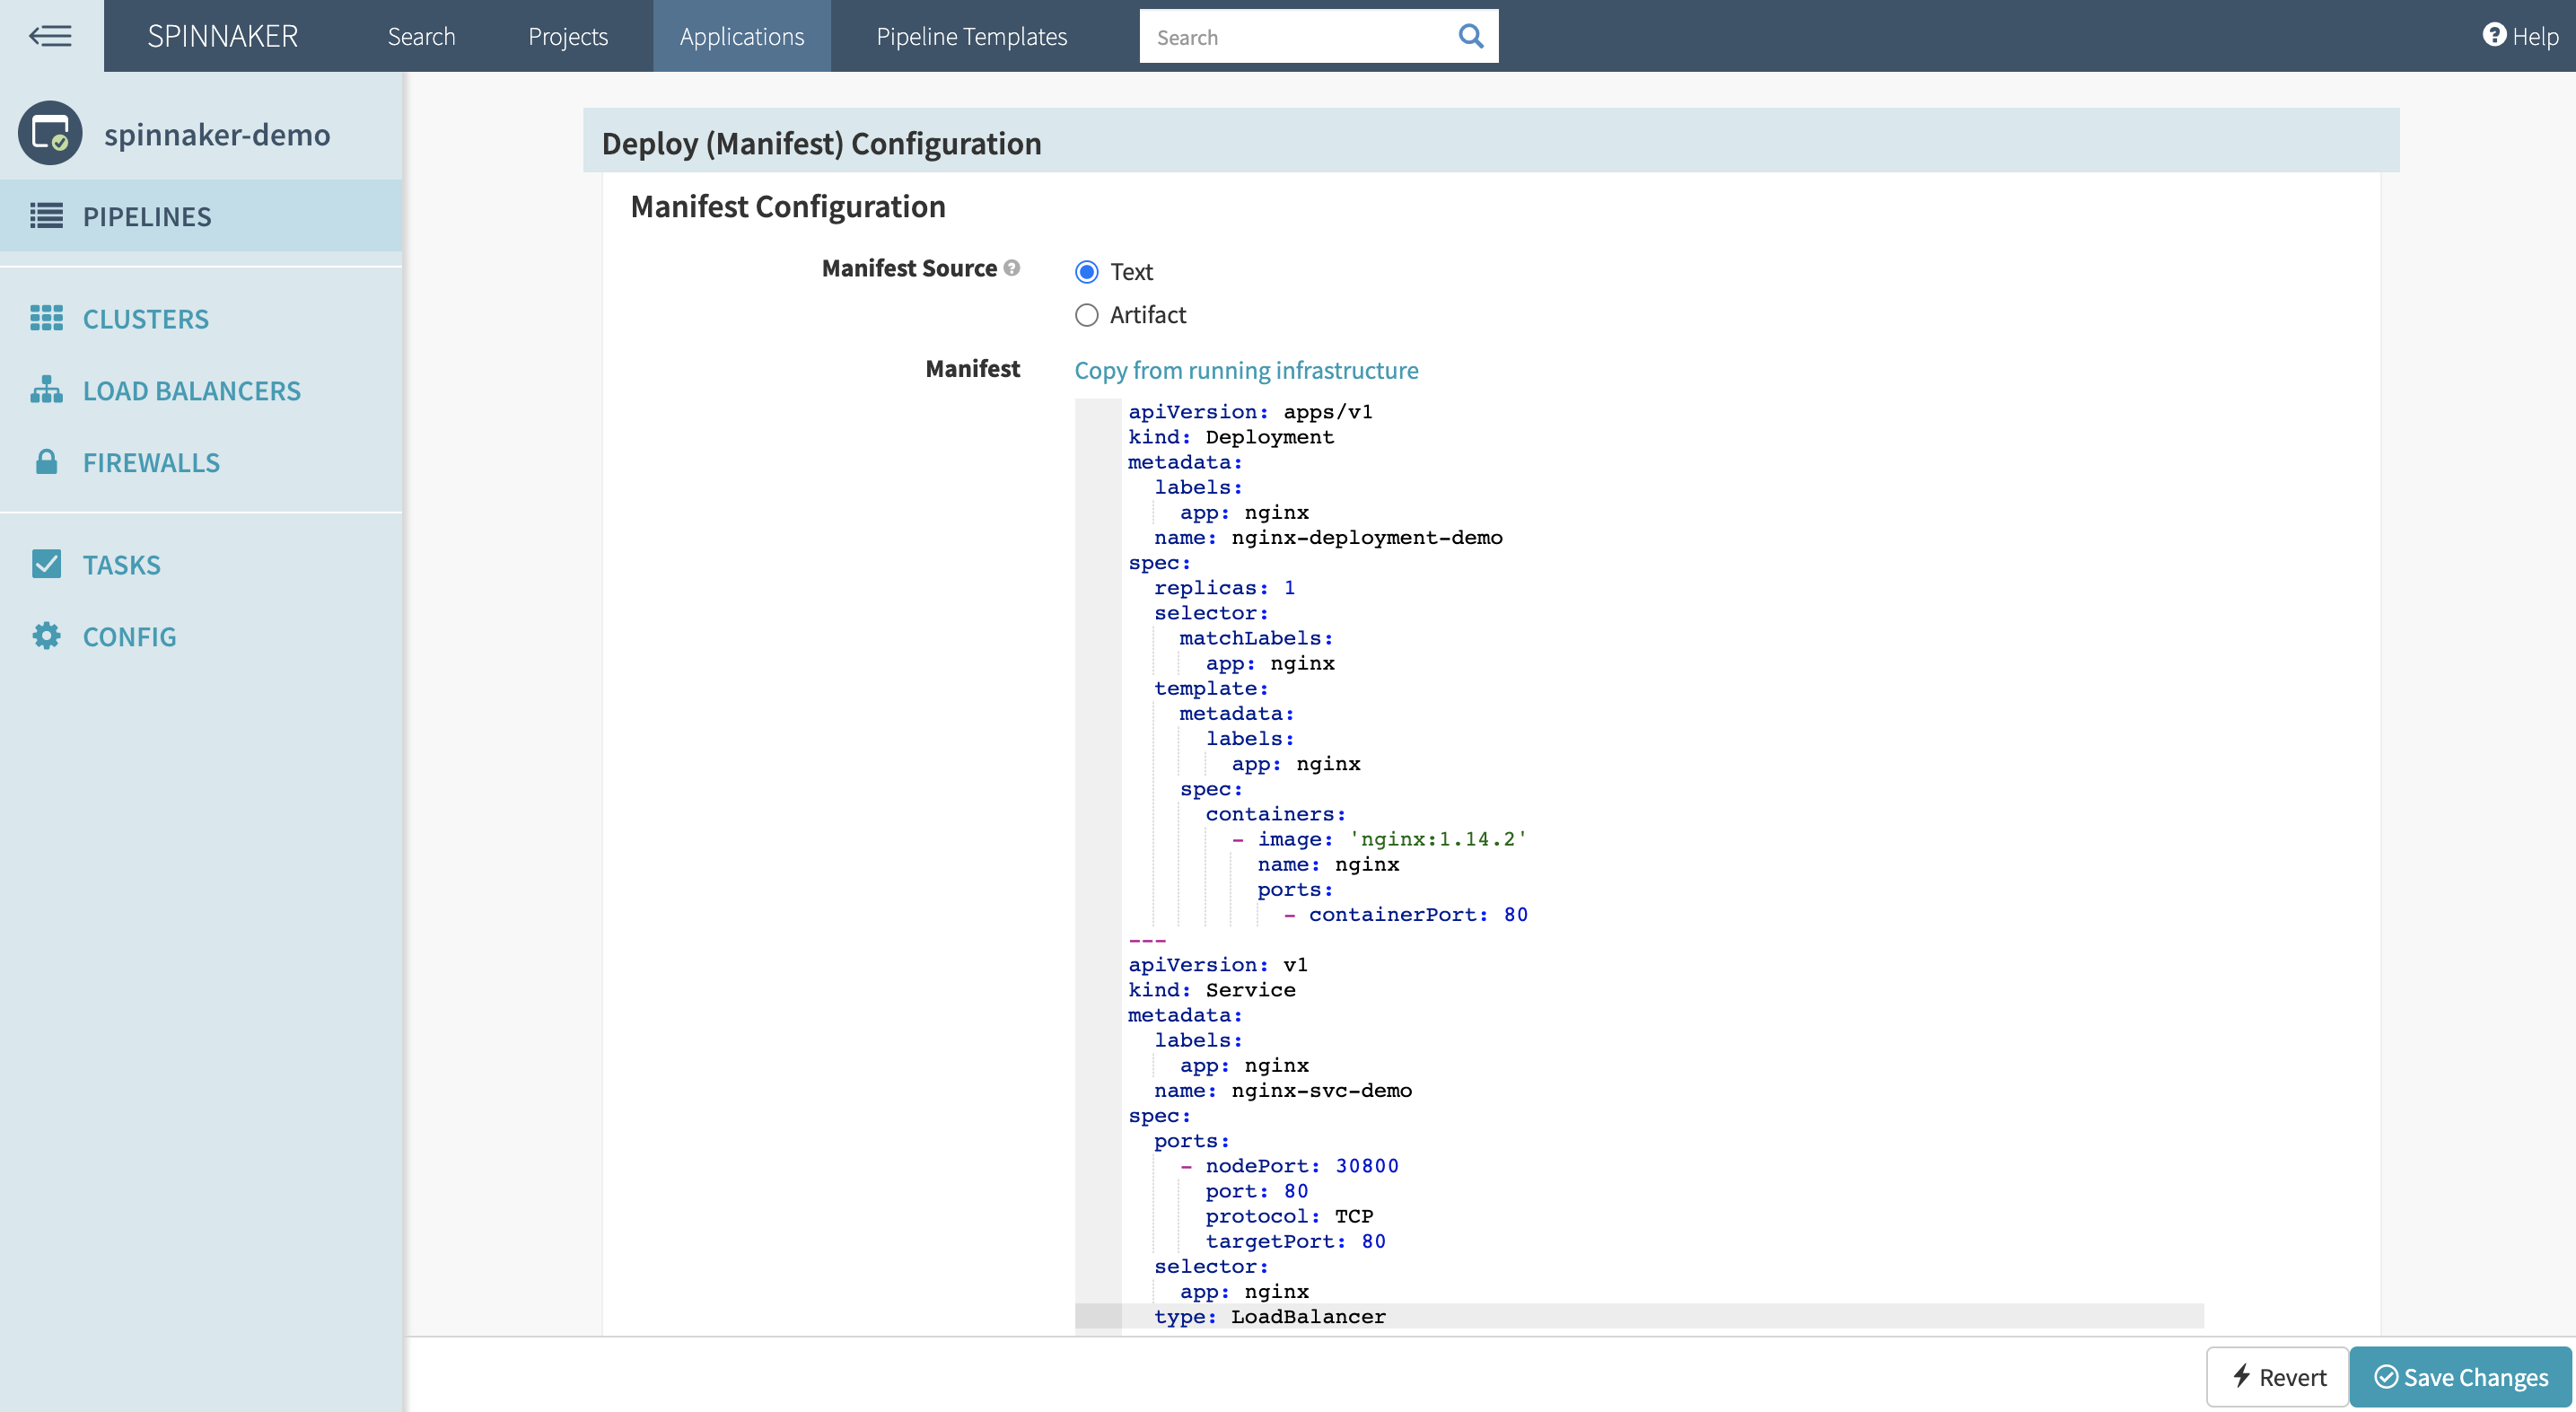
Click Save changes. Navigate back to the pipeline and click Start manual execution.
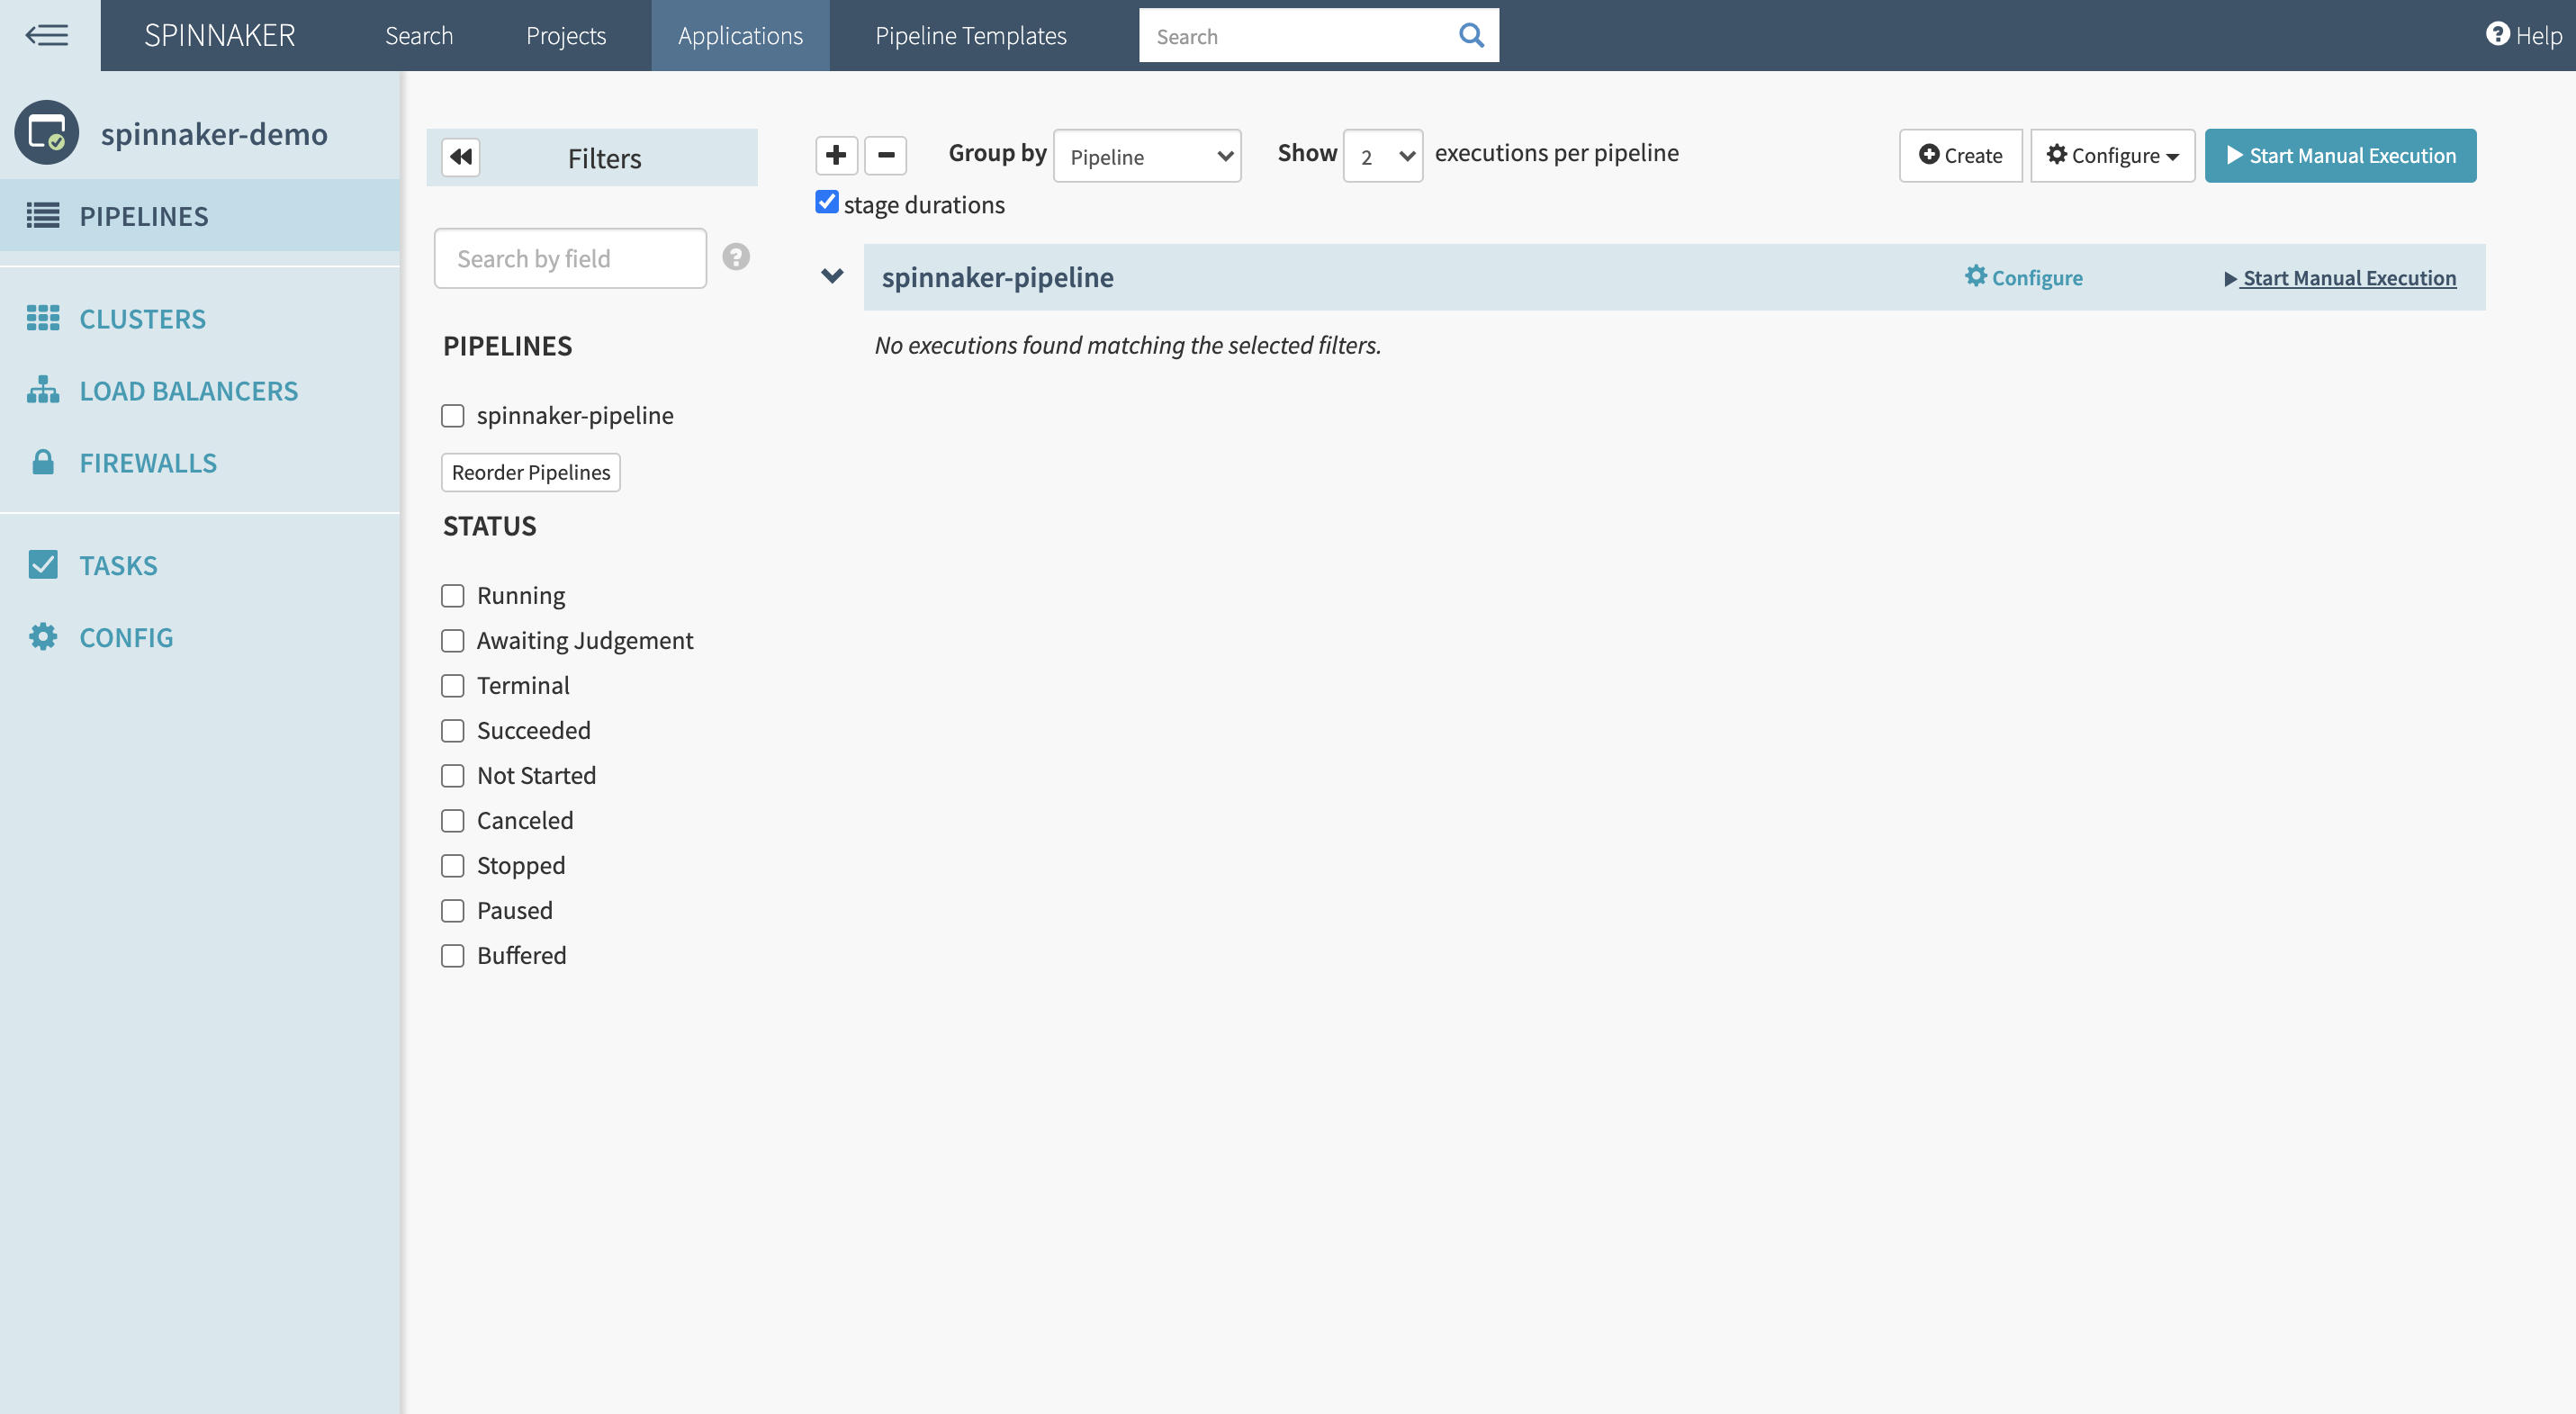
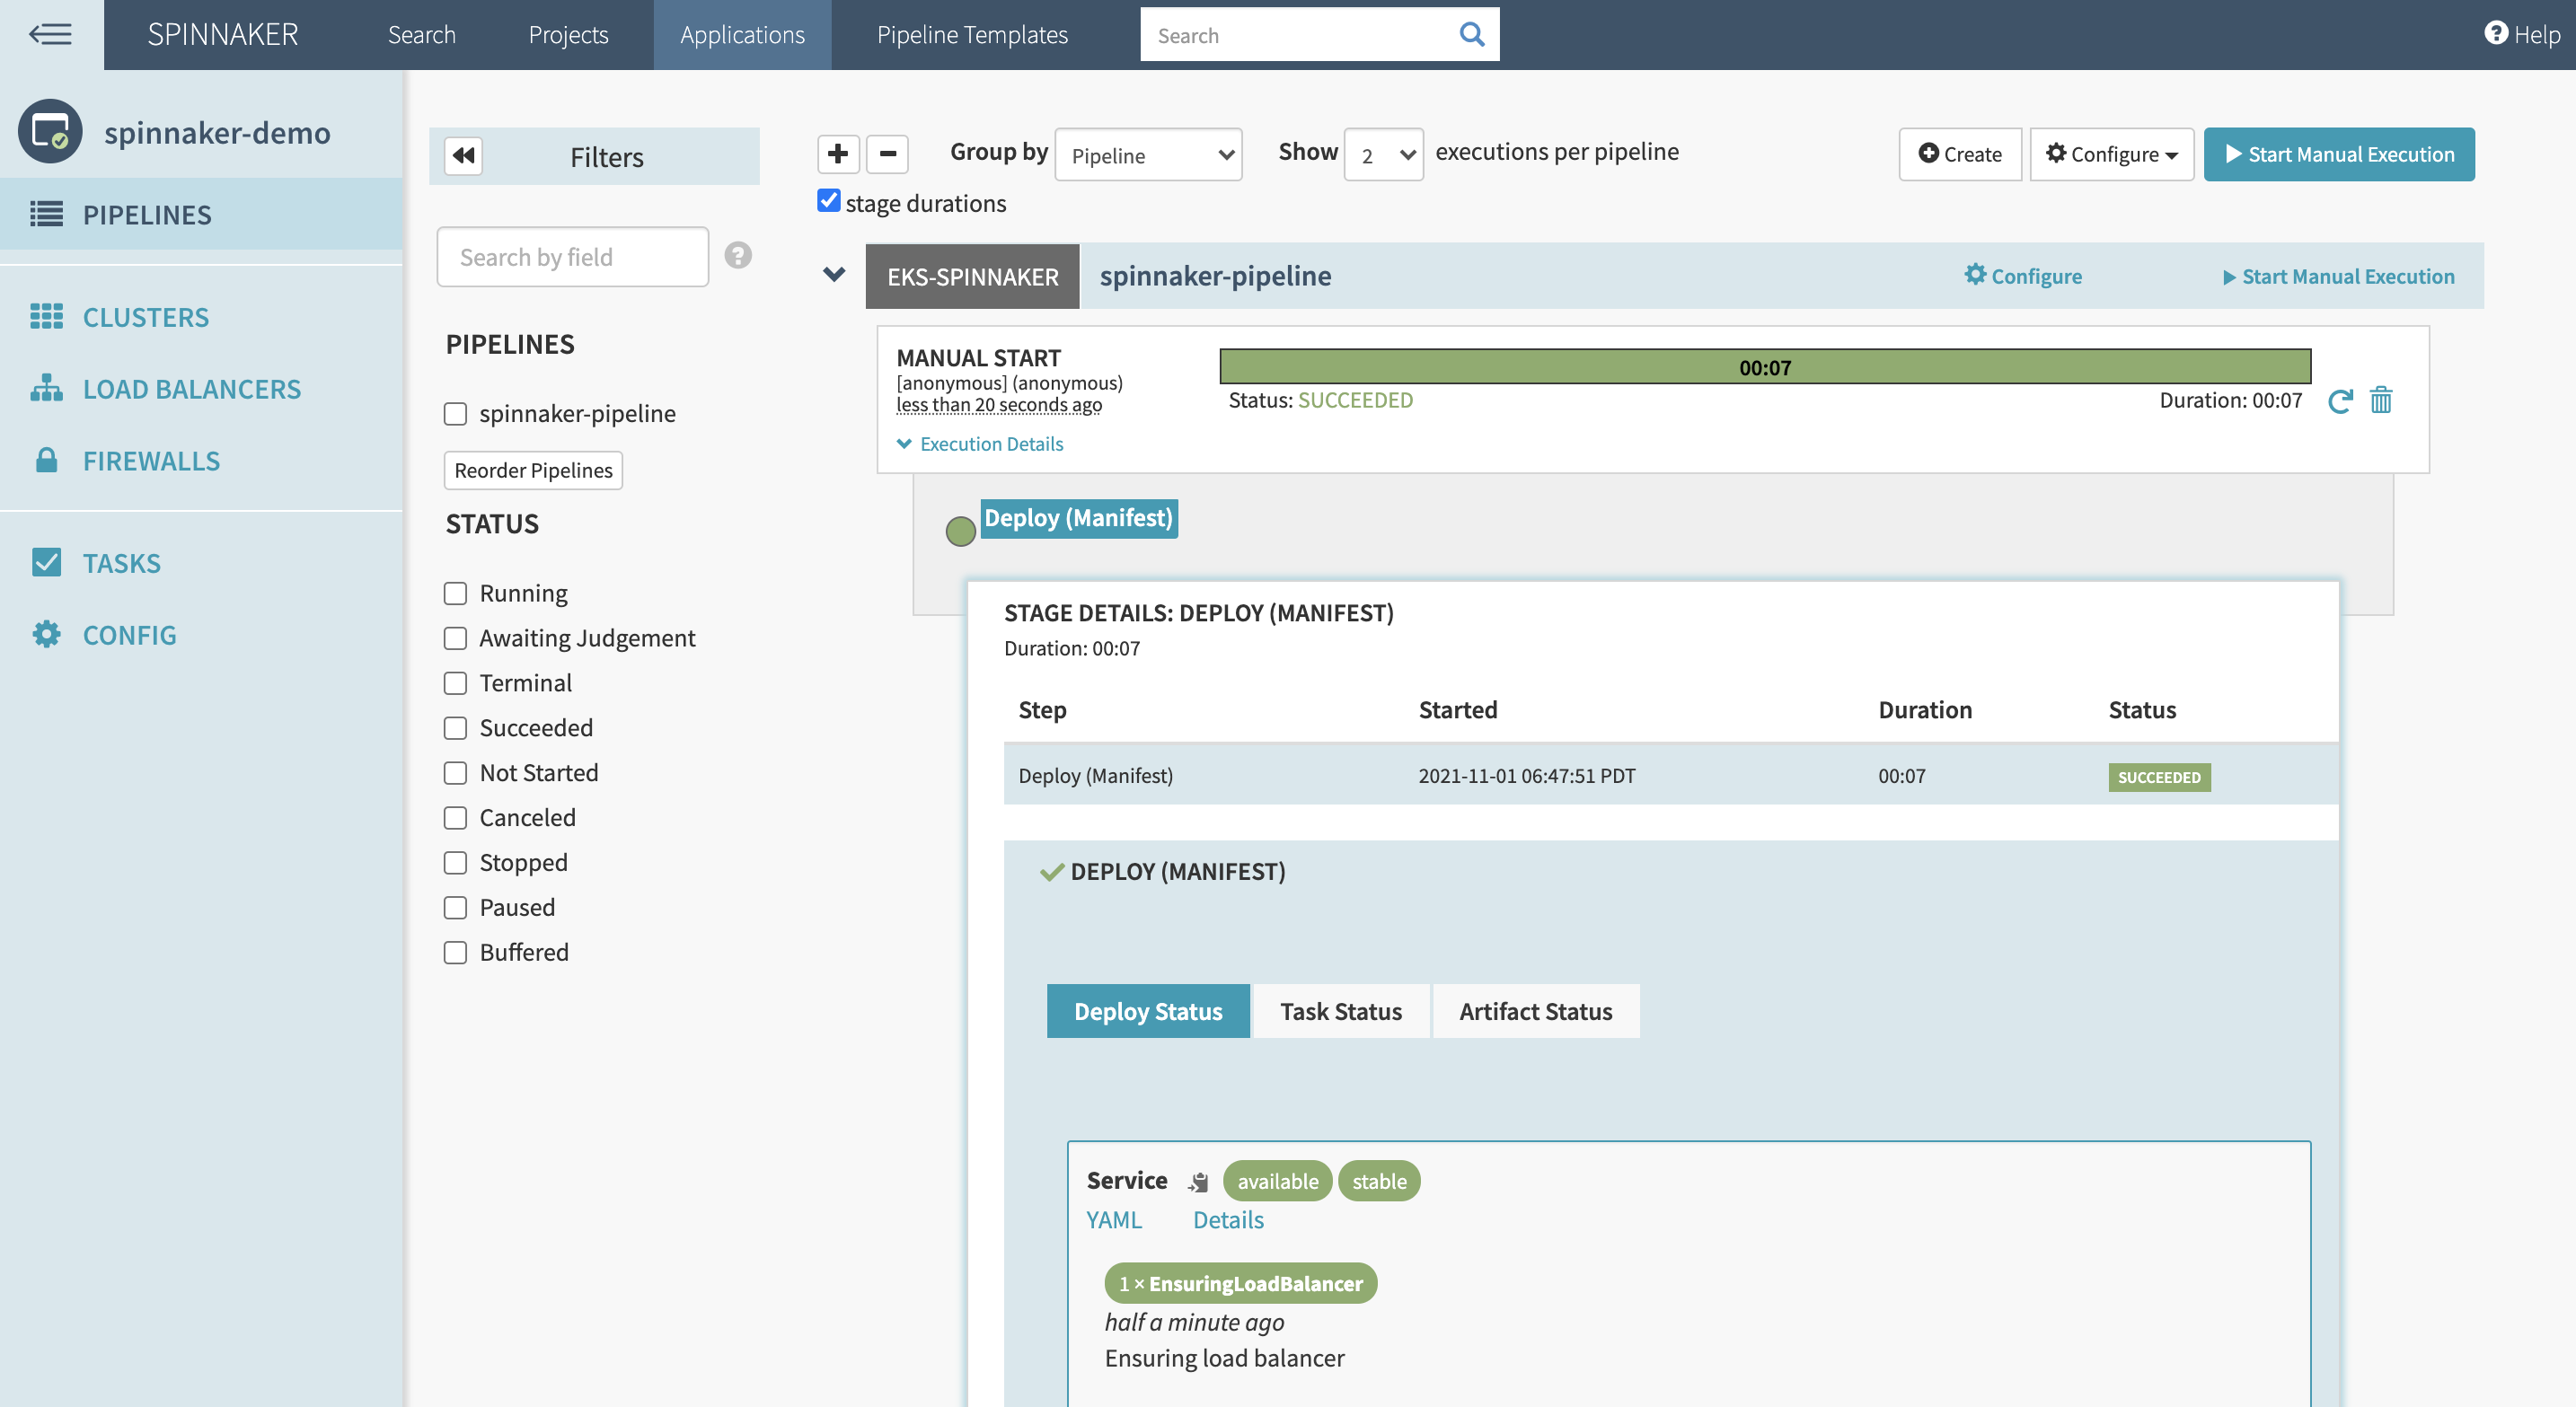
If the pipeline runs without any error, then you should see something similar to this:
To view the deployed manifest, go to your cluster and run:
kubectl get svc -n spinnakerYou should see the exposed NGINX service with the name nginx-svc-demo:

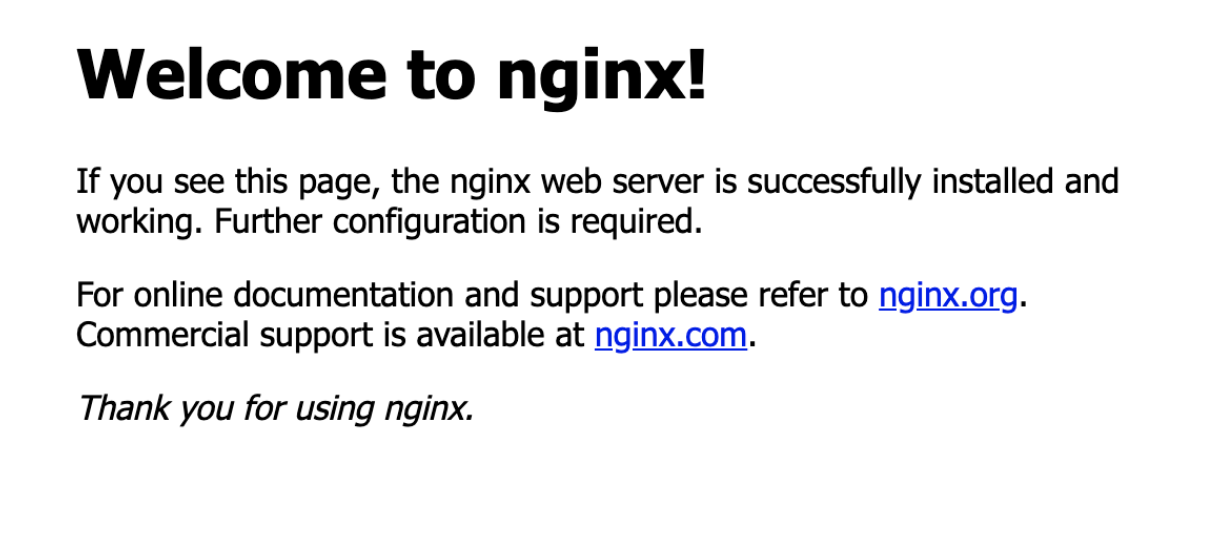
Copy the external URL of the exposed service and paste it on the browser. You should see the deployed NGINX server:
And of course there are tons of other configuration options you can set up.
Conclusion
Spinnaker makes it easy to automate application deployments. Your development team can spend its energy more wisely, improving the number of releases they can handle per day, per week, or per month.
To further improve your CI/CD workflow, check out Earthly. Earthly is a continuous integration tool for both your development machine and the CI server, ensuring repeatable builds for everyone.
Earthly makes CI/CD super simple
Fast, repeatable CI/CD with an instantly familiar syntax – like Dockerfile and Makefile had a baby.


