Can Rancher Help You Better Manage Kubernetes?
We’re Earthly. We make building software simpler and therefore faster using containerization. If you’re managing Kubernetes clusters with Rancher, you’ll find Earthly a useful tool for streamlining your container and service builds. Check it out.
Recently, multi-cloud and hybrid cloud deployments have gained significant traction as they let you optimize costs, increase scalability, improve agility, and achieve greater operational resilience. However, with these deployment strategies, managing different Kubernetes clusters with multiple tools and dashboards can be a challenge; Rancher can help you seamlessly manage such deployments at scale.
This article will explore the features and capabilities of Rancher, an open source Cloud Native Computing Foundation (CNCF) certified Kubernetes distribution designed to make it easy to deploy, manage, and monitor multi-cluster environments from a centralized UI. Here, you’ll learn about Rancher and the different deployment options it provides, and understand the aspects that make it unique.
What Is Rancher?
The main goal of any Kubernetes distribution is to orchestrate container workloads. However, Rancher was created by SUSE to provide capabilities beyond those of conventional Kubernetes distributions. Rancher is an enterprise-grade platform that facilitates consistent administering of multiple Kubernetes clusters from a single UI—while addressing key Kubernetes pain points, such as cluster and workload deployment, security management, workload monitoring across multiple clusters, and scalability.
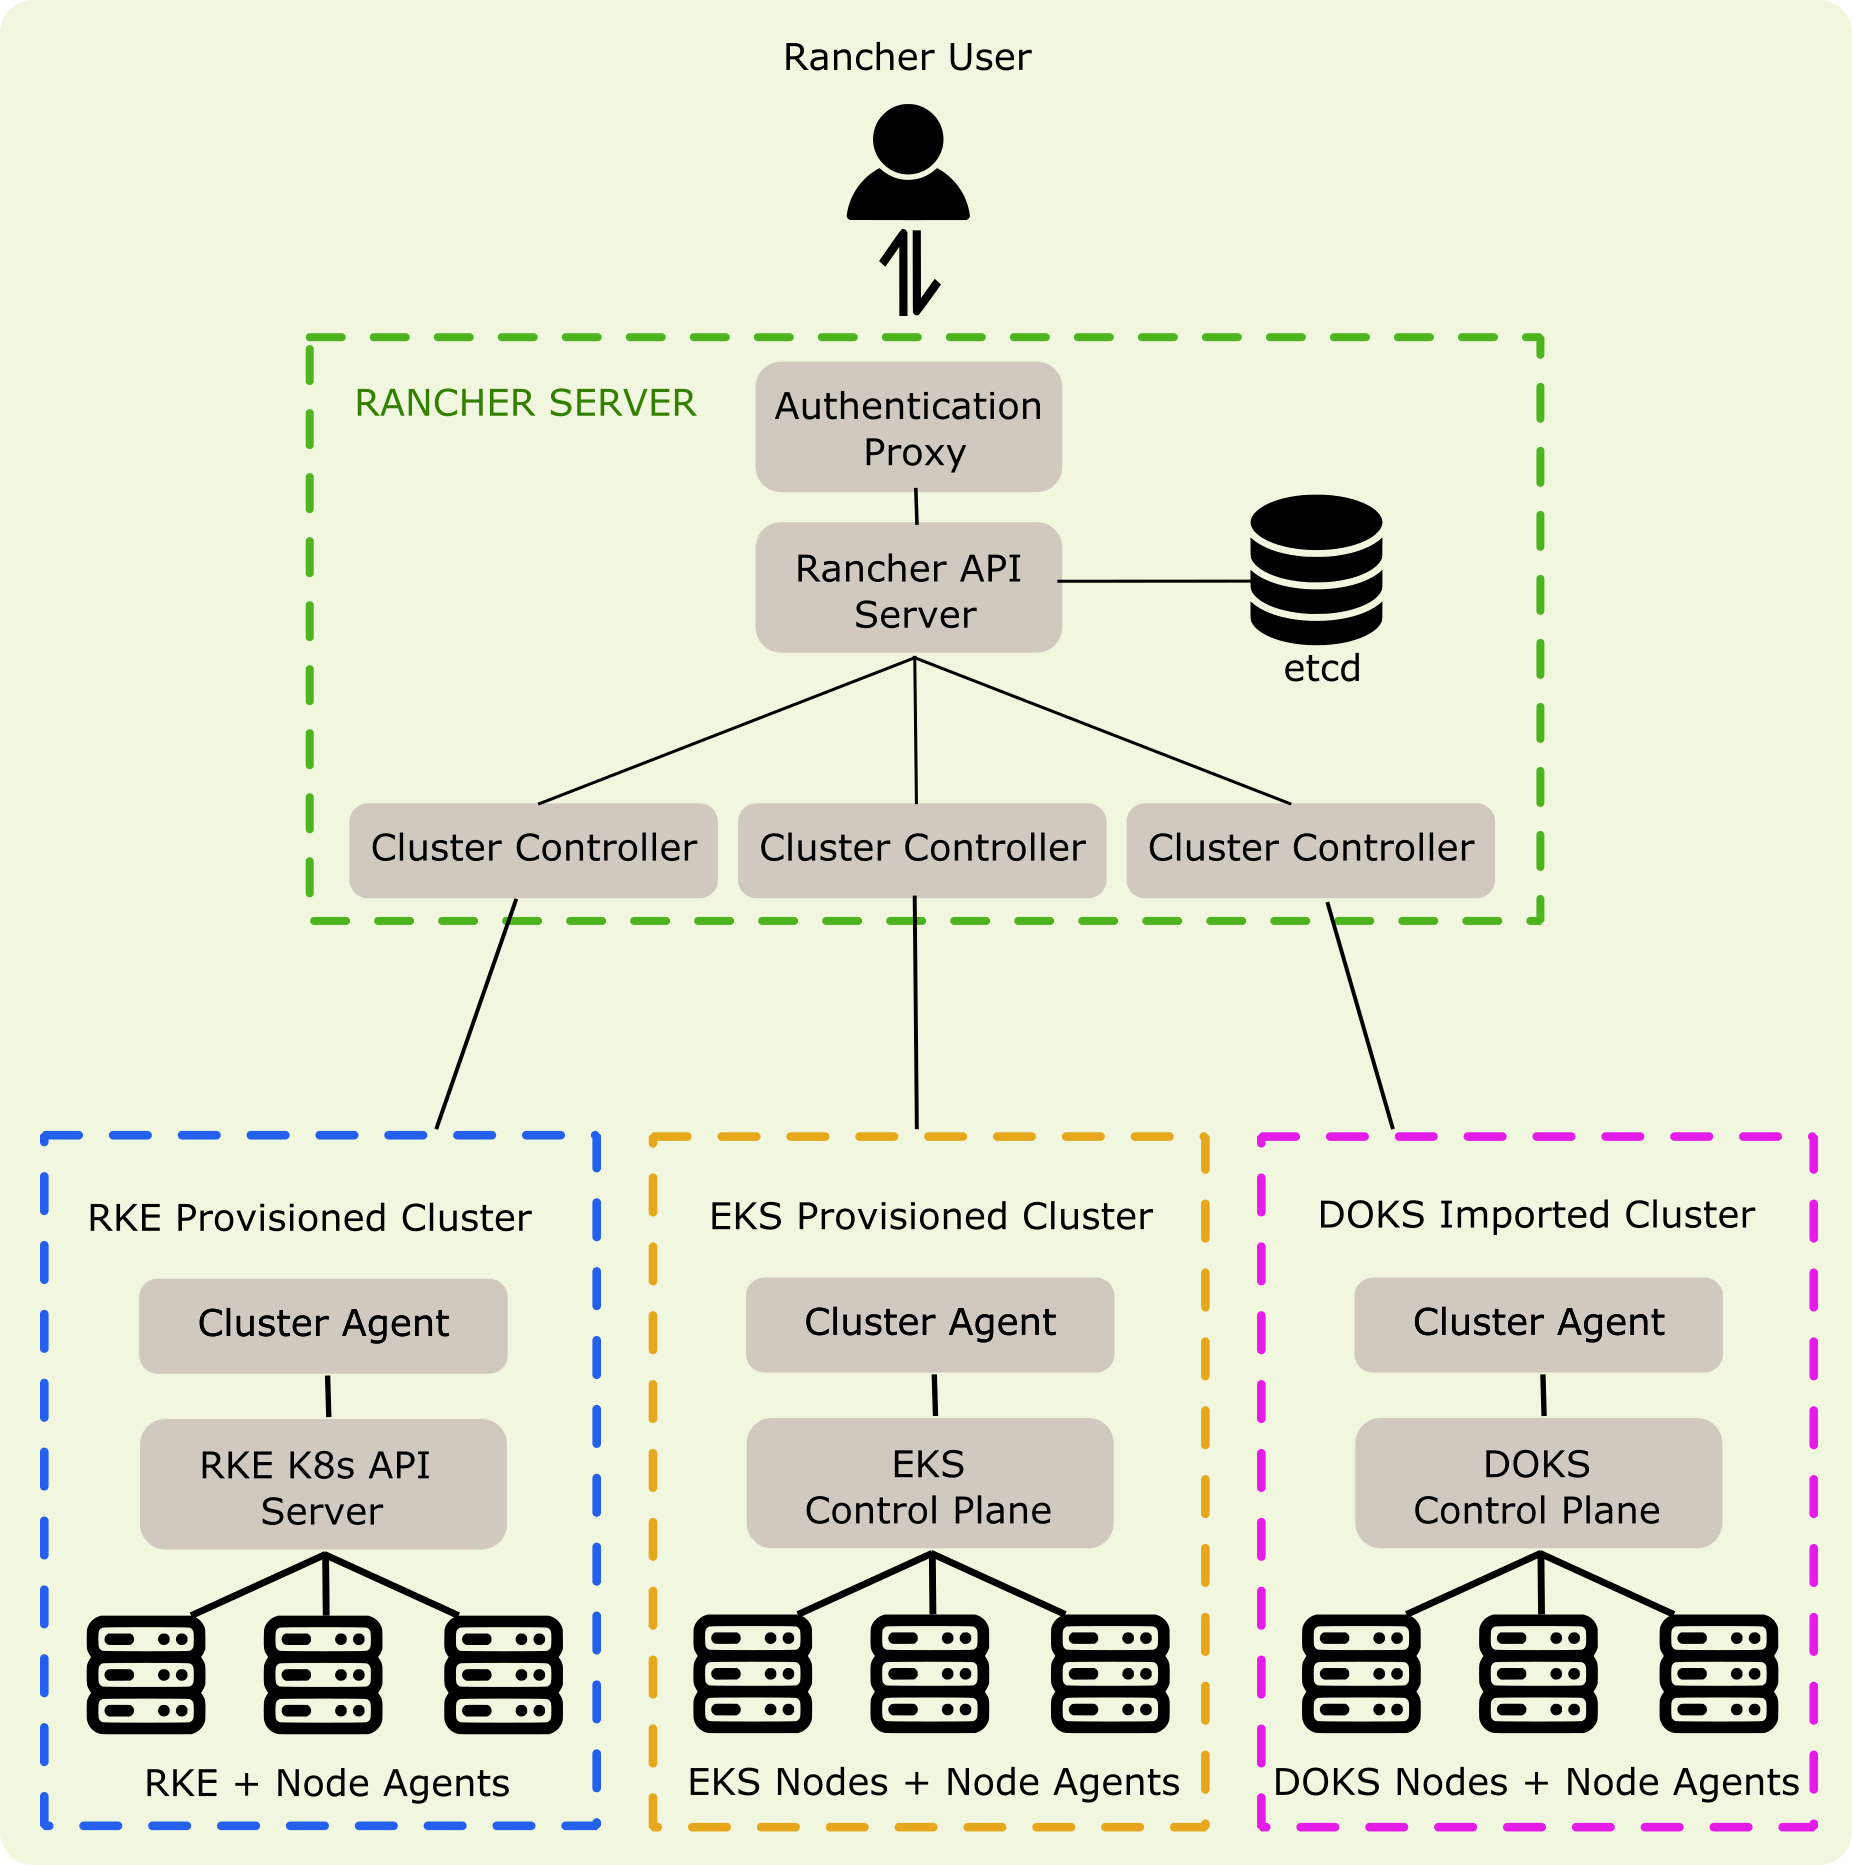
In a nutshell, Rancher simplifies managing, monitoring, importing, and provisioning Kubernetes clusters with just a few clicks from its intuitive UI. But how does Rancher achieve this? The following diagram gives you a high-level overview of the components that make it all possible:
Here’s a breakdown of the main components:
- Rancher server: You can think of the Rancher server as the heart of the Rancher cluster, as it includes key components, like etcd, the authentication proxy, the Rancher API server, and cluster controllers. At a high level, its primary function is to allow users to manage, monitor, and provision other Kubernetes clusters through the Rancher UI.
- Rancher Kubernetes Engine (RKE): RKE is a term used to refer to both the RKE library and the RKE command-line utility that can be used to create RKE clusters. RKE is also a CNCF-certified Kubernetes distribution that runs entirely within Docker containers, similar to K3s.
- Cluster controllers and cluster agents: These components are responsible for establishing secure communication between the Rancher server and each downstream Kubernetes cluster.
- Authentication proxy: On each Kubernetes API call, this component authenticates the caller with local or external authentication services and forwards that call to the appropriate downstream cluster.
- Node agents: Under normal circumstances, the
cattle-node-agentperforms several operations on Rancher Launched Kubernetes cluster nodes, such as creating or restoringetcdsnapshots or upgrading the cluster to the latest version. However, each node agent can provide the same functionality as the cluster agent when the latter is not available.
If you’re looking to delve deeper into the workings of Rancher server and its components, check out the official documentation.
Key Features of Rancher
Now that you know the basics of Rancher, here are the key features that set it apart.
Deploying Managed Kubernetes Clusters
Rancher allows your DevOps team to seamlessly deploy managed Kubernetes clusters on popular platforms, like Amazon Elastic Kubernetes Service (EKS), Azure Kubernetes Service (AKS), and Google Kubernetes Engine (GKE). It also has drivers that provide support to other vendors, like DigitalOcean Kubernetes (DOKS), Linode Kubernetes Engine (LKE), Alibaba Cloud Container Service for Kubernetes (ACK), Baidu Cloud Container Engine (CCE), Huawei CCE, Open Telekom Cloud CCE, Oracle Container Engine for Kubernetes (OKE), and Tencent Kubernetes Engine (TKE). With Rancher, development teams can easily create custom drivers, making it possible for Rancher to support virtually any existing Kubernetes platform.
Deploying Kubernetes Clusters on Any Infrastructure
Rancher’s flexibility is not limited to deploying Kubernetes clusters on managed platforms. You can also provision and install Kubernetes on-premise or in compute nodes, like Microsoft Azure, Cloudscale, Google, Amazon Elastic Compute Cloud (Amazon EC2), Alibaba Cloud Elastic Compute Service (ECS), OpenStack, and VMware vSphere,to name a few. This allows you to create Kubernetes clusters tailored to your organization’s needs while avoiding vendor lock-in.
Importing Existing Kubernetes Clusters
Deploying and provisioning Kubernetes clusters is a helpful feature, but Rancher offers more. From the Rancher UI, you can also import existing Kubernetes clusters to be managed and monitored from a single unified interface.
Enforcing Security Across Kubernetes Clusters
Rancher lets your organization enforce enterprise-level security using a central dashboard from which you can manage users, groups, Kubernetes cluster roles, pod security policies, and authentication. Additionally, Rancher provides out-of-the-box support for NeuVector, a container-focused open source security application, Istio, and Center for Internet Security Inc. (CIS) security scans to ensure that the best security practices are implemented.
Built-In Active Directory, LDAP, and SAML Support
Rancher enforces security and convenience by facilitating authentication mechanisms, such as Active Directory (AD), Azure AD, GitHub, Google, Security Assertion Markup Language (SAML) support for Lightweight Directory Access Protocol (LDAP), and Okta.
Enterprise Support with No Vendor Lock-In
Rancher offers enterprise-level support with the benefit of not tying your organization to a particular vendor; the teams can decide which Kubernetes distro to use depending on the specific use case.
One Interface to Rule Them All
The biggest advantage of Rancher is the convenience of managing all your Kubernetes clusters from a single dashboard. This eliminates the complexity and inconvenience of accessing vendor-specific dashboards and management tools.
Easy To Install
Rancher is easy to install both in the cloud and on premise, which makes it optimal for both development and production.
The previous list is just a fraction of the features Rancher brings to DevOps teams. To learn more about all of Rancher’s features that DevOps teams can use, check out the documentation.
Setup and Maintenance in Rancher
Unlike most Kubernetes distributions, Rancher can be easily installed in virtually any environment, including virtual machines (VMs), containers, hosted Kubernetes, cloud infrastructures, on premise, and the edge. To that end, you can set up Rancher using a Docker container, Helm charts, RKE, and more. The following are some scenarios and the recommended environments:
- Development and testing purposes: The easiest way to test Rancher is to install it on a single node using Docker. Another alternative for development and testing purposes is to use the RKE binary to set up an RKE cluster on VMs or physical nodes running Docker. In this scenario, binaries are available for macOS, Linux x64, Linux ARM (32/64), and Windows (32/64), making it easy to get single or multiple-node RKE clusters up and running in no time. In turn, you can install Rancher on top of such cluster using the Helm quick start guide to emulate a production environment. You can as well install Rancher on top of another lightweight Kubernetes distribution like K3s.
- Production environments: The best practice for running Rancher in production is to set up a dedicated high-availability (HA) Kubernetes cluster with at least three nodes, a load balancer, and a DNS record. This way, each node can act as a control plane, etcd, and worker, if necessary. You can find more information about HA installations in Rancher’s how-to guides. Rancher documentation provides several guides regarding this topic:
The above-listed procedures involve creating a configuration file and then running a script that uses RKE to provision each node. Alternatively, you can use an existing HA cluster and apply Helm charts to install Rancher on top of Kubernetes. In summary, setting up Rancher is straightforward.
Regardless of the method selected, once you’ve installed Rancher, you’ll see the login screen:

Next, you need to create a new admin password for the Rancher UI:
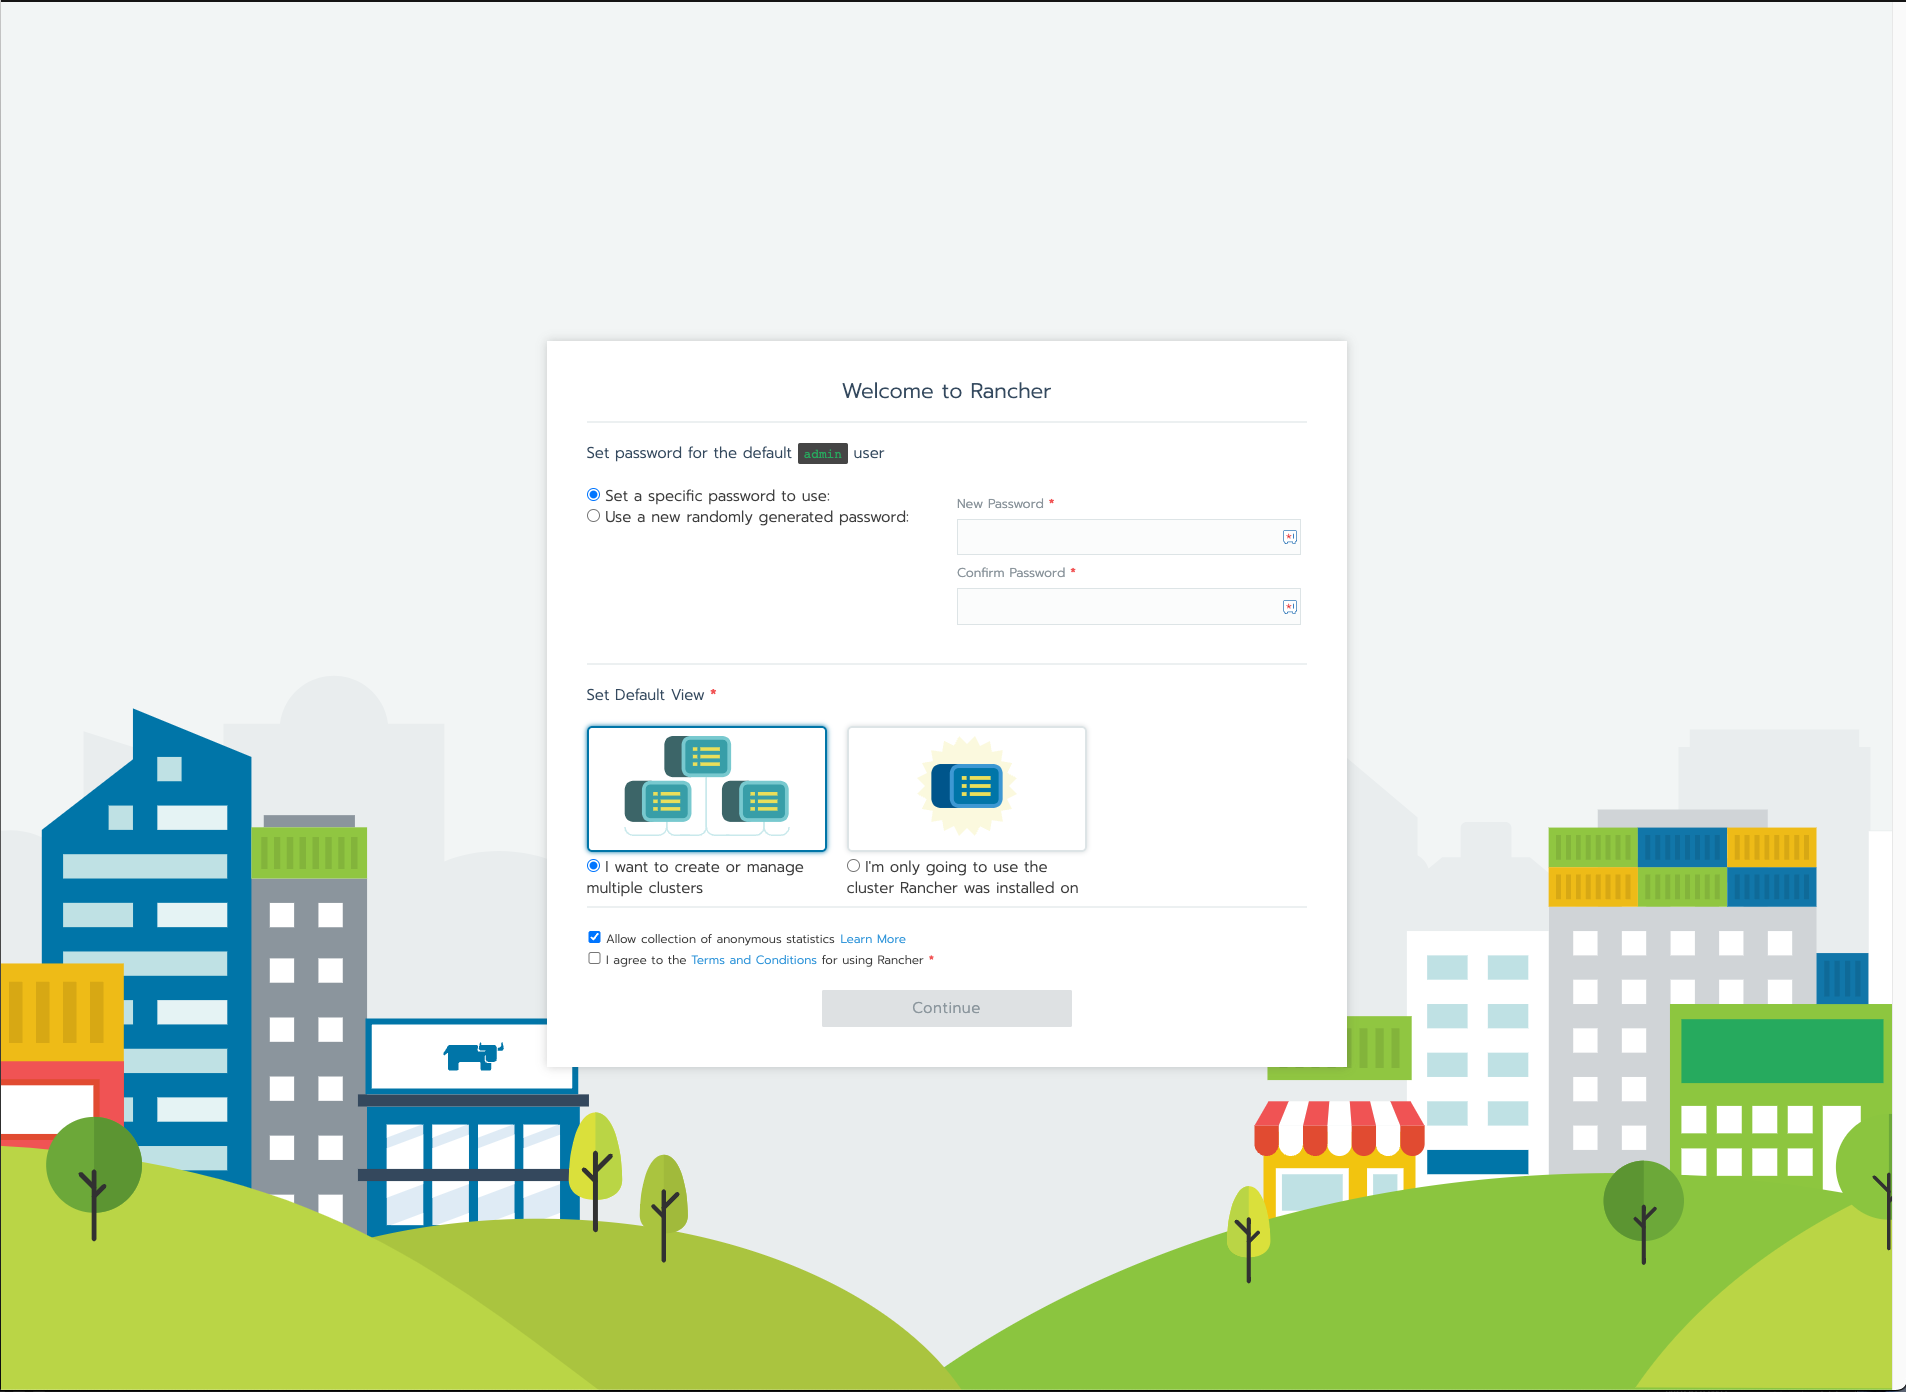
You then need to confirm the access URL:

With Rancher, upgrading, or reverting to a previous version is easy. If you use a single-node Rancher server on Docker, all you have to do is run the container with the desired version. If you installed Rancher using RKE or Helm charts, you should run helm upgrade.
Rancher Versions
If you want to use Rancher in production, it’s recommended to use the latest stable version. However, to test new builds of Rancher, you may want to use other versions. In the Rancher “Getting Started” docs, you can find more information on how to choose a version of Rancher using Helm charts or Docker images. Additionally, in this SUSE documentation, you can find the Rancher support matrix.
Use Cases Where Rancher Excels
You’ve already learned about some of Rancher’s most notable features. Here are some aspects that make this tool unique.
Kubernetes Deployment and Monitoring on Any Infrastructure
Rancher allows you to deploy Kubernetes clusters on any infrastructure from its convenient UI.
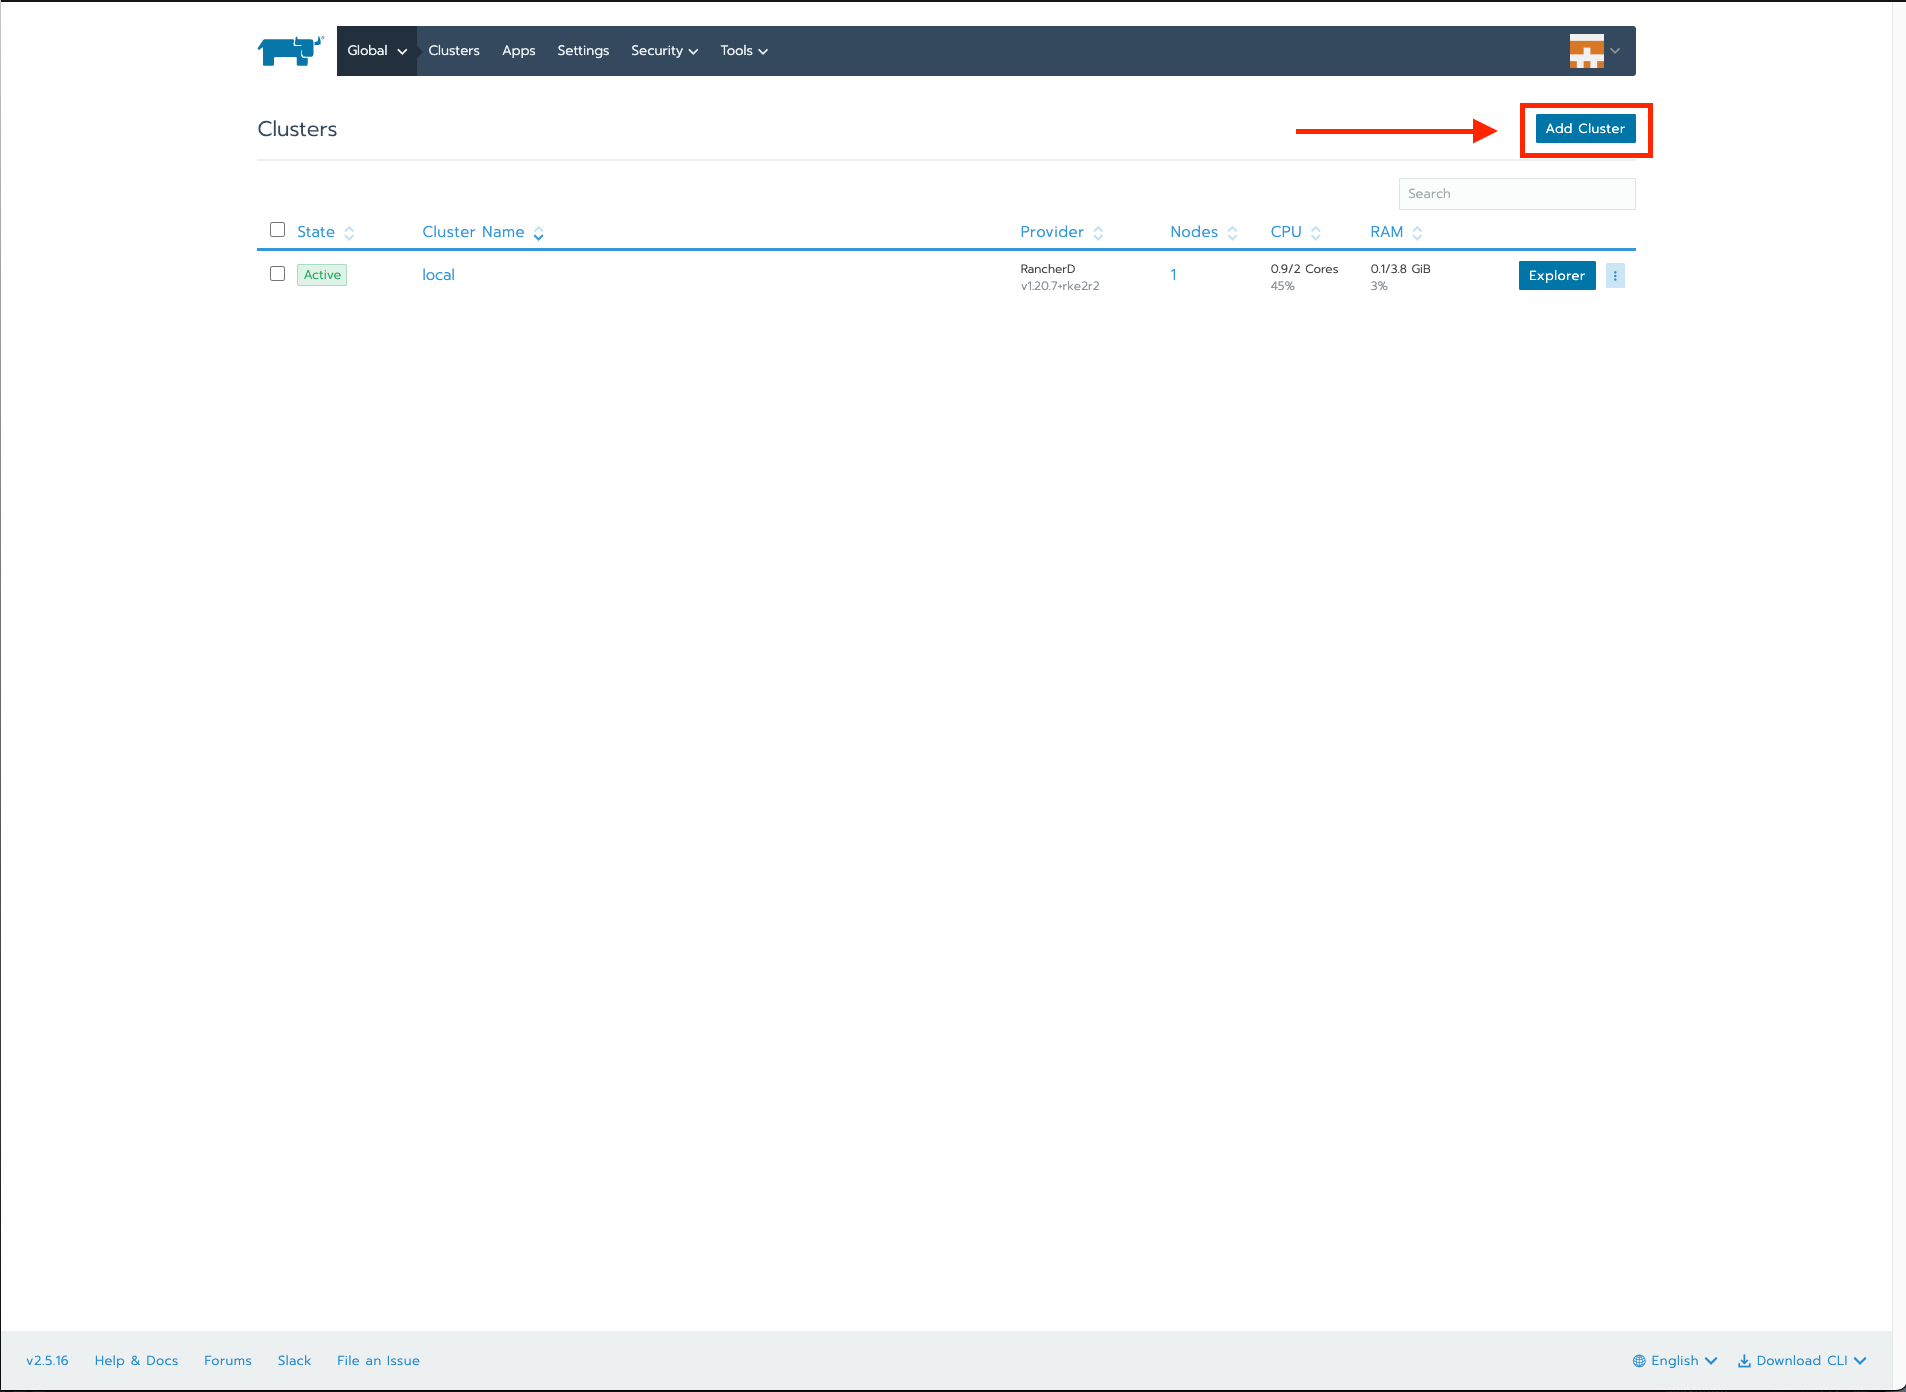
The following screen shows Rancher’s main dashboard. Note that only the cluster from which Rancher is running is displayed. To add more clusters, click the Add Cluster button located on the top right:
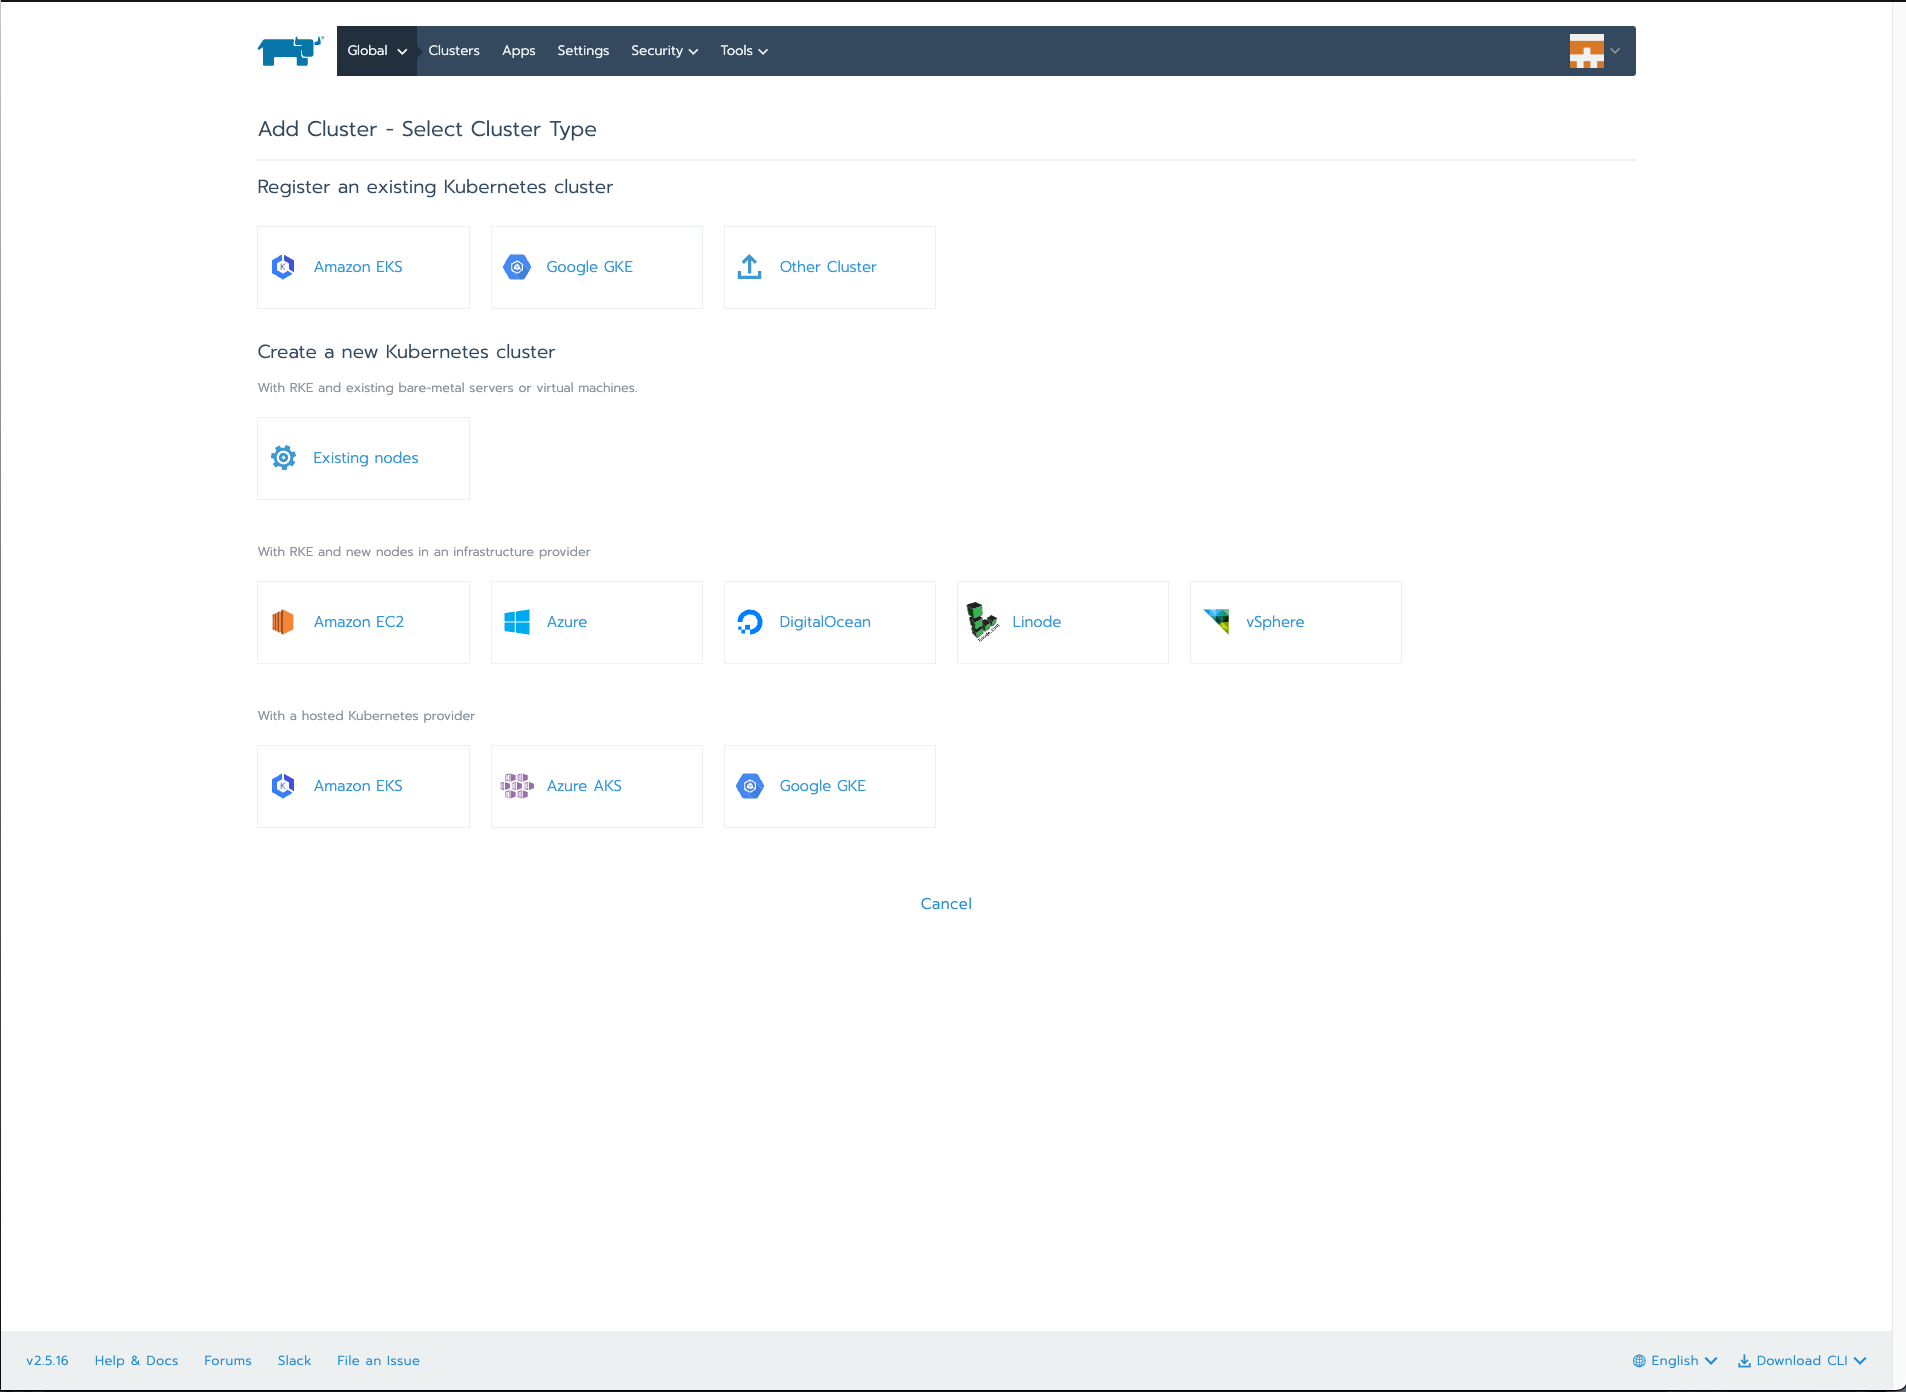
The next screen asks you to select the type of cluster to deploy. At this point, you have these options:
- Register an existing Kubernetes cluster
- Create a new Kubernetes cluster using existing nodes
- Create a new Kubernetes cluster on new nodes
Here’s an example; you create a new Kubernetes cluster on new DigitalOcean nodes:
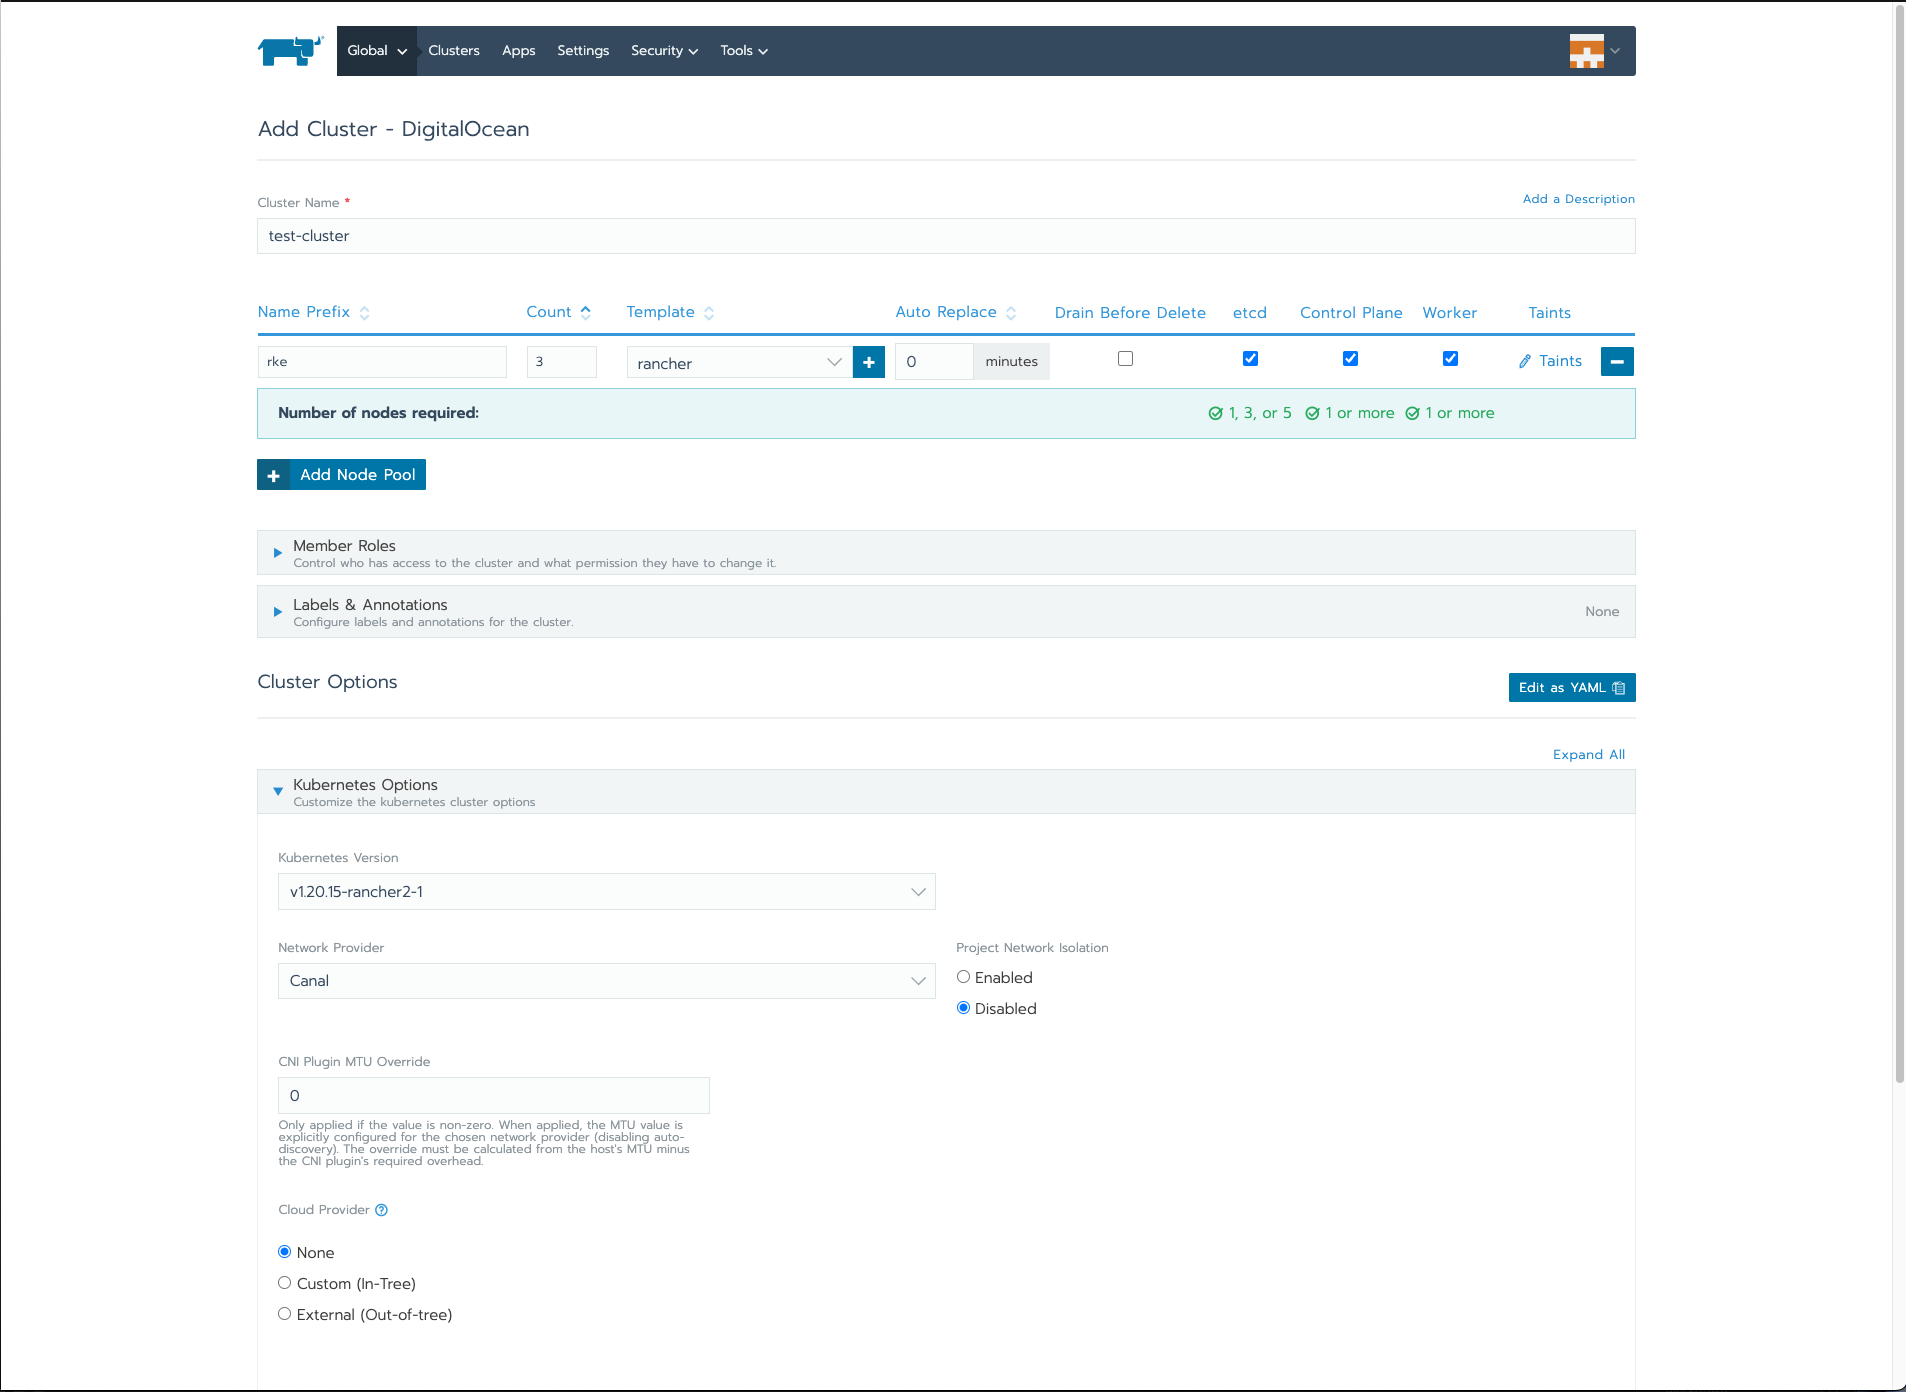
The next screen lets you create node pools, select a network provider, set the number of nodes, create labels, and much more. From here, you can fully configure the Kubernetes cluster. Once that configuration is ready, you can deploy the cluster:
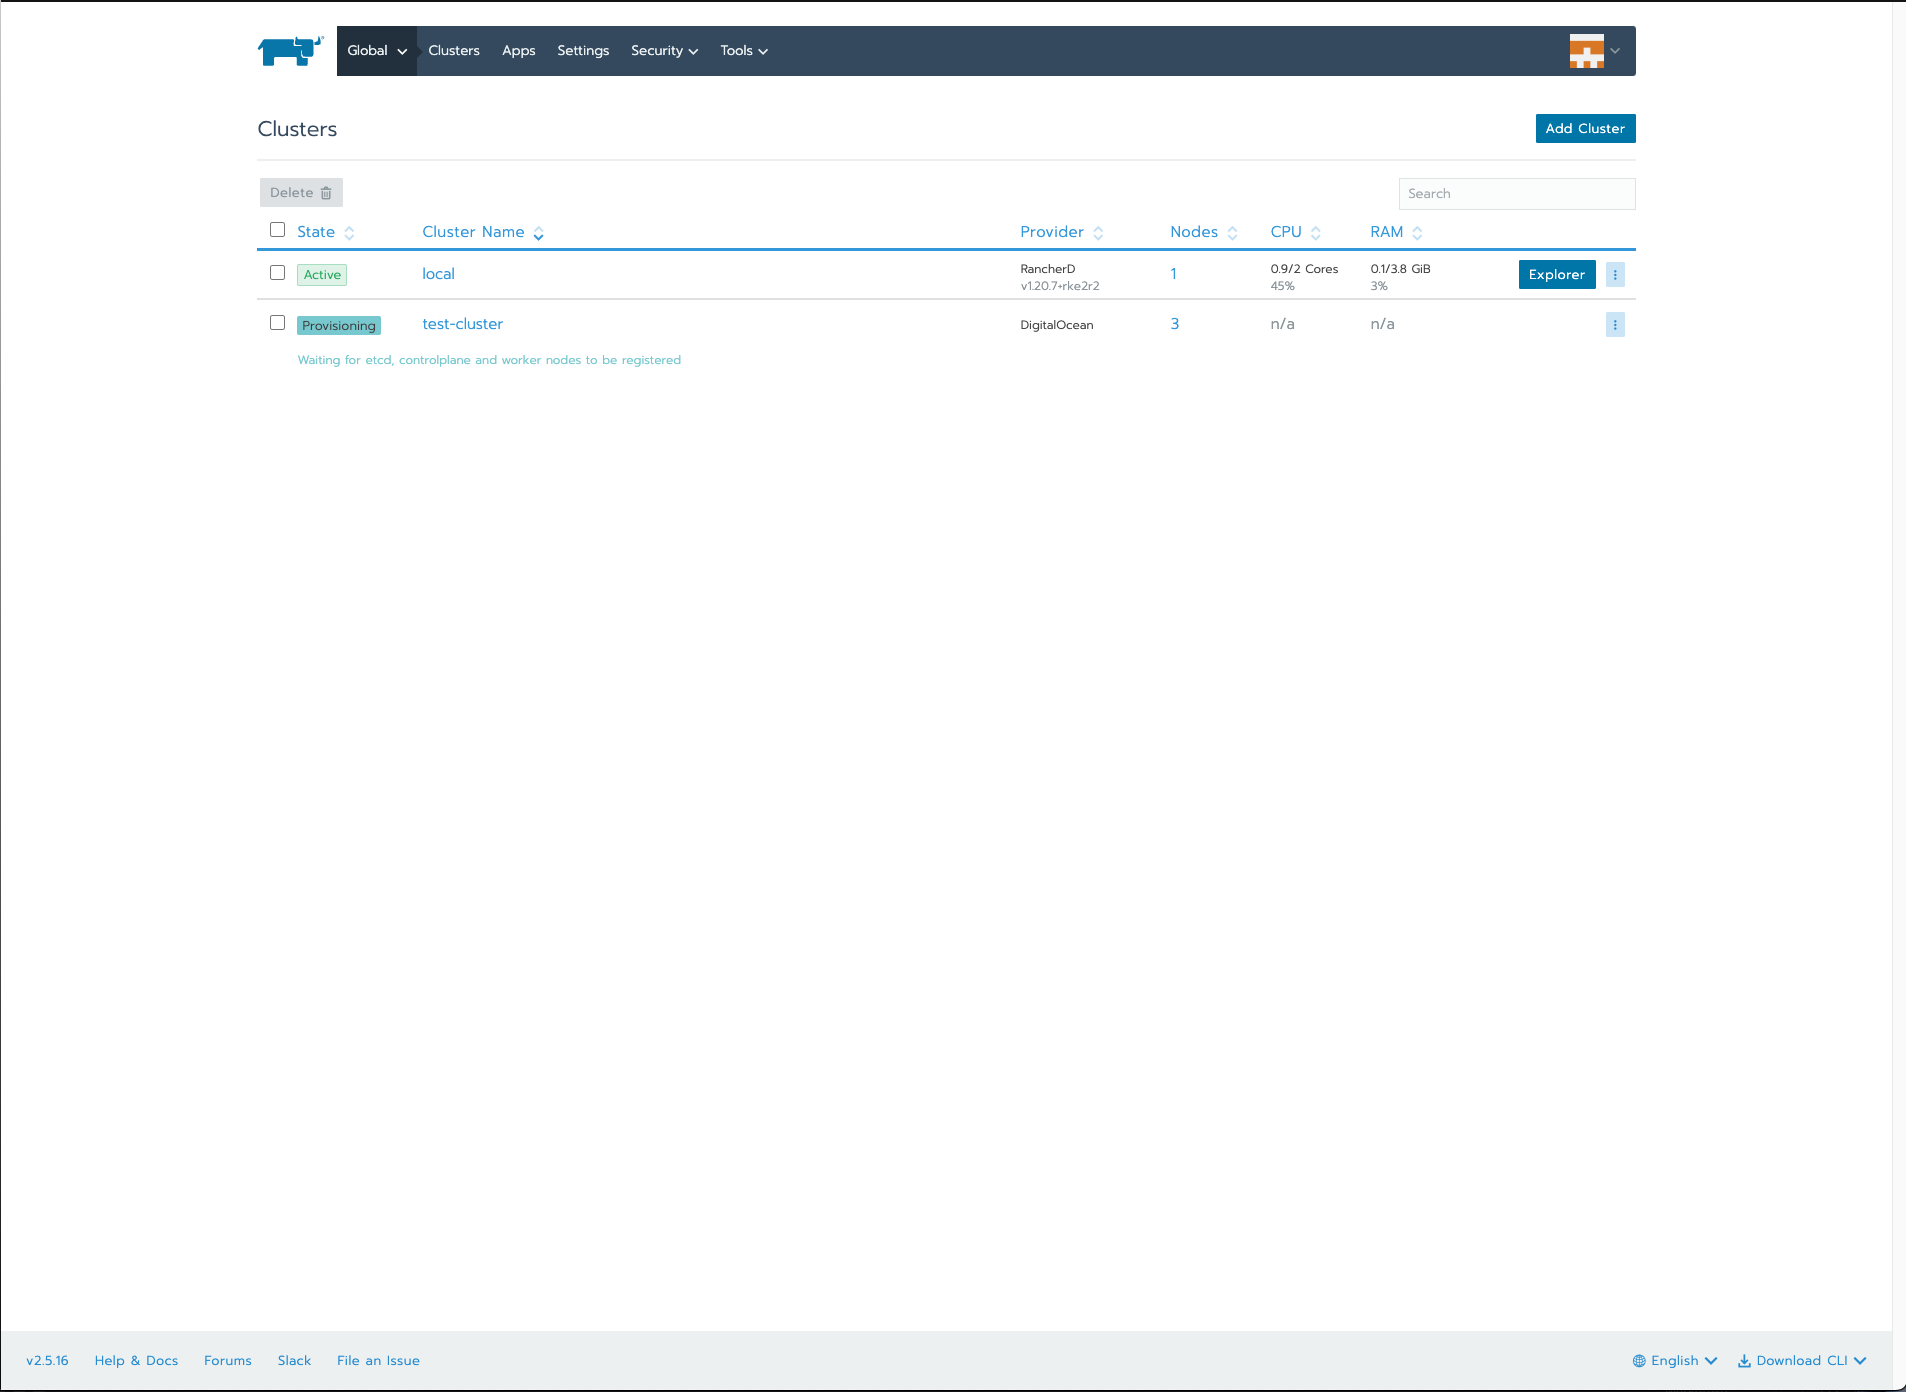
The next screen shows the main dashboard, where you can see how the cluster is provisioned in real time:
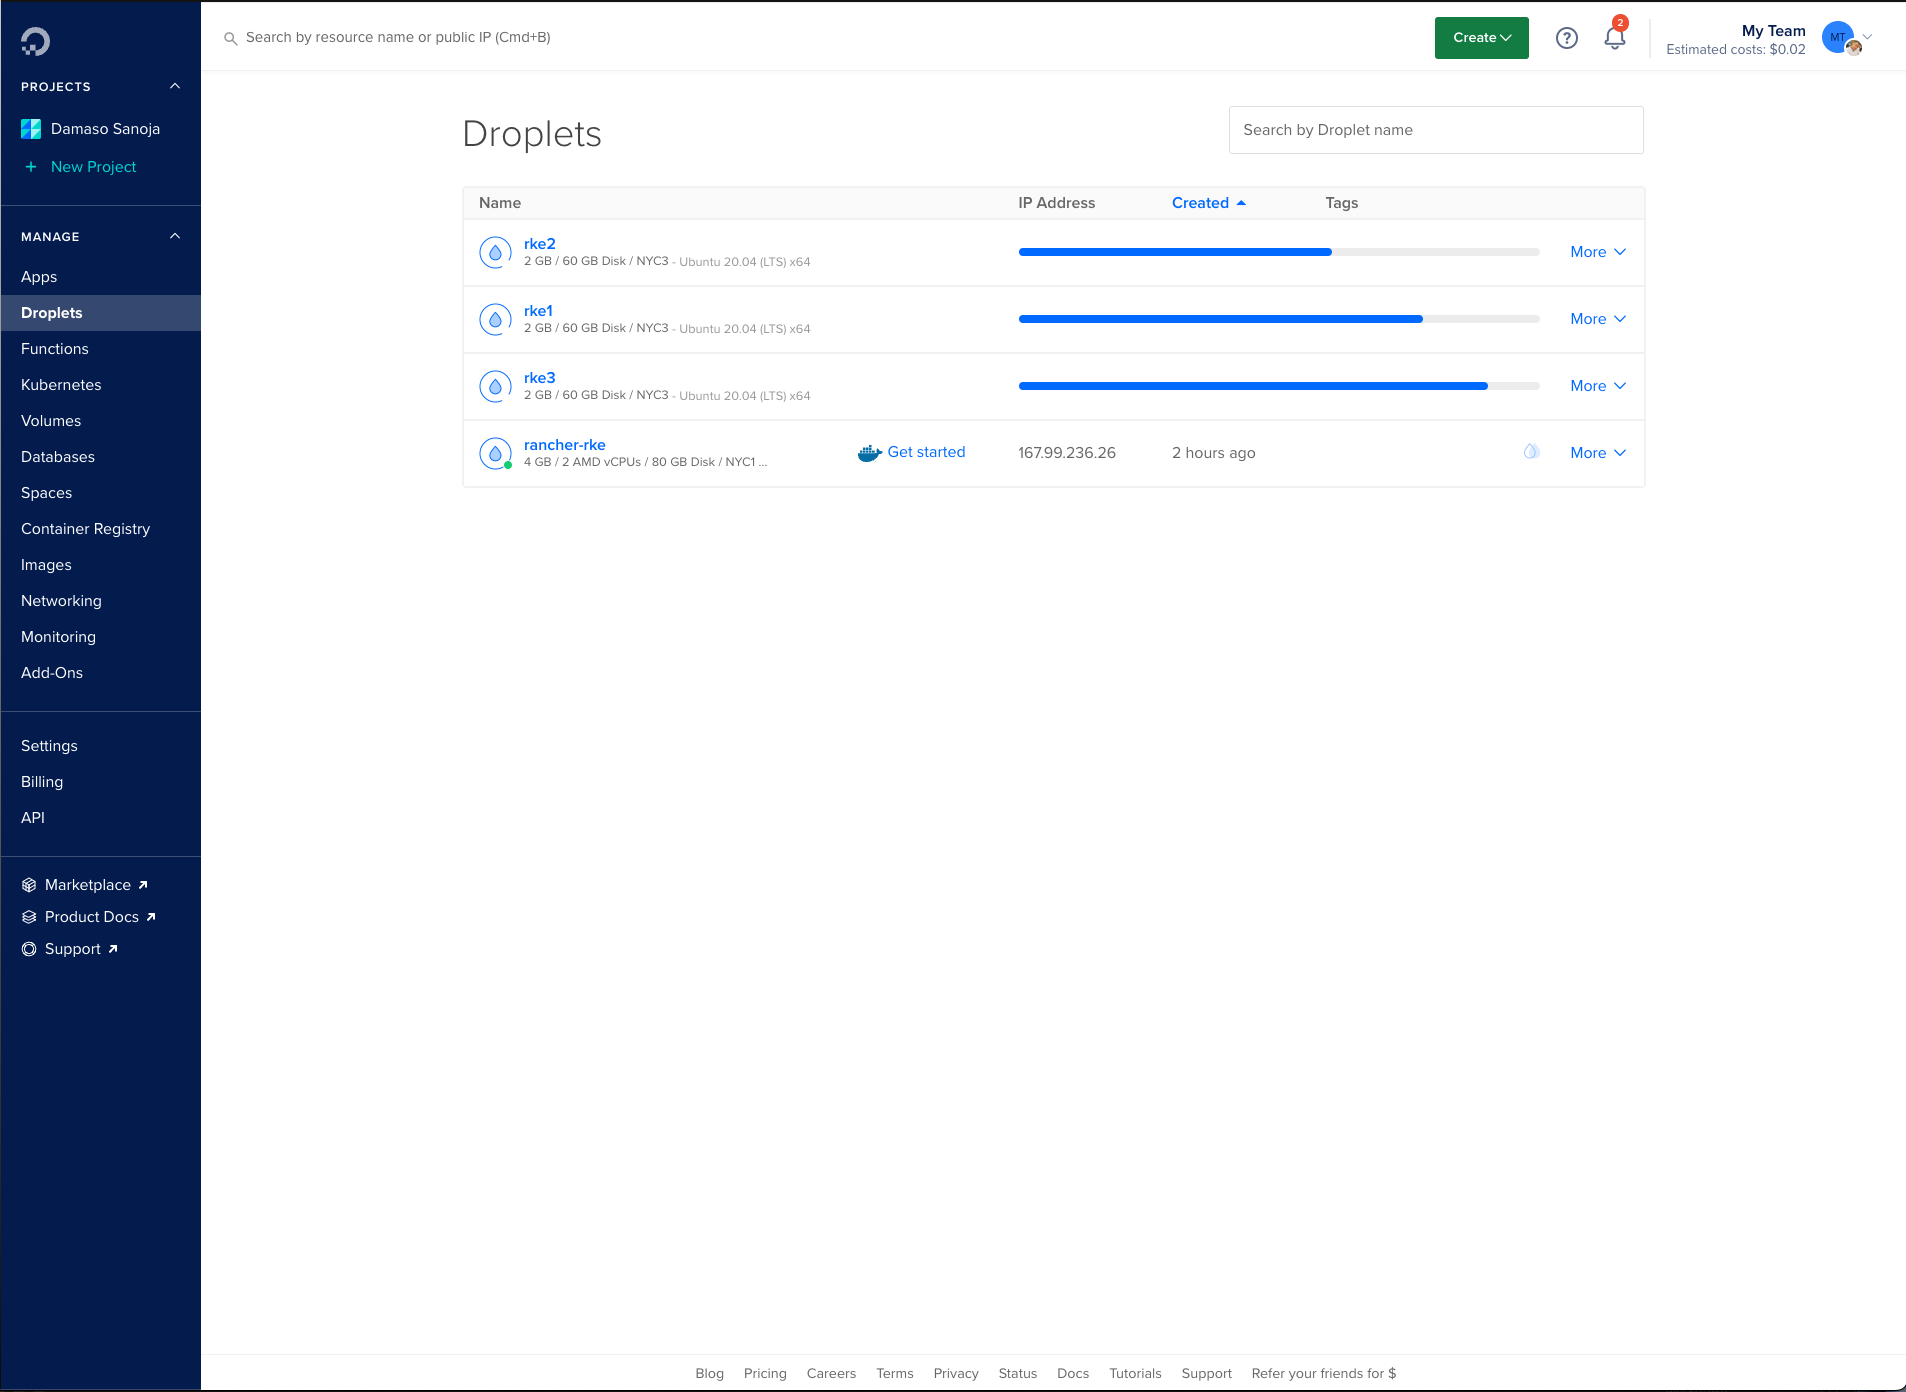
For reference, the following is a screenshot of the DigitalOcean dashboard where you can see how the cluster is provisioned:
Once the process is complete, both clusters will be listed in the Rancher dashboard:

The hamburger menu to the right of the cluster allows you to perform some basic operations, like editing the cluster, taking a snapshot of the cluster, running a CIS scan, and deleting the cluster:

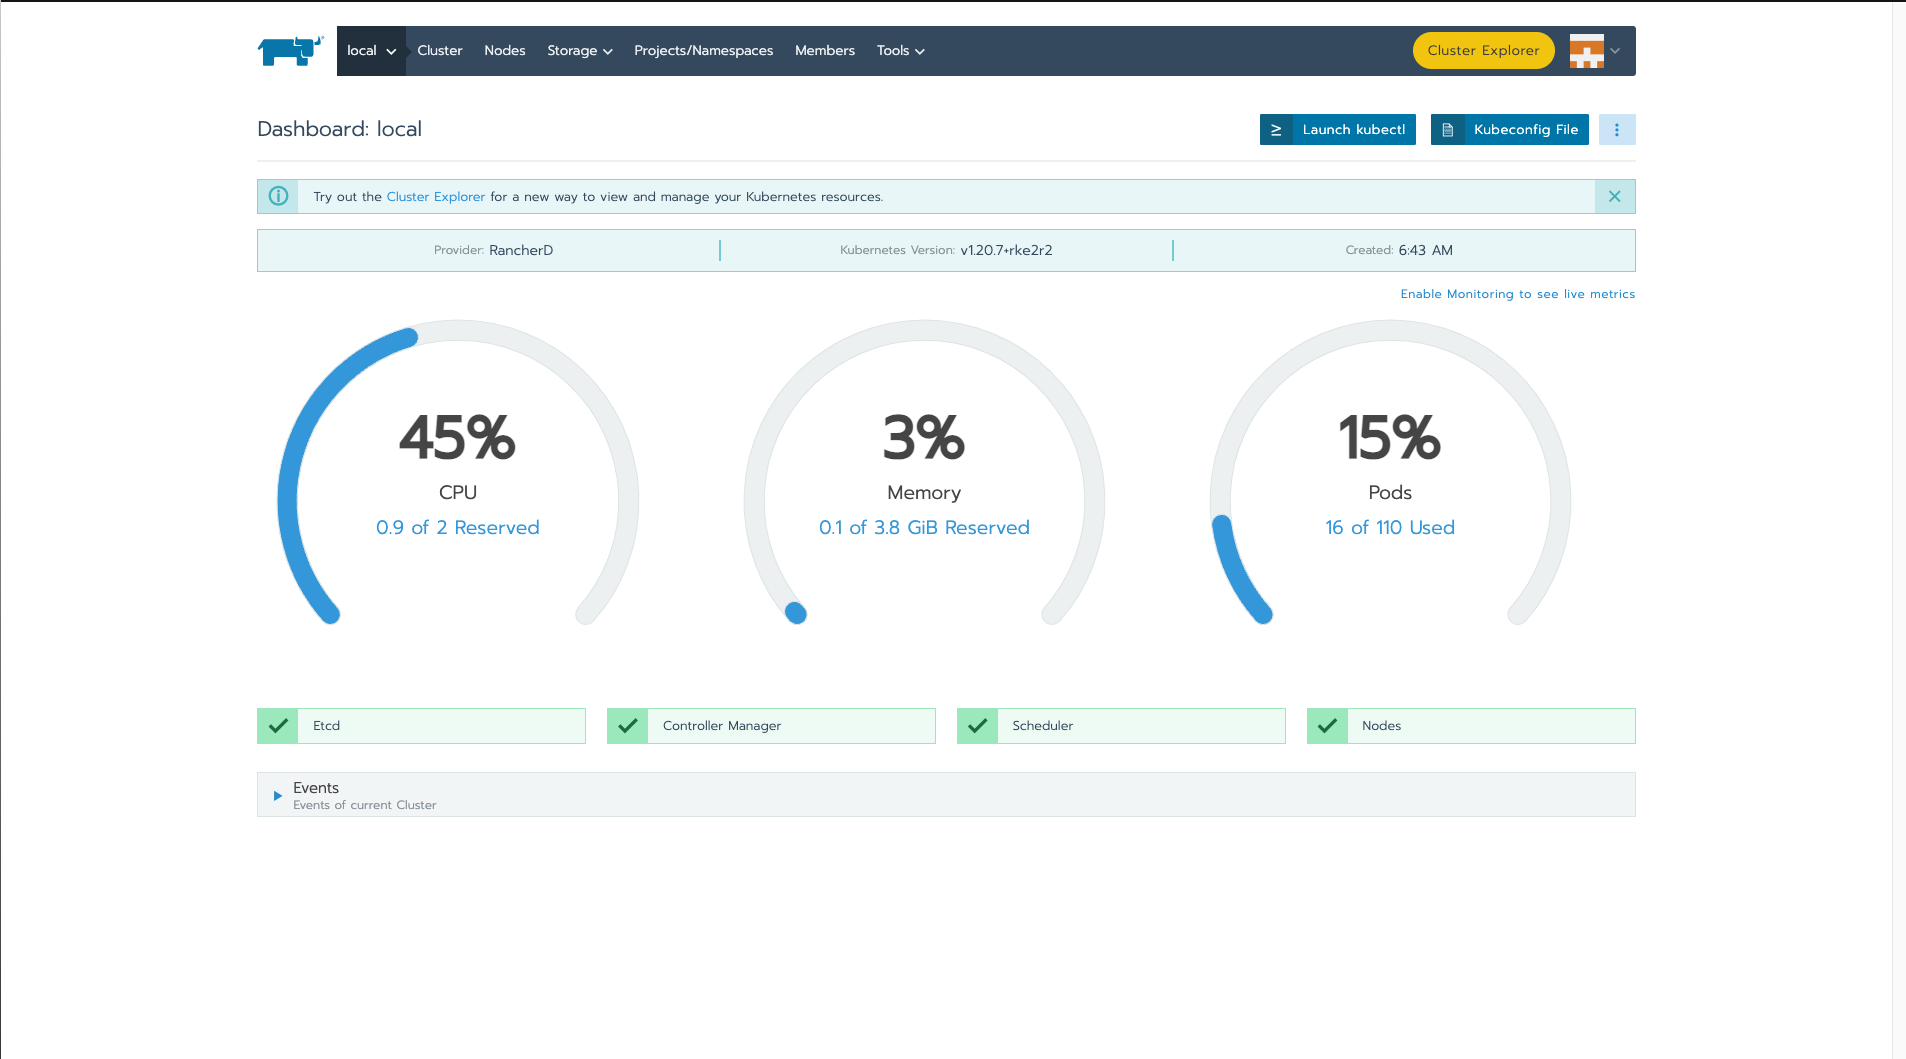
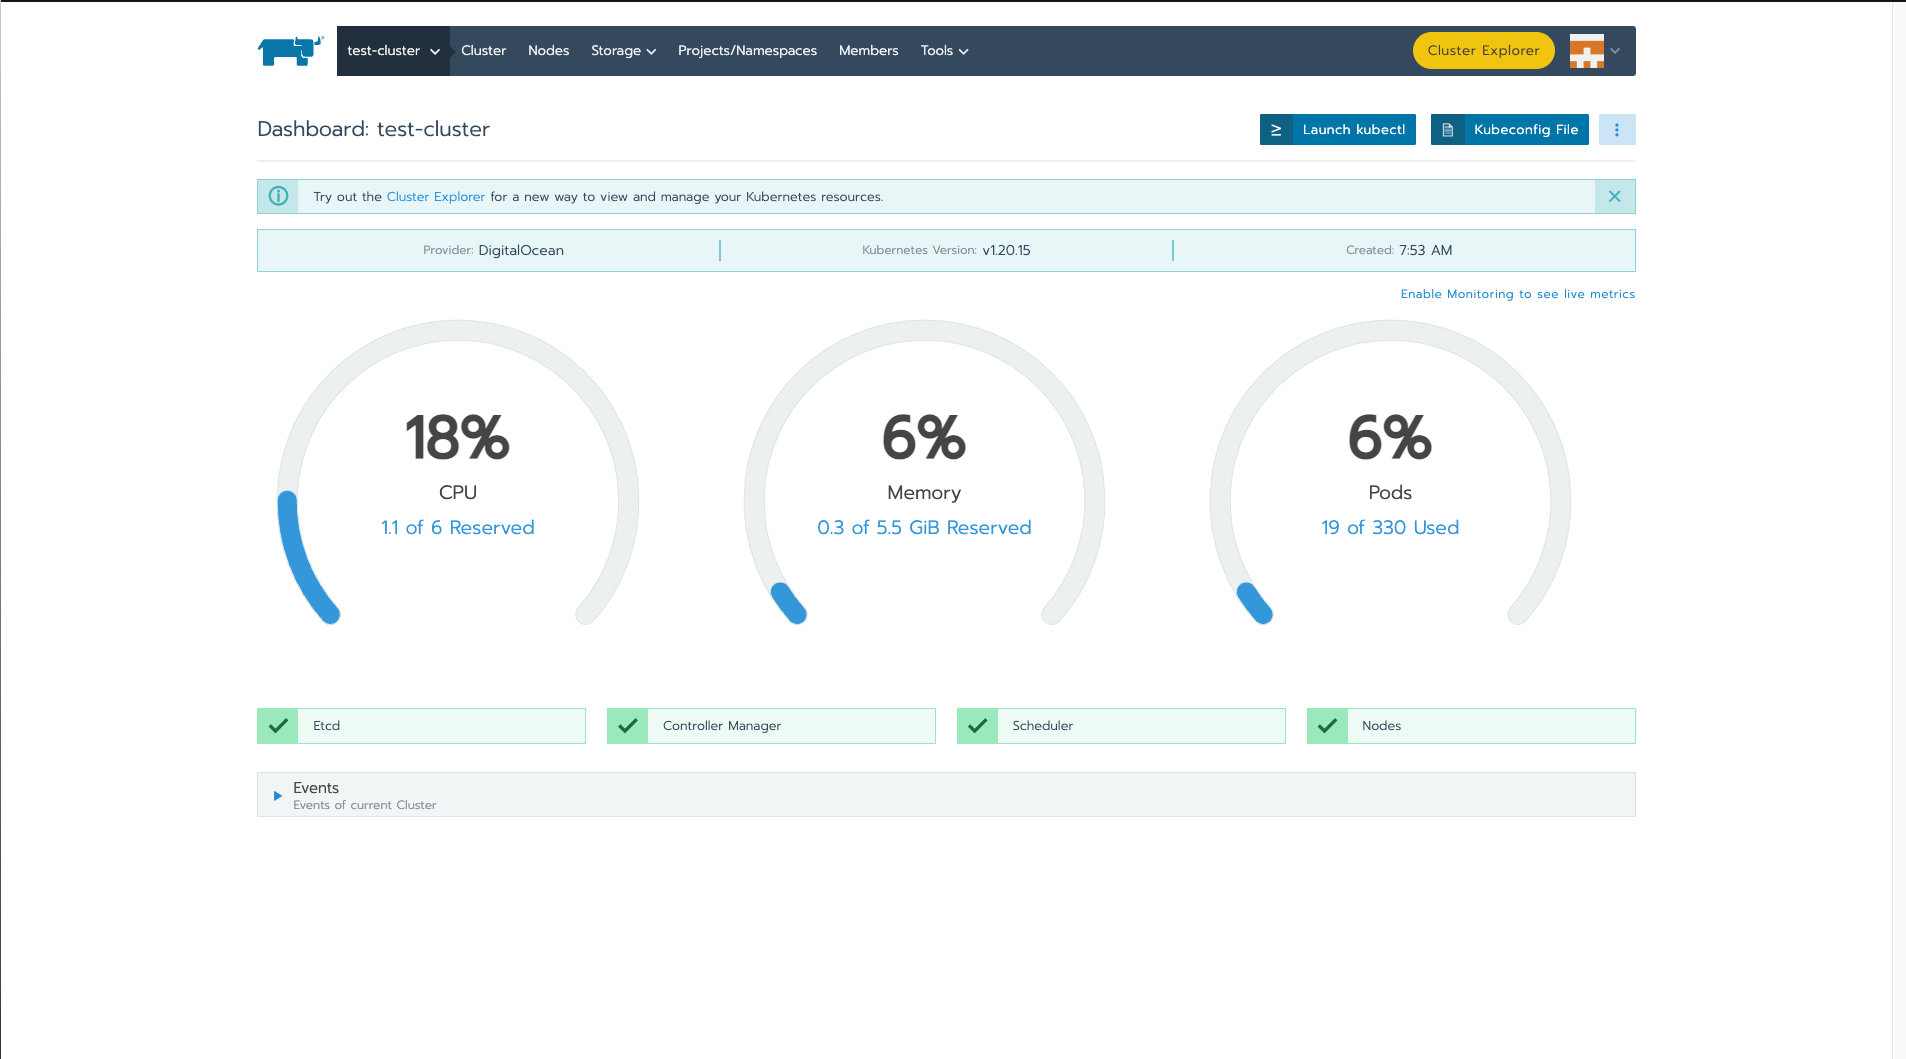
If you click on any of the clusters, you will be taken to a screen where you can see the key metrics of each cluster:
If you’re familiar with DigitalOcean, you may be interested in knowing which OS was used for each node and the specifications of the RAM, vCPU, and storage (the specific Droplet). An advantage of Rancher is that you can create and manage node templates for any supported host provider and then use those templates during cluster creation. Take a look at this example:
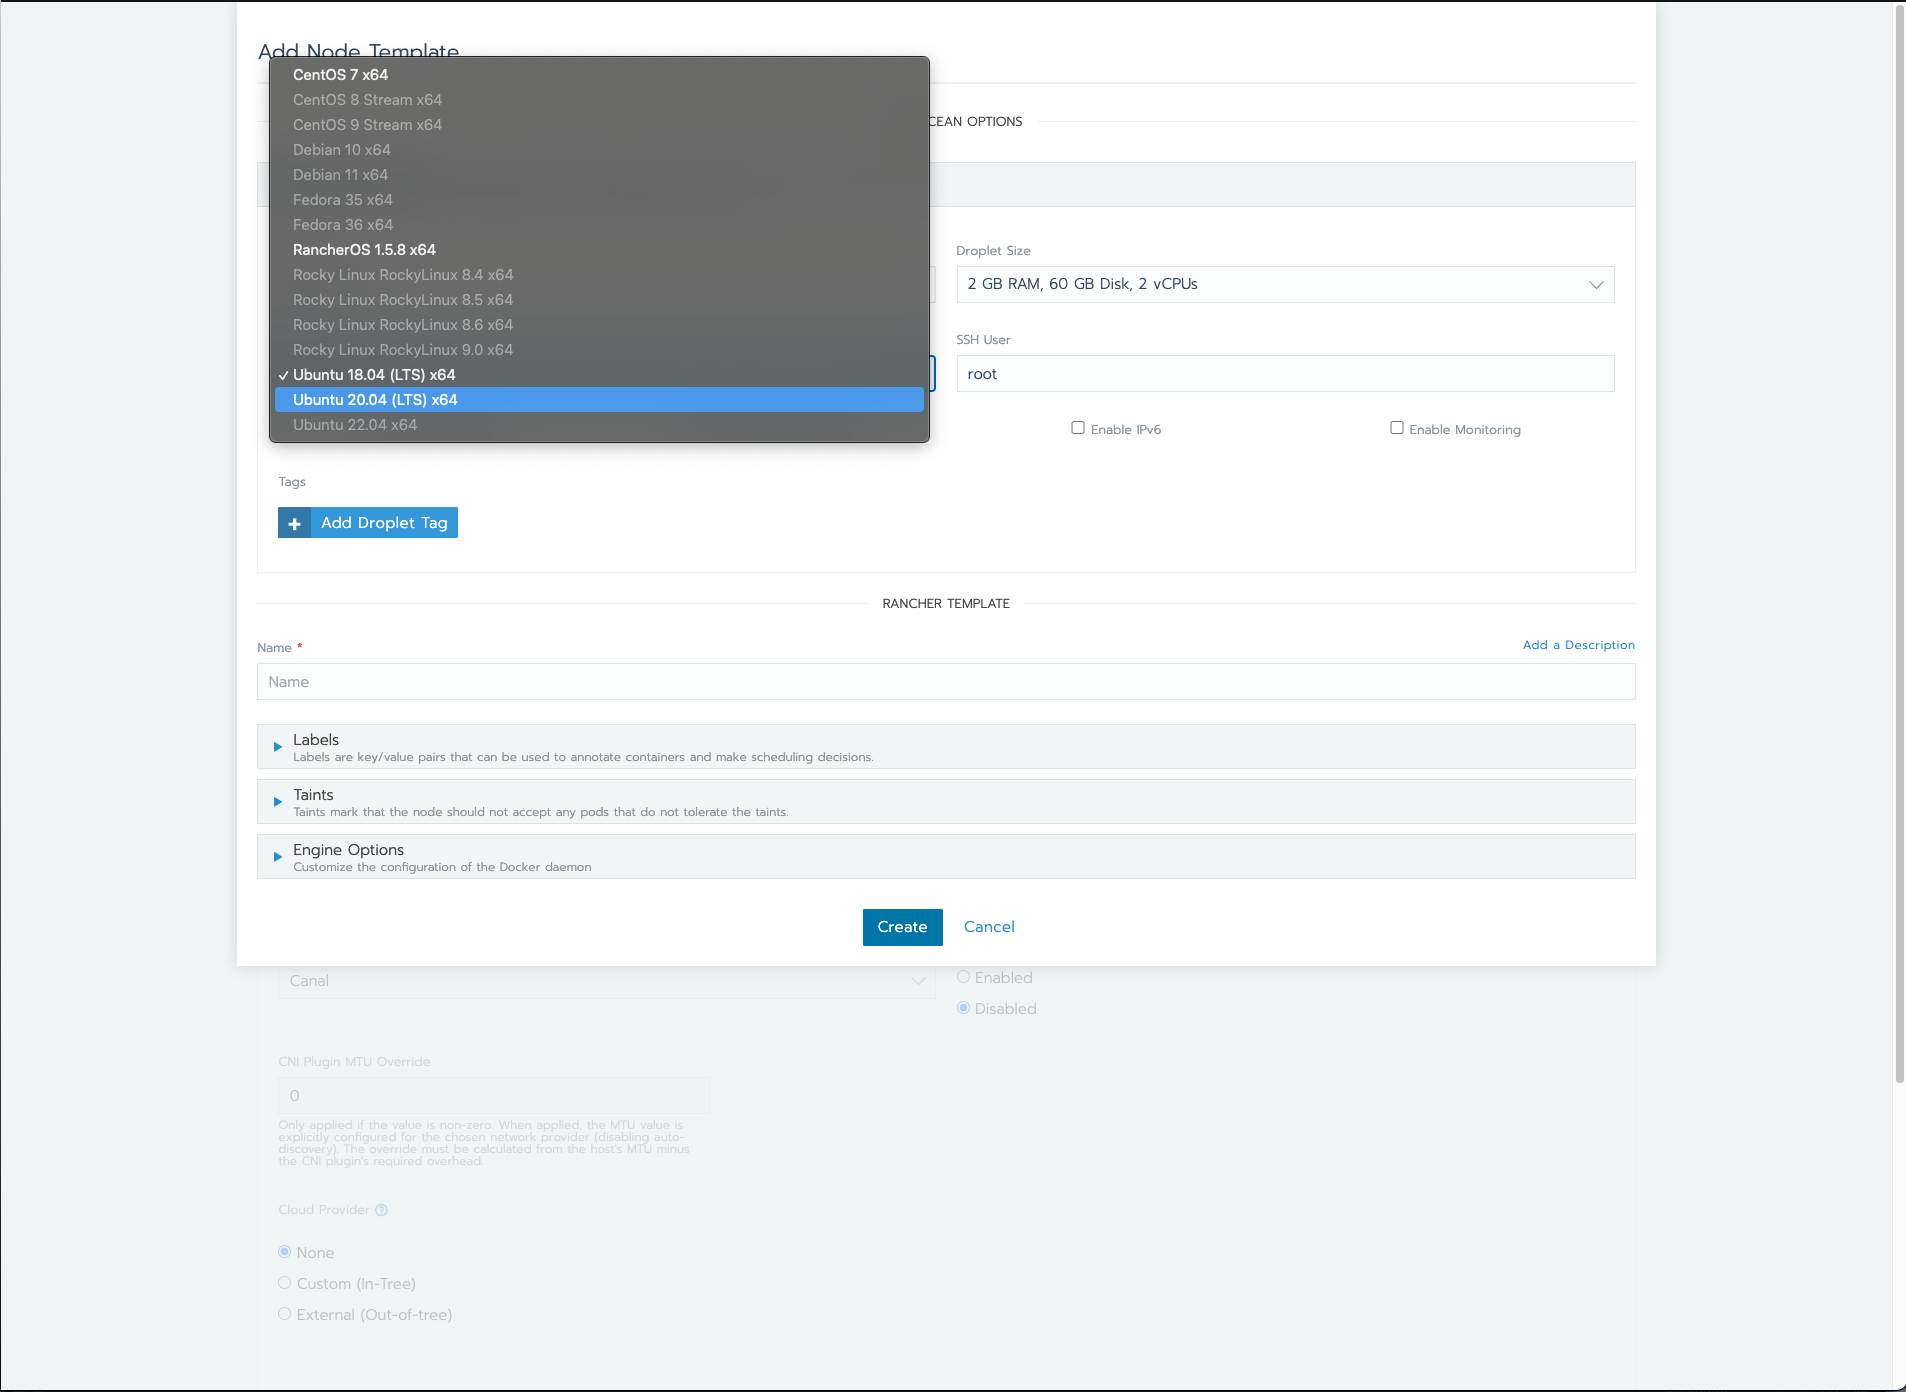
The procedure for deploying managed Kubernetes clusters is similar. In all cases, you must previously configure the necessary access tokens. This will enable the cluster controller to communicate correctly with the cluster agent and perform all the necessary operations.
Management of Multi-Cluster and Hybrid-Cluster Environments from a Single Interface
But can Rancher help you better manage Kubernetes? In short, the answer is yes.
Go back for a moment to one of the previous screenshots:

At the top right, you can see a button labeled Launch kubectl. If you click on it, another screen similar to the following will be displayed:

From here, you can run any command on the selected cluster. As shown, the kubectl get pods -A command has been run. This means, without switching contexts in your terminal, you can easily use kubectl commands on any of the Rancher-managed clusters.
Rancher’s convenience for managing multi-cluster environments doesn’t end there. Instead of clicking the Launch kubectl button, you could click the yellow button labeled Cluster Explorer located at the top left:
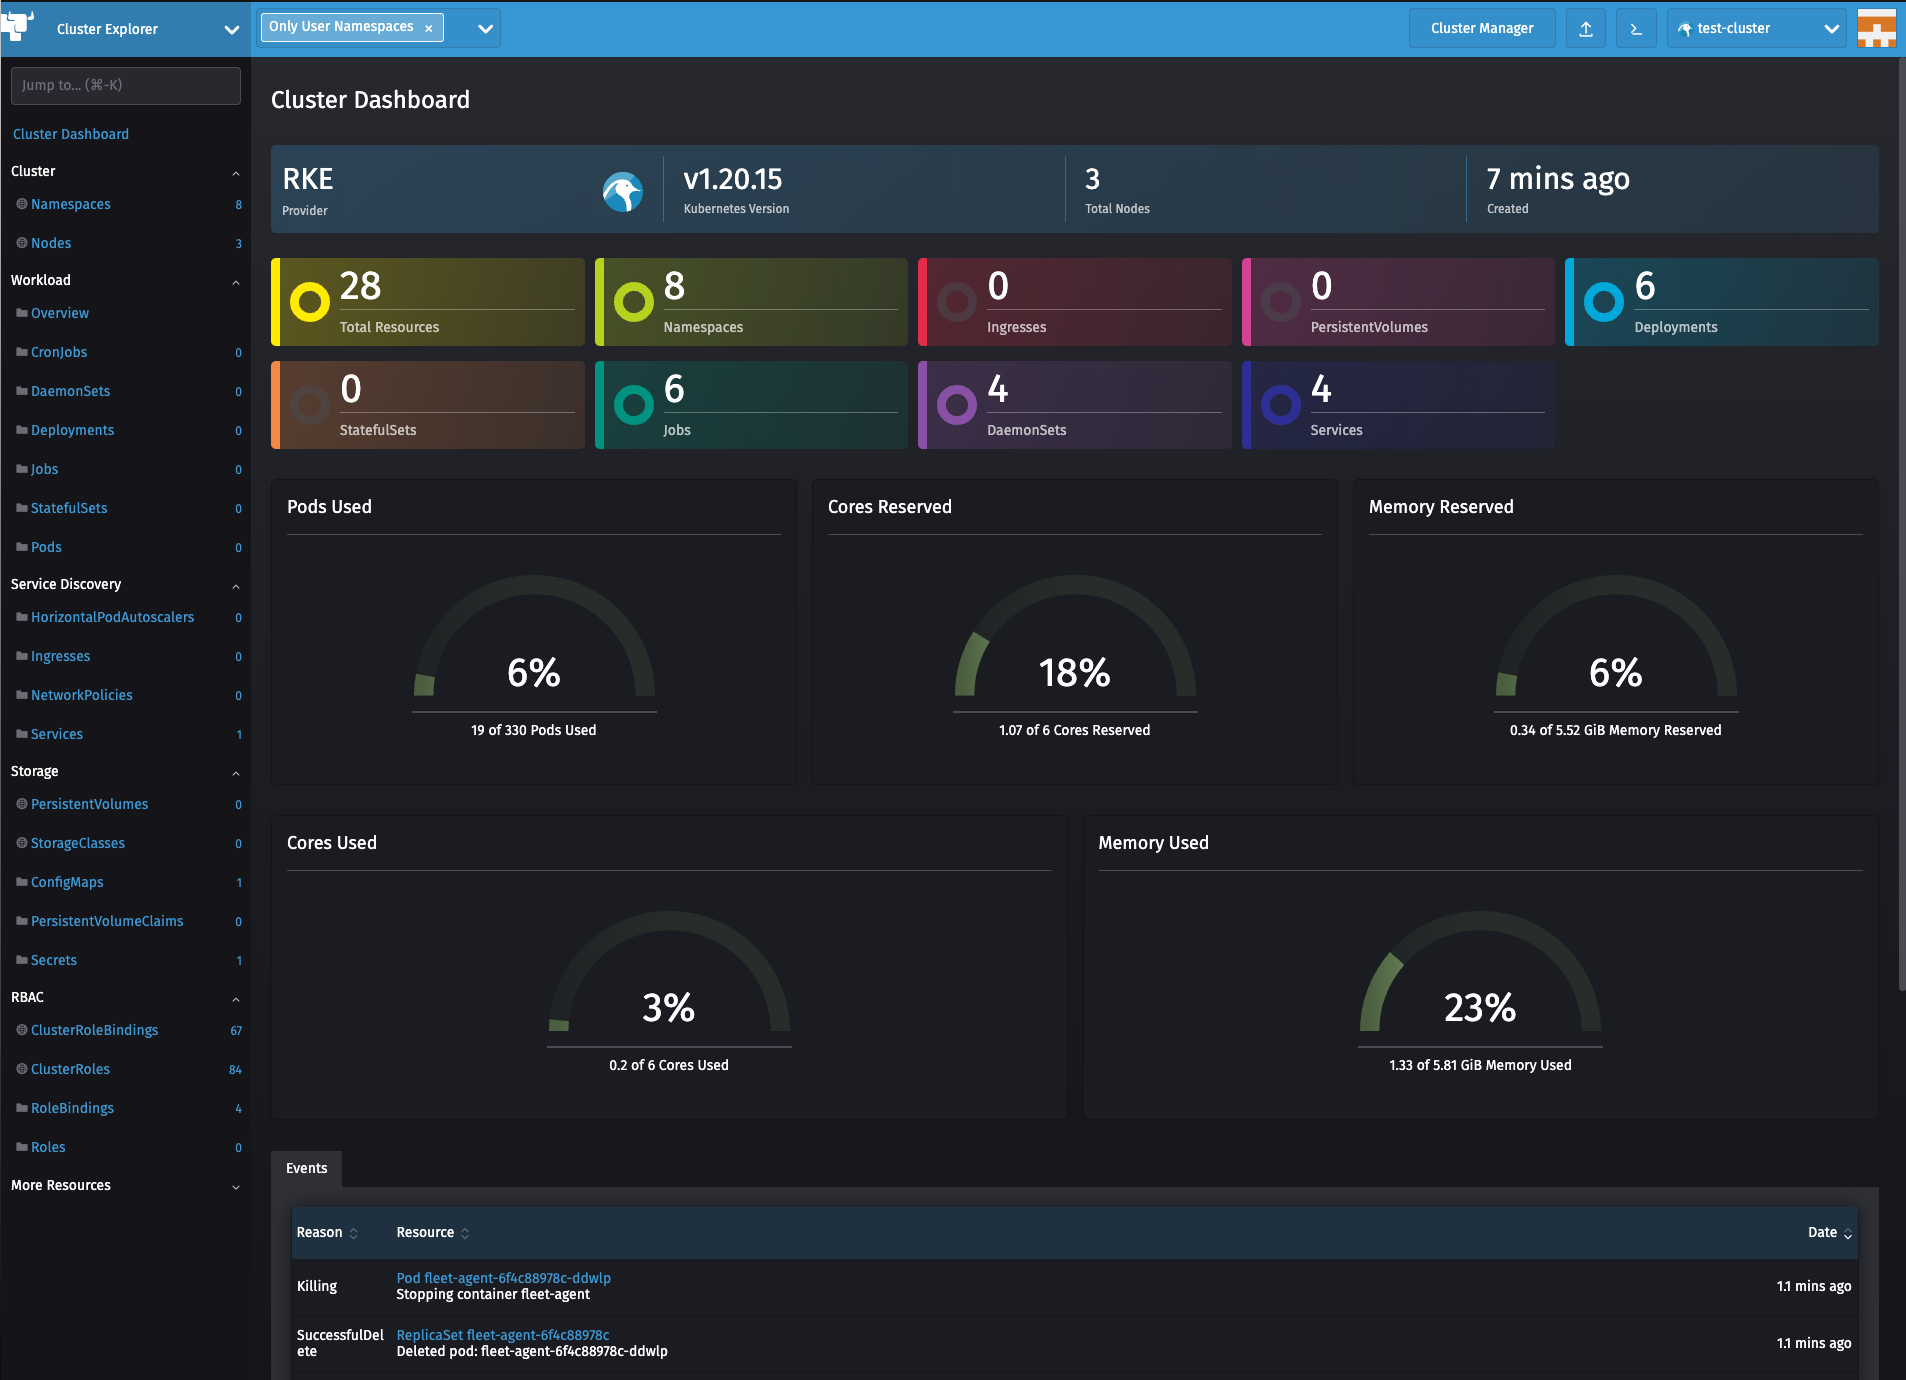
This screen offers detailed information about the status of the selected cluster and is ideal for more detailed monitoring of the resources used. On the left, you can see a side menu with multiple options. Take a look at the nodes:

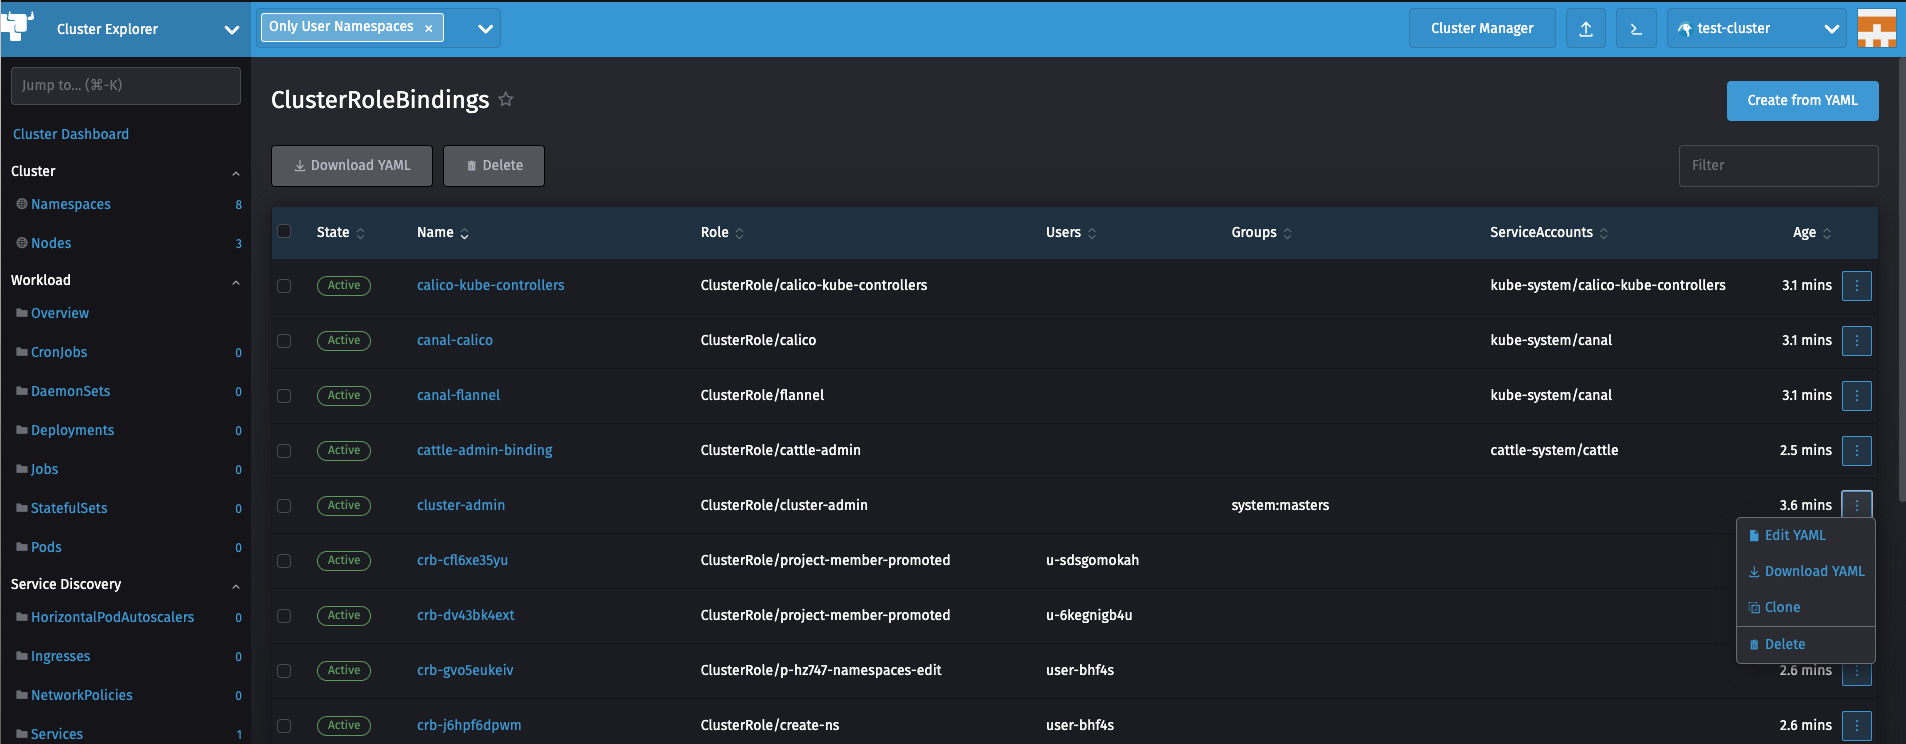
Or you could also handle the cluster role bindings:
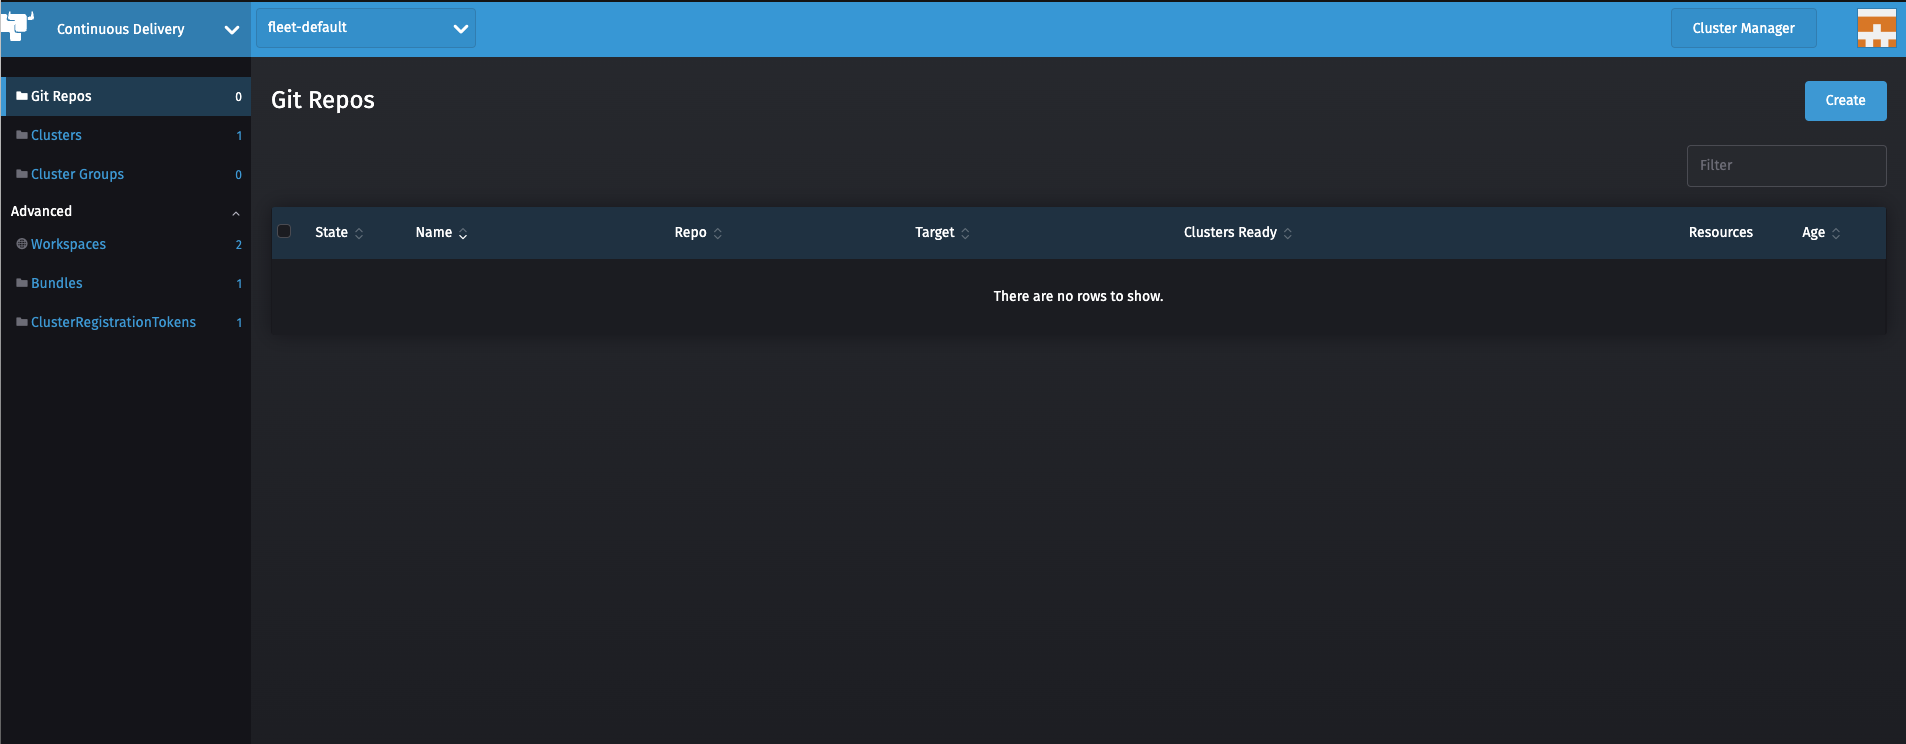
Do you want to configure Git repositories for continuous delivery? You can also do that from the Rancher UI:
Since Rancher uses Helm, you can install any number of applications and tools on each cluster, and you can do it from the convenience of the Rancher marketplace:
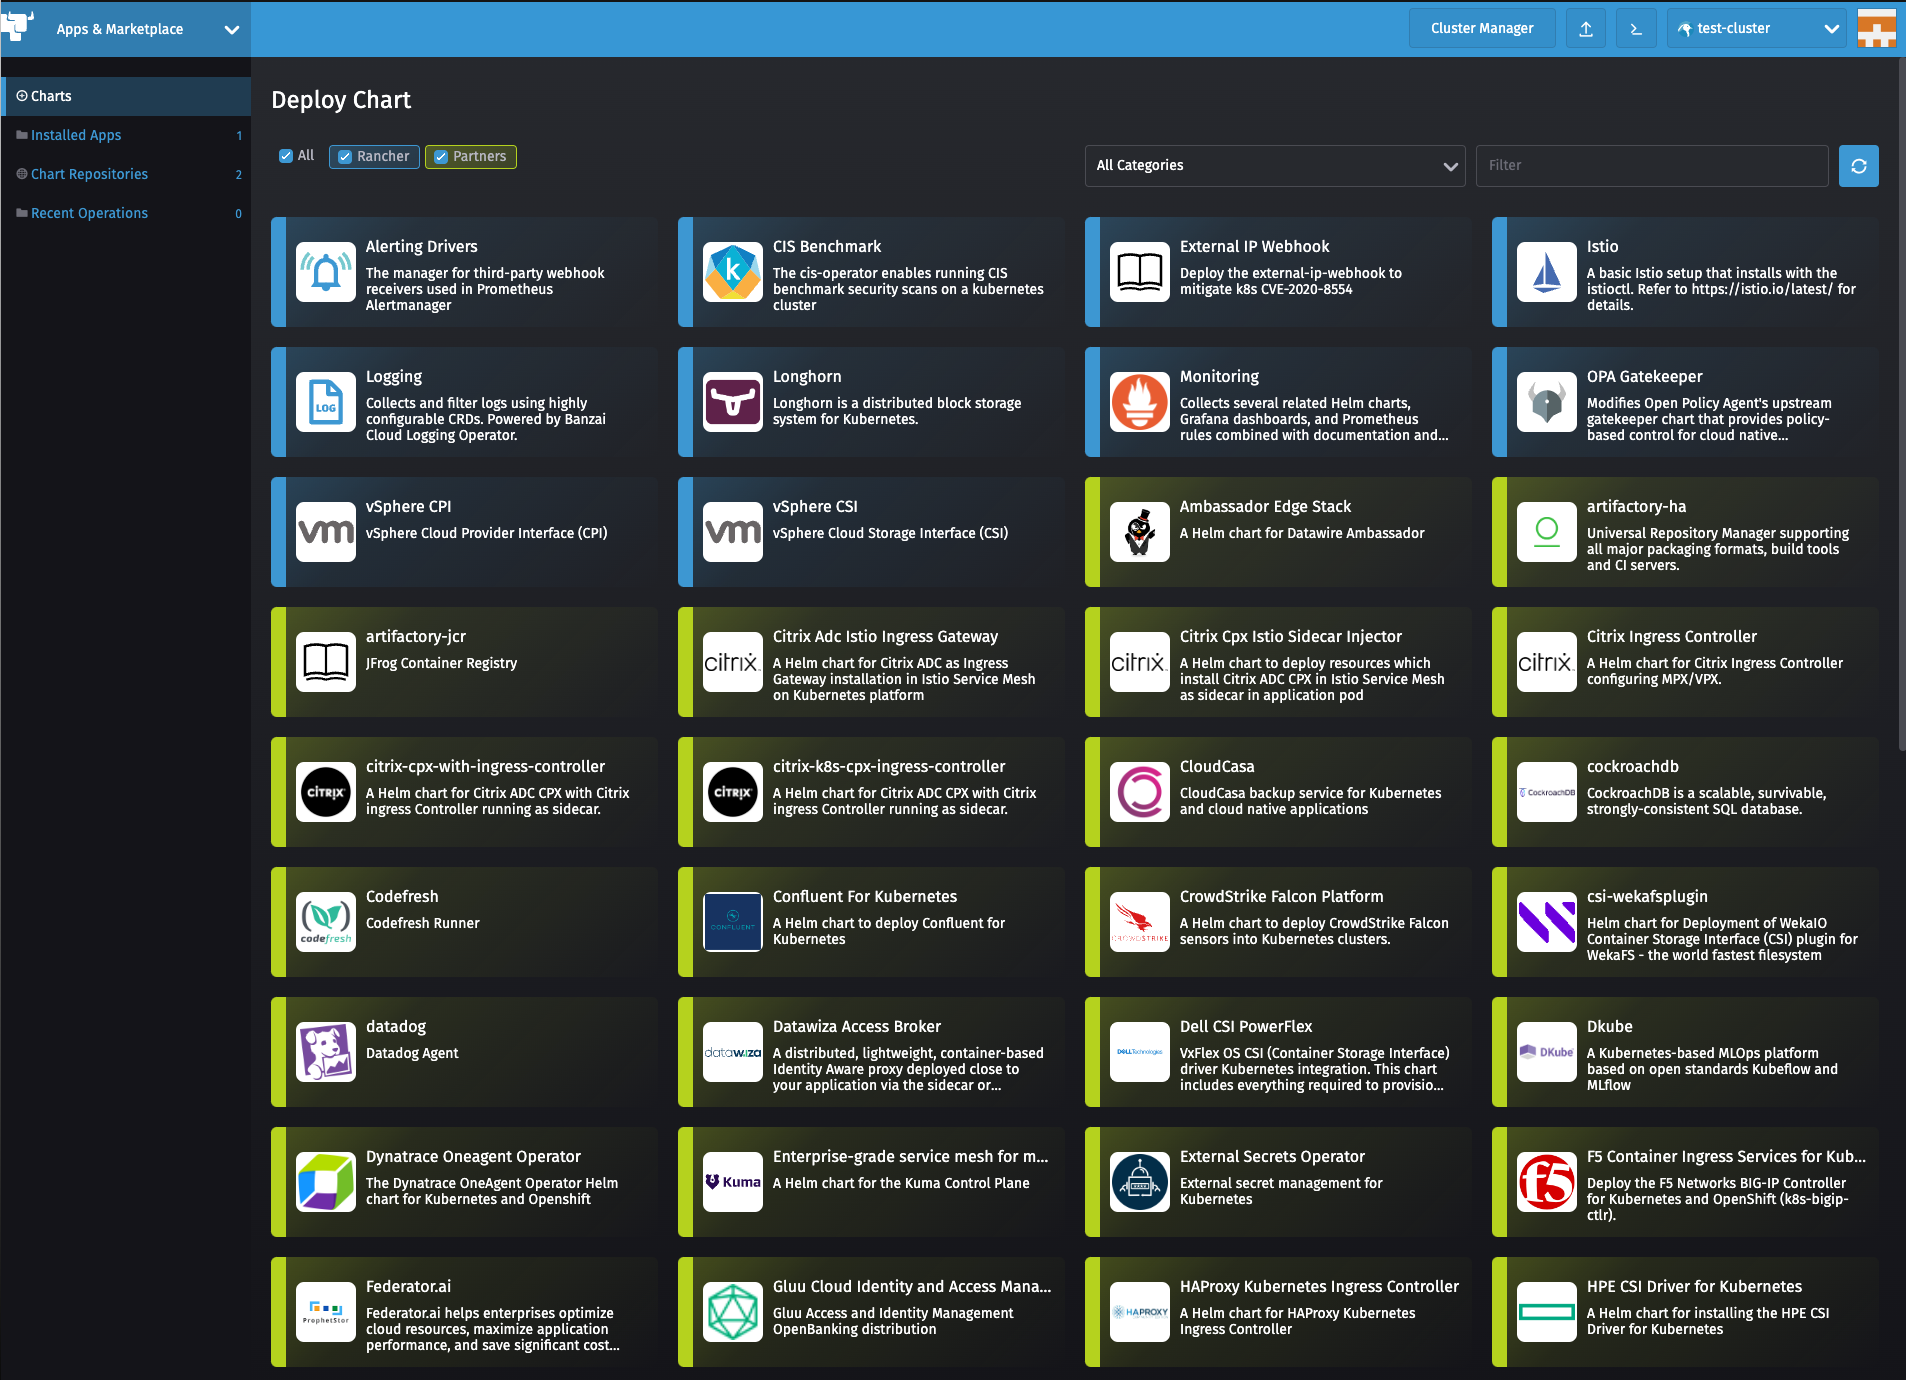
You can even add or remove the Helm chart according to your needs:

This is just a brief overview of all the operations that can be done from the Rancher Cluster Explorer. From workload management to storage and RBAC, you can manage multi-cluster and hybrid-cluster environments conveniently from a single interface.
Centralized Security Policy Management
As briefly mentioned in the previous section, from the Rancher Cluster Explorer, you can manage Kubernetes’s role-based access control (RBAC):

This means you can enforce ClusterRoleBindings, ClusterRoles, RoleBindings, and Roles—for both users and services running on your clusters—from the same UI.
Use Cases That Require Built-In Active Directory, LDAP, or SAML Support
Another layer of security and convenience that Rancher offers is the authentication of those who enter the UI. Kubernetes does not provide any mechanism to manage users, so to block the access of someone in particular to the cluster, their certificates or access token must be revoked.
Rancher, however, does have built-in support for major authentication providers and also offers you absolute control over the permissions granted to each user:
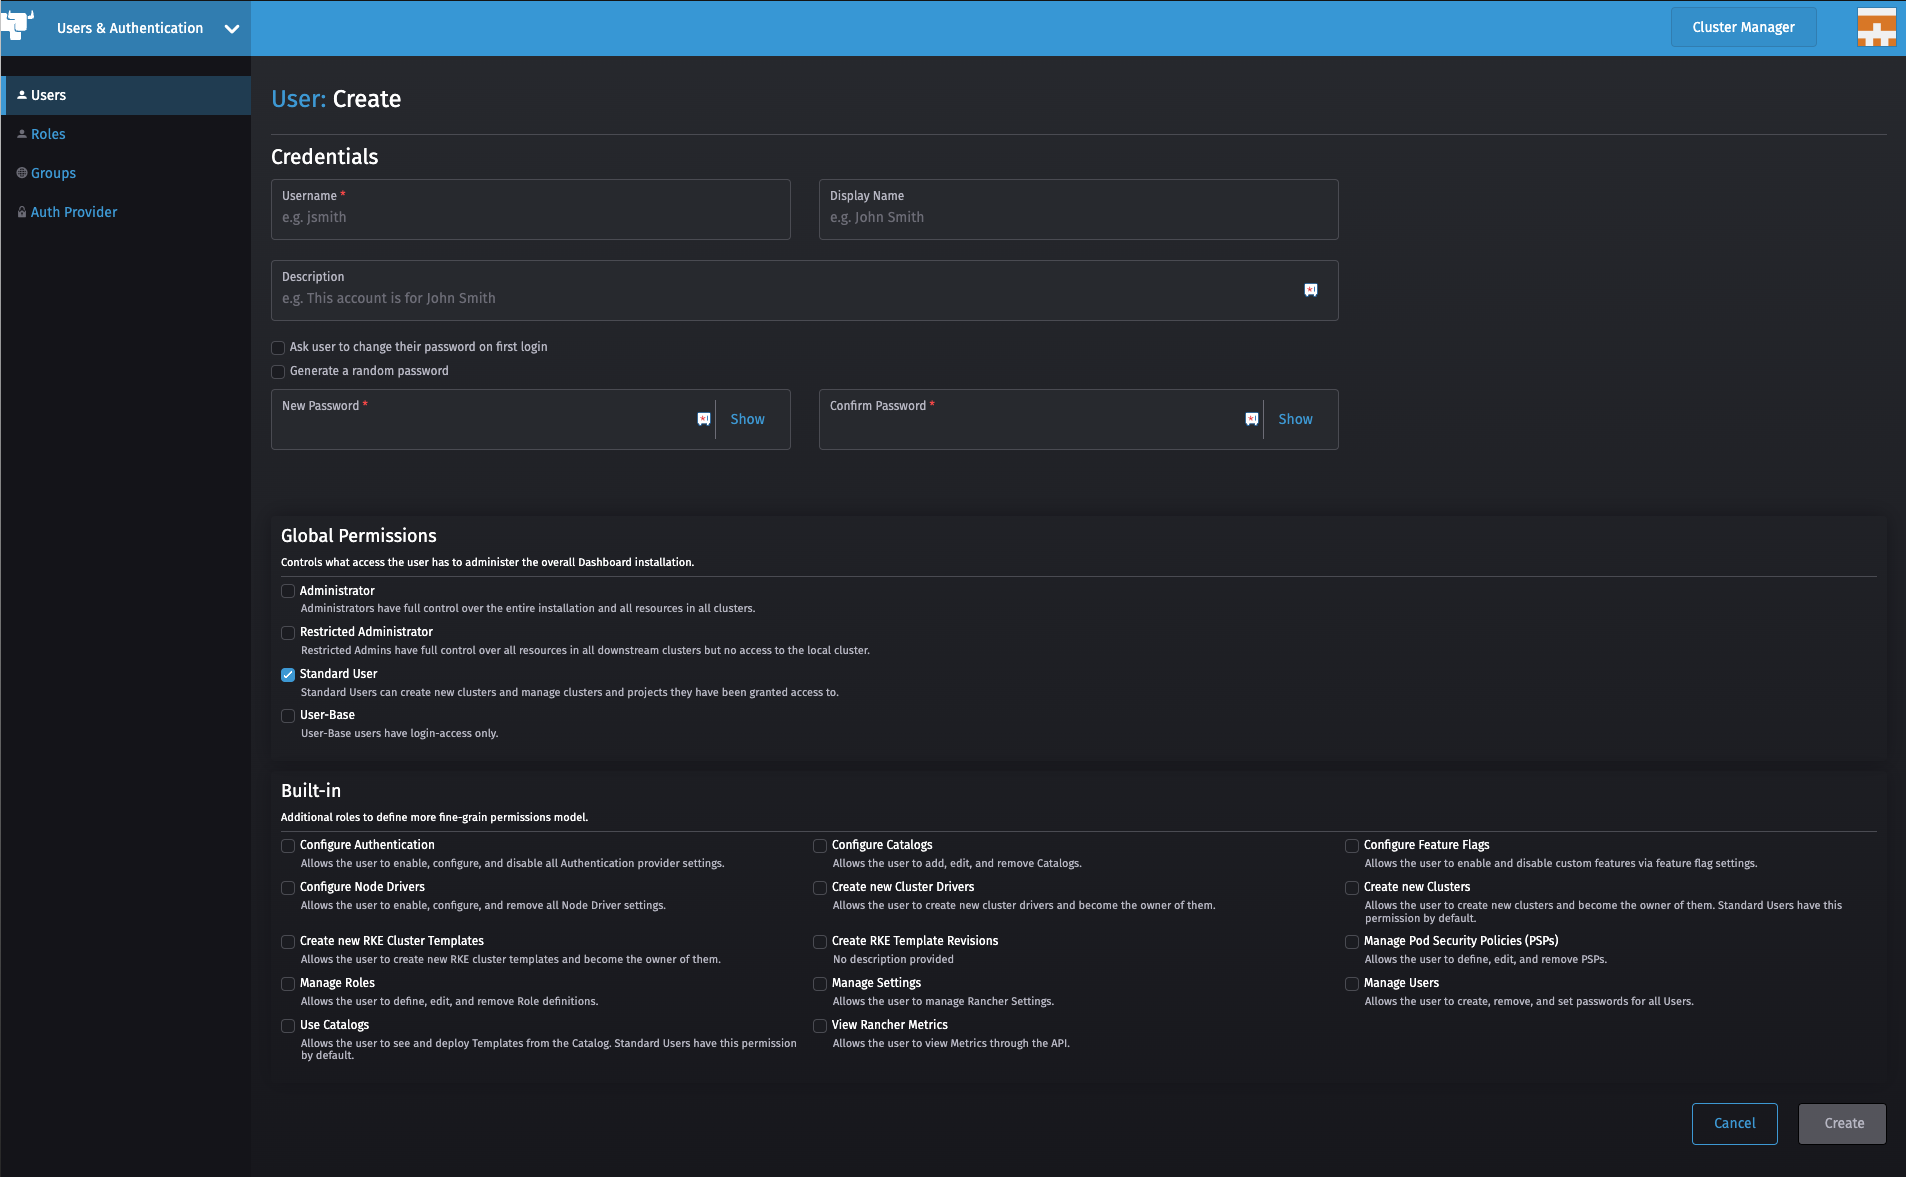

This allows efficient and secure management of who can enter each cluster and with what permissions they can do so.
Enterprise Support with No Vendor Lock-In
Rancher allows you to handle multi-cluster and hybrid-cluster environments, no matter what Kubernetes distro you are using. This eliminates vendor lock-in and lets you subscribe to enterprise-level support without being tied to a particular vendor.
Plug-in Support
Rancher is synonymous with flexibility and convenience; for this reason, its amazing plug-in support should come as no surprise.
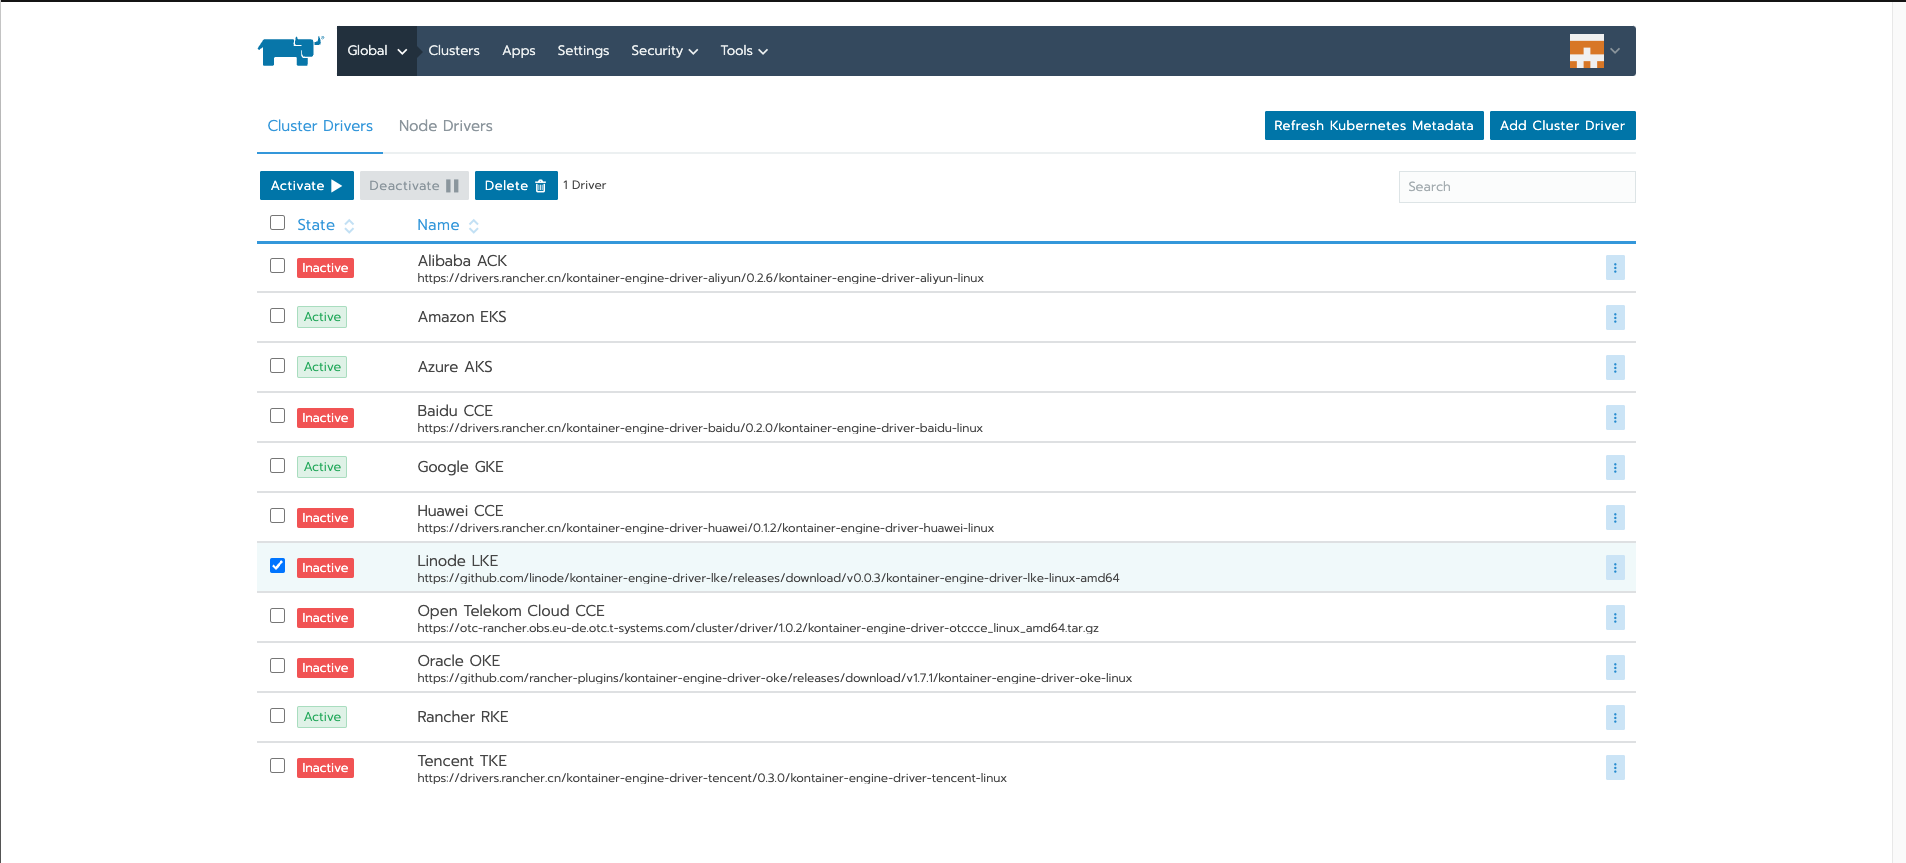
These plug-ins, also called drivers, allow Rancher to communicate with different Kubernetes-hosted solutions and infrastructure providers. You can access Rancher Cluster Drivers from the UI:
You can also access the different Node Drivers from the UI:
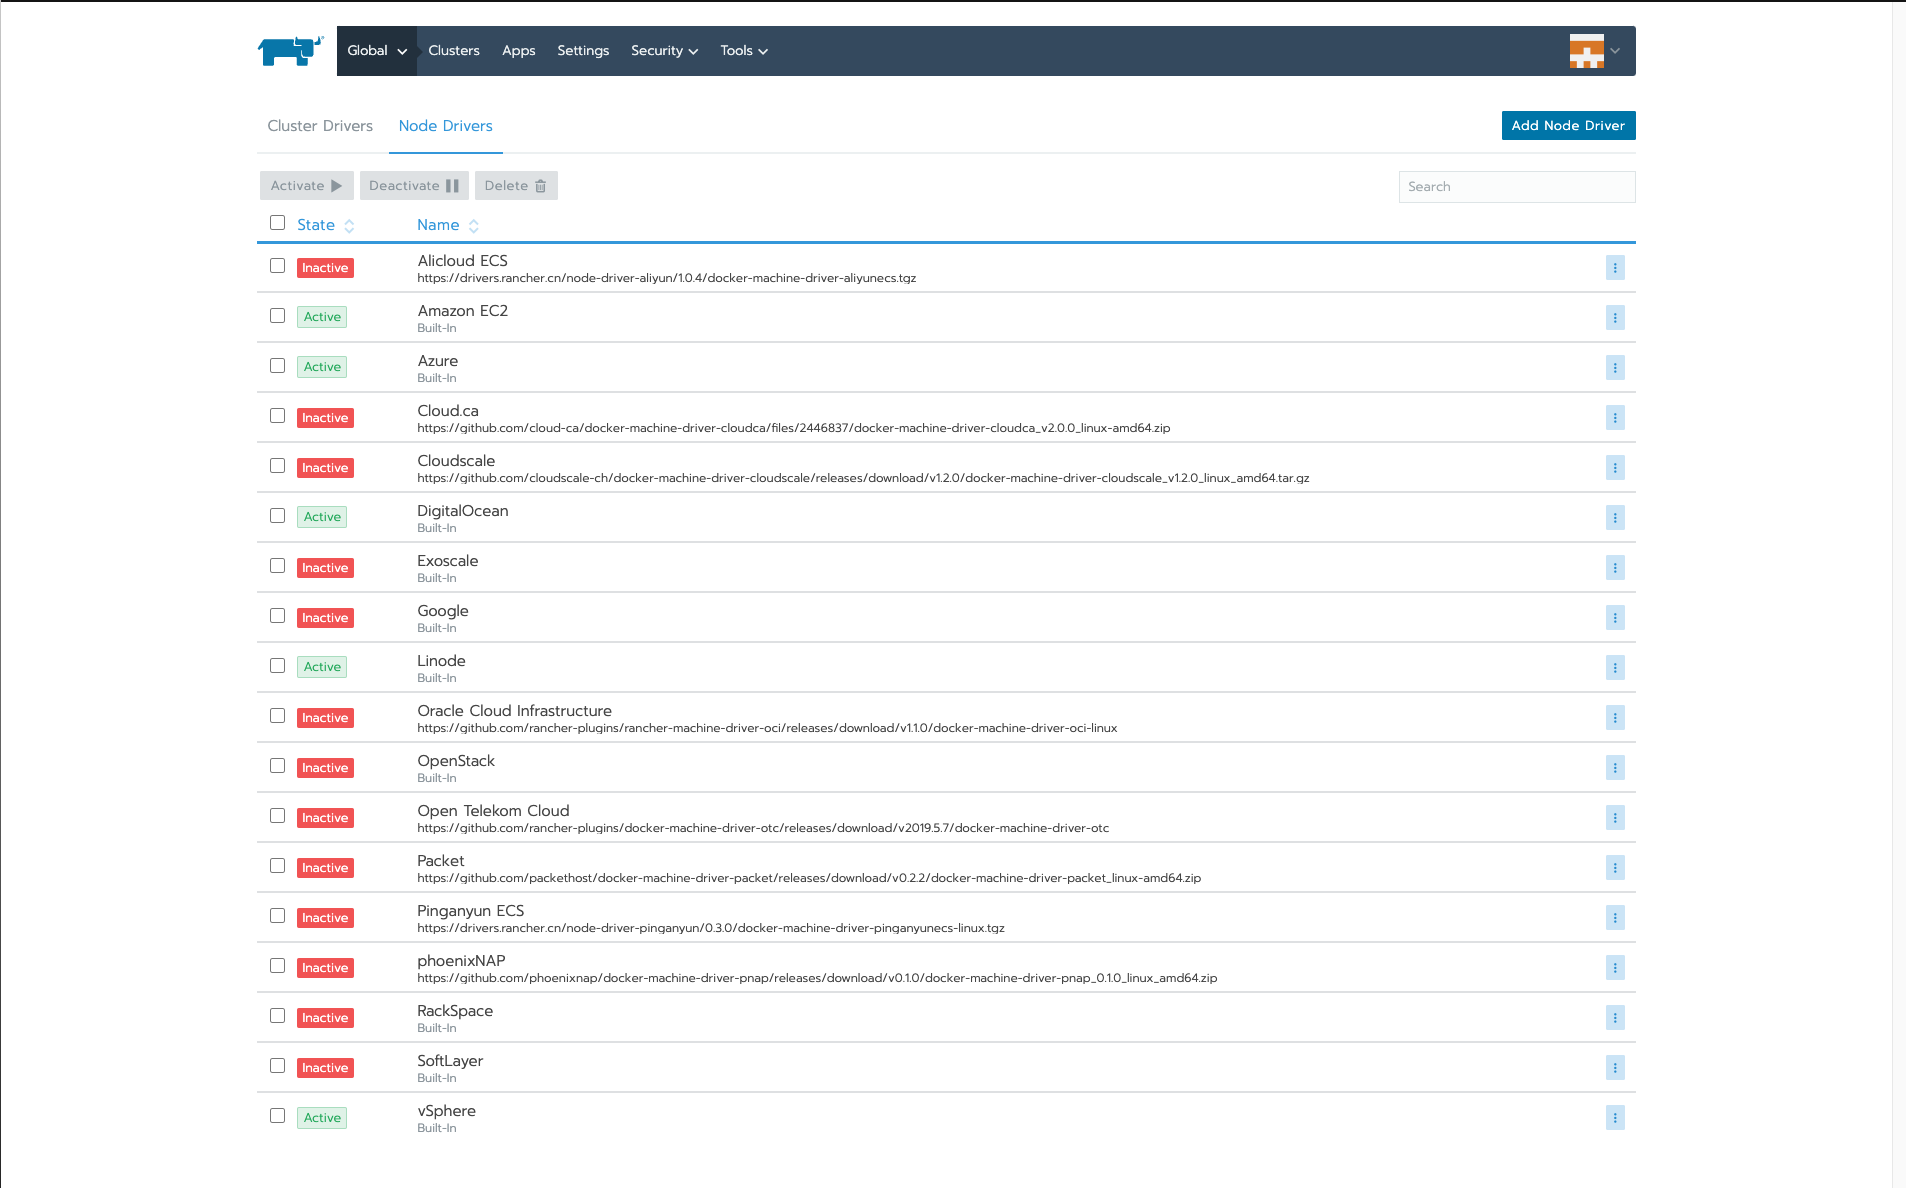
In both cases, you can activate, deactivate, or even add new drivers from Rancher’s graphical interface.
Conclusion
In this article, you learned what Rancher is and how it can help you better manage your Kubernetes clusters regardless of where they’re hosted. To that end, you’ve explored how Rancher solves many Kubernetes pain points by extending its default functionality to allow deployment and monitoring of Kubernetes clusters on any infrastructure, management of hybrid and multi-cluster environments from a single interface, and support for authentication methods such as Active Directory, LDAP, or SAML.In summary, Rancher takes Kubernetes to the next level by adding vital features and enterprise support with no vendor lock-in.
Another tool that is as flexible and easy to use as Rancher is Earthly, the effortless CI/CD framework that allows you to develop pipelines locally and run them anywhere.
Earthly makes CI/CD super simple
Fast, repeatable CI/CD with an instantly familiar syntax – like Dockerfile and Makefile had a baby.


