Jobs and Cron Jobs in Kubernetes
We’re Earthly.dev. We make building software simpler and therefore faster using containerization. This article covers jobs and cron jobs in Kubernetes. If you want to know more about building in containers then check us out.
Modern software applications require efficient and reliable management of jobs and scheduled tasks. As applications become more complex and Kubernetes clusters increase in size, automating repetitive tasks like backups, batch processing, and data analysis becomes essential.
Kubernetes provides two critical resources to manage these tasks: Jobs and CronJobs. Jobs are ideal for running one-off or batch tasks, while a CronJob is perfect for scheduling recurring tasks. By using these resources, developers, DevOps engineers, and cluster administrators can focus on more critical tasks and ensure the reliability and efficiency of Kubernetes deployments.
Whether you’re a seasoned developer or a Kubernetes novice, understanding Jobs and CronJobs is essential for efficient and reliable application management. In this tutorial, we’ll explore how to run and schedule tasks with Kubernetes Jobs and CronJobs. You’ll learn how to create (define the desired state), monitor (watch their completion status), and customize these powerful resources in Kubernetes!
Prerequisites
To follow along in this tutorial, you’ll need to have:
- A Kubernetes cluster up and running (A single node cluster will work fine).
- This tutorial uses a Linux machine with the Ubuntu 22.04 LTS distro (Any other OS will work fine as long as you have Kubernetes set up).
Overview of Jobs and CronJobs in Kubernetes
Kubernetes Jobs and CronJobs play a critical role in managing and automating tasks in a Kubernetes cluster. They are an essential tool for ensuring the reliability and efficiency of any modern software application.
A Kubernetes Job is a resource that defines a task and ensures that it runs to completion. It creates one or more pods and manages their lifecycle to ensure that the desired number of successful completions is achieved. A CronJob resource creates Job objects on a predefined schedule (daily, weekly, or monthly). Each Job object created by the CronJob runs a specific task or a set of tasks as a Pod. So you simply specify the desired state for a Job or CronJob, and Kubernetes will ensure the desired state is achieved.
In summary, Jobs, and CronJobs are an essential part of Kubernetes, and understanding how to use them can help improve the reliability and efficiency of your Kubernetes deployments.
Creating and Managing Jobs in Kubernetes
As mentioned, Jobs are Kubernetes objects that run a container or pod(s) to completion, either once or as part of a batch process. In this section, we’ll explore how to create and manage jobs in Kubernetes.
Creating a Job Manifest File
Before you can run a job in Kubernetes, you need to create a job manifest file that defines the specifications of the job. This file should be created in YAML format and should include information such as the name of the job, the container image to be used, and the command to run.
To create your first job, create a yaml file, open it up with your preferred code editor, and paste in the following code snippets; this tutorial uses the nano text editor and calls this file job.yaml:
# job.yaml
apiVersion: batch/v1
kind: Job
metadata:
  name: hello-world
spec:
  template:
    spec:
      containers:
      - name: busybox
        image: busybox
        command: ["echo",  "Hello World!"]
      restartPolicy: Never
The code snippet above does the following:
- Creates a Kubernetes job named hello-world using the batch/v1 API version.
- Runs a container named busybox with the image busybox.
- Executes the command echo Hello World! and then exits.
💡 The restartPolicy: Never specifies that the container should not be restarted if it fails or exits.
Understanding the Lifecycle of a Job
When a job is created, Kubernetes creates a pod to run the container image specified in the job manifest file. The pod will continue to run until the container completes successfully or fails. If the container fails, Kubernetes will restart the container based on the job’s specifications until it reaches the completion state.
Now create and view this job with the following kubectl commands:
kubectl apply -f job.yaml
kubectl get jobs
Run the following command to view the pod and its logs created by the job:
kubectl get pods
kubectl logs <name of the pod>
From the image below, you can see that the job created a pod that echoes Hello World!.

💡 For a more detailed description of a job, you can execute the command kubectl describe job <job-name> | less. This will output what namespace the job was created in, the start time of the job and when it was completed, the duration of the job and other vital information.
Since the job has run to its completion, you’ll need to delete the job manually with the following command kubectl delete job hello-world as it will not delete itself automatically when it runs to completion:

Monitoring Job Status and Completion
To ensure that your jobs are running as expected, it’s important to monitor their status and completion. Kubernetes provides several ways to monitor jobs, including using kubectl commands or the Kubernetes dashboard.
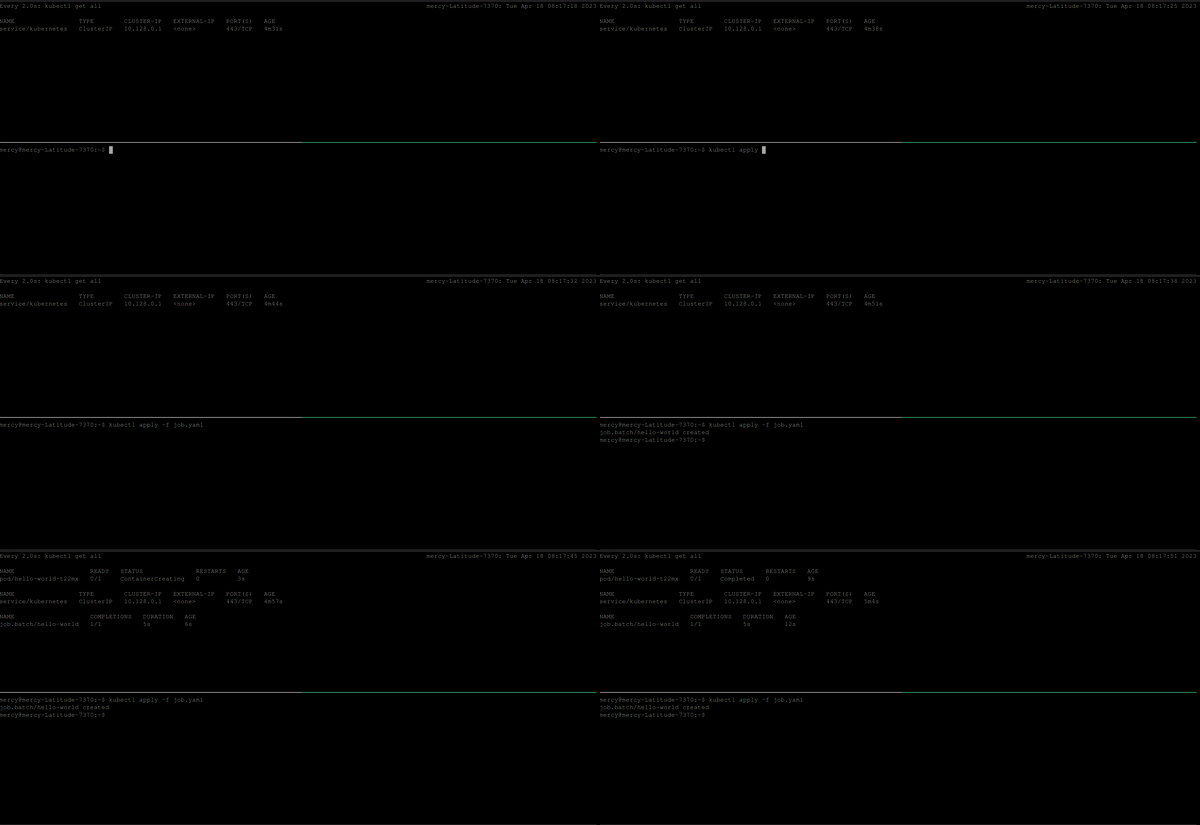
Divide your terminal into two segments (you can use tmux), and run the following command watch kubectl get all on one segment and execute the kubectl apply -f <your-job-specification-manifest-file> on the other segment, like the clip below; this process aims to see how a job gets created:
Additionally, when you create a job in Kubernetes, this job runs to completion even if you delete the pod it creates. Meaning if you delete the pod that the job creates, the pod will be recreated automatically, as long as it hasn’t run to completion.
To see this in action, delete the job you created above kubectl delete job hello-world and edit the job.yaml file to look like the following:
# job.yaml
apiVersion: batch/v1
kind: Job
metadata:
  name: hello-world
spec:
  template:
    spec:
      containers:
      - name: busybox
        image: busybox
        command: ["sleep",  "45"]
      restartPolicy: Never
The code above creates a job configuration that is designed to run a short-lived task that pauses for 45 seconds before exiting.
Divide your terminal into two segments, and run the following command watch kubectl get all on one segment and execute the kubectl apply -f <your-job-specification-manifest-file> on the other segment, like the clip below:
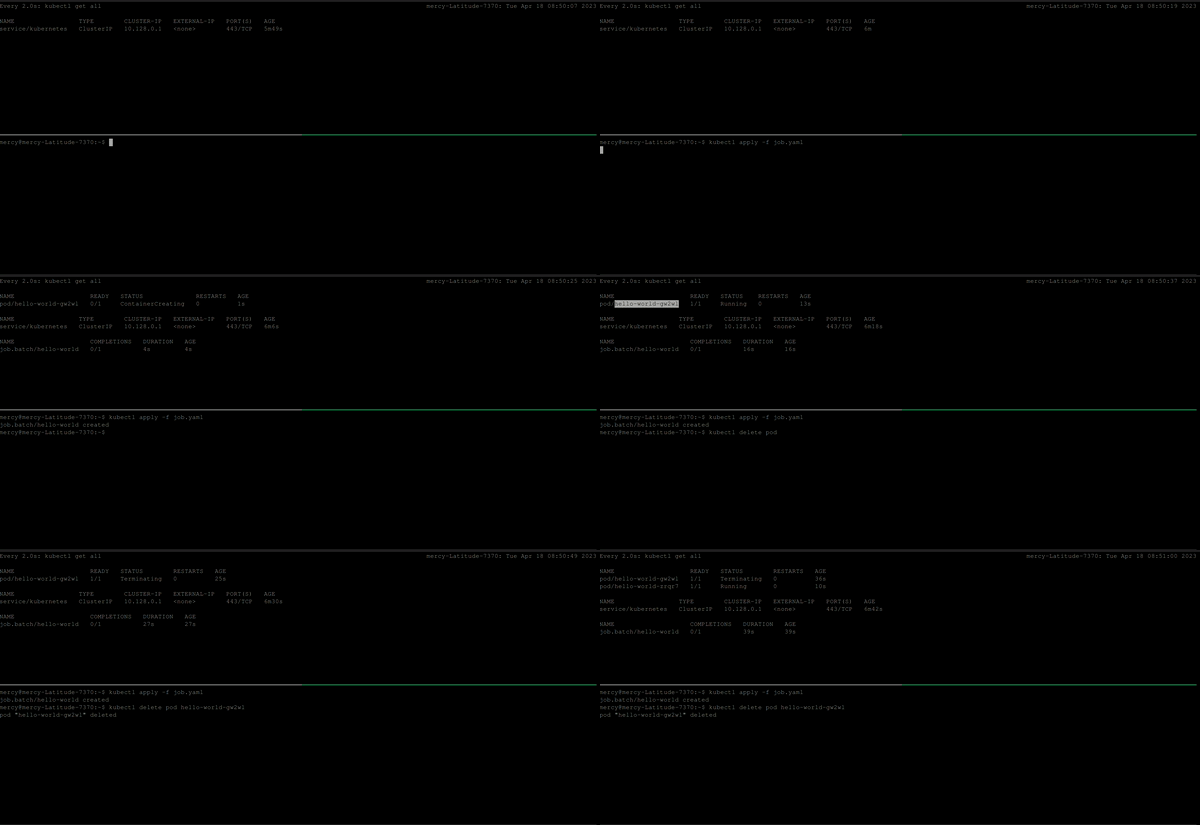
You can see from the clip above that the pod created by the hello-world job gets recreated after deletion because it hasn’t run to completion.
Exploring Job Specifications
Jobs in Kubernetes has several specifications that can be customized to meet the specific requirements of your workload. These include completions, parallelism, backofflimit, and activeDeadlineSeconds.
Completions
Completions is a job specification that specifies the desired number of successfully completed pods in a job sequentially (one after the other). When a job is created, the job controller creates a completions number of pods and manages them until they complete successfully.
If the completions field is not specified, the default value is 1. The job is considered complete when the specified number of completions is reached, and any remaining pods are terminated. If a pod fails, Kubernetes will automatically create a new pod to replace it until the specified number of completions is reached.
💡 The completions field can be useful when you need to ensure that a specific number of pods complete successfully before proceeding to the next step in a workflow. For example, you might use the completions field to ensure that a certain number of database backups have been completed before proceeding to the next stage of a backup and recovery process.
Delete the current job and edit the job.yaml file to look like the following:
# job.yaml
apiVersion: batch/v1
kind: Job
metadata:
  name: hello-world
spec:
  completions: 2
  template:
    spec:
      containers:
      - name: busybox
        image: busybox
        command: ["echo",  "Hello World!"]
      restartPolicy: Never
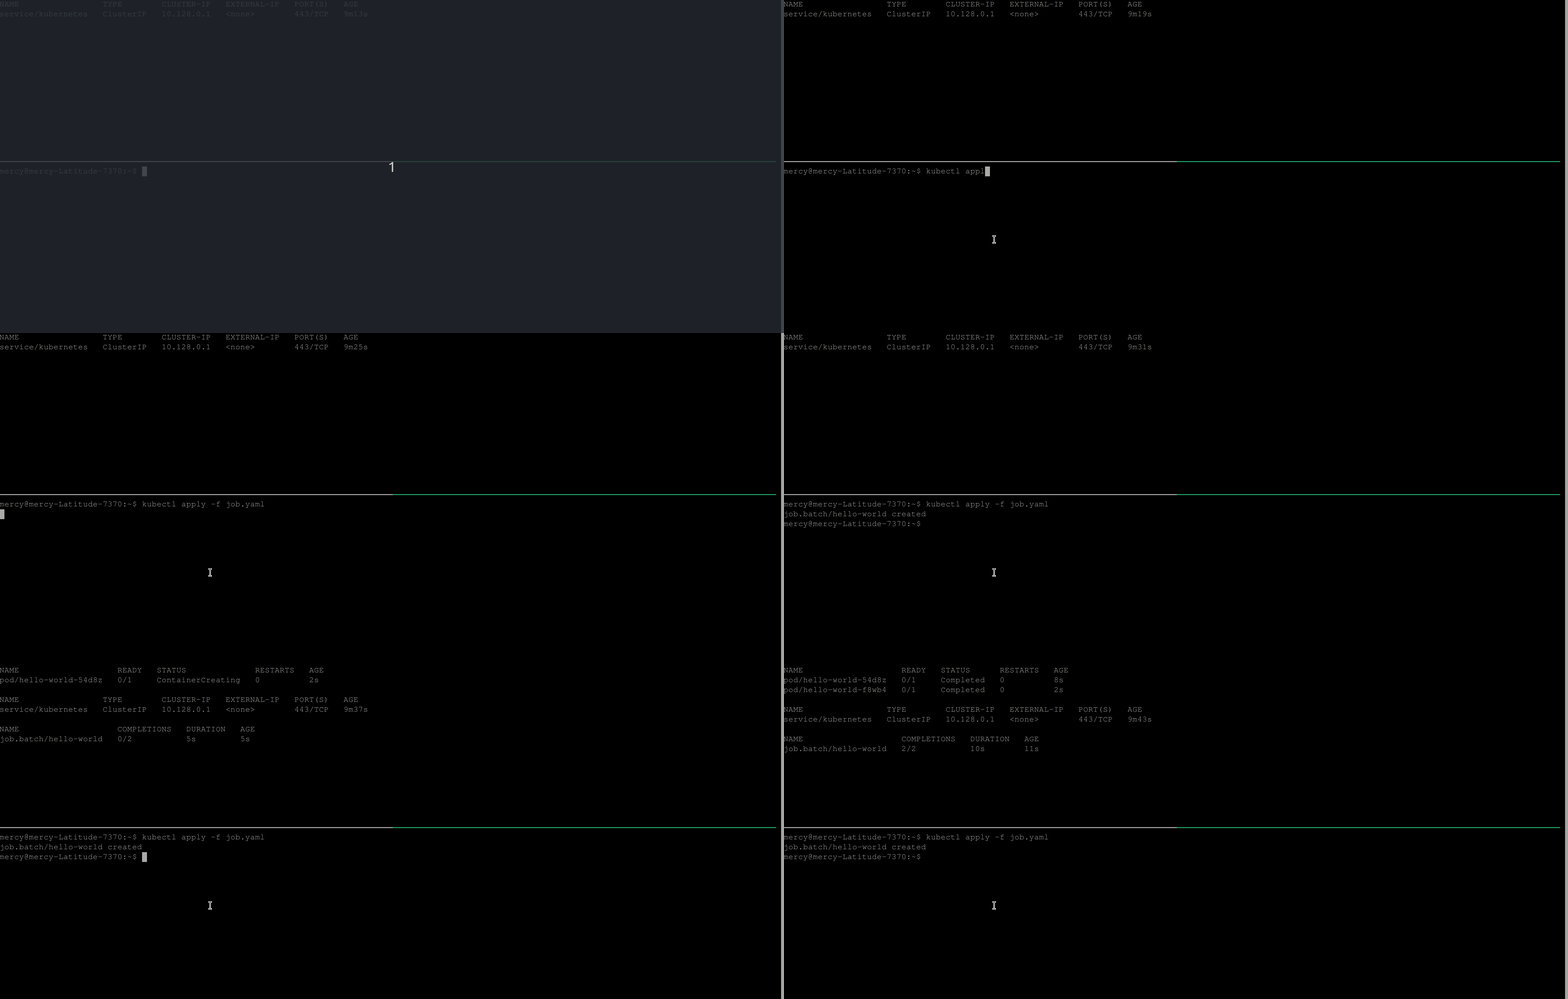
The code above creates a Kubernetes Job with a completions value of 2. The completions field specifies the desired number of completed pods that should exist when the job is considered complete.
Parallelism
Parallelism specifies the maximum number of pods that can run in parallel to complete the job. This is useful for workloads that require multiple instances of a task to run concurrently.
Delete the current job and edit the job.yaml file to look like the following:
#job.yaml
apiVersion: batch/v1
kind: Job
metadata:
  name: hello-world
spec:
  completions: 2
  parallelism: 2
  template:
    spec:
      containers:
      - name: busybox
        image: busybox
        command: ["echo",  "Hello World!"]
      restartPolicy: Never
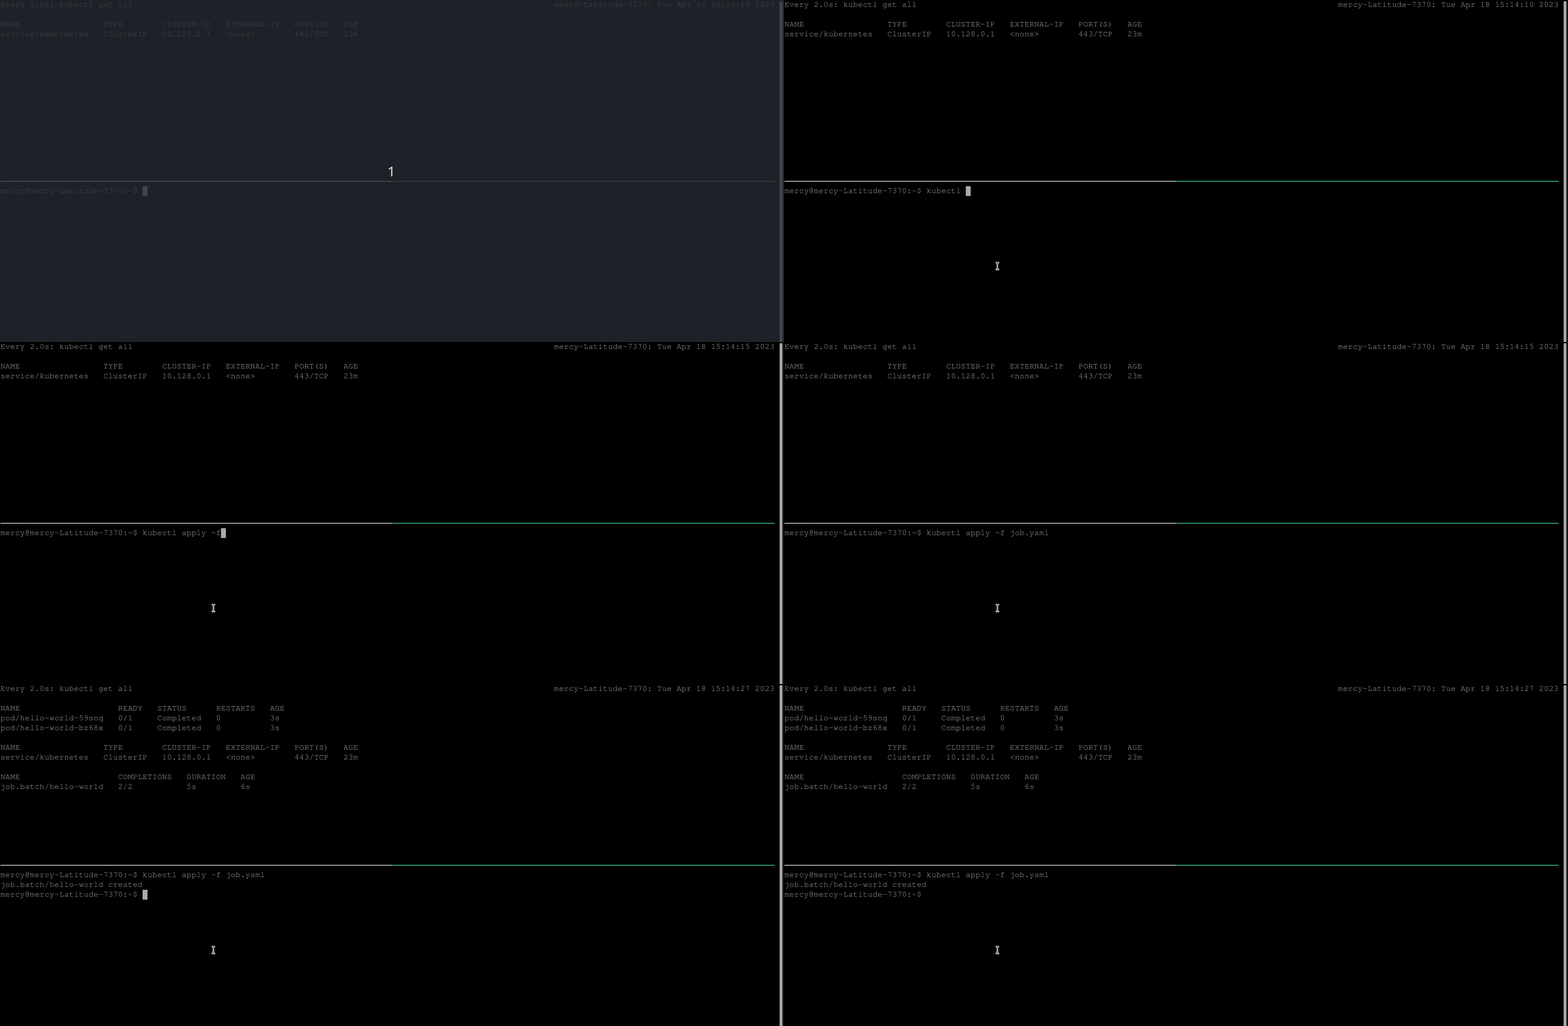
The parallelism field specifies the maximum number of pods that should be created simultaneously to run the job’s tasks. Also, the parallelism field is set to 2, which means that at most 2 pods will be created to run the tasks of the job at any given time. This can help increase the efficiency and speed of the job by allowing multiple tasks to be processed in parallel.
Backofflimit
Backofflimit specifies the number of times Kubernetes should retry a failed container before giving up. This can be useful for workloads prone to failures or requiring several attempts to complete successfully.
Delete the current job and edit the job.yaml file to look like the following:
#job.yaml
apiVersion: batch/v1
kind: Job
metadata:
  name: hello-world
spec:
  template:
    spec:
      containers:
      - name: busybox
        image: busybox
        command: ["cat",  "job.yaml"]
      restartPolicy: Never
The code above will create a job that runs the busybox container which uses the busybox image to execute the cat command with the argument job.yaml. Now, this job is expected to fail, as such command cat job.yaml doesn’t exist in the busybox image.
Once you create this job, the behavior below is expected:
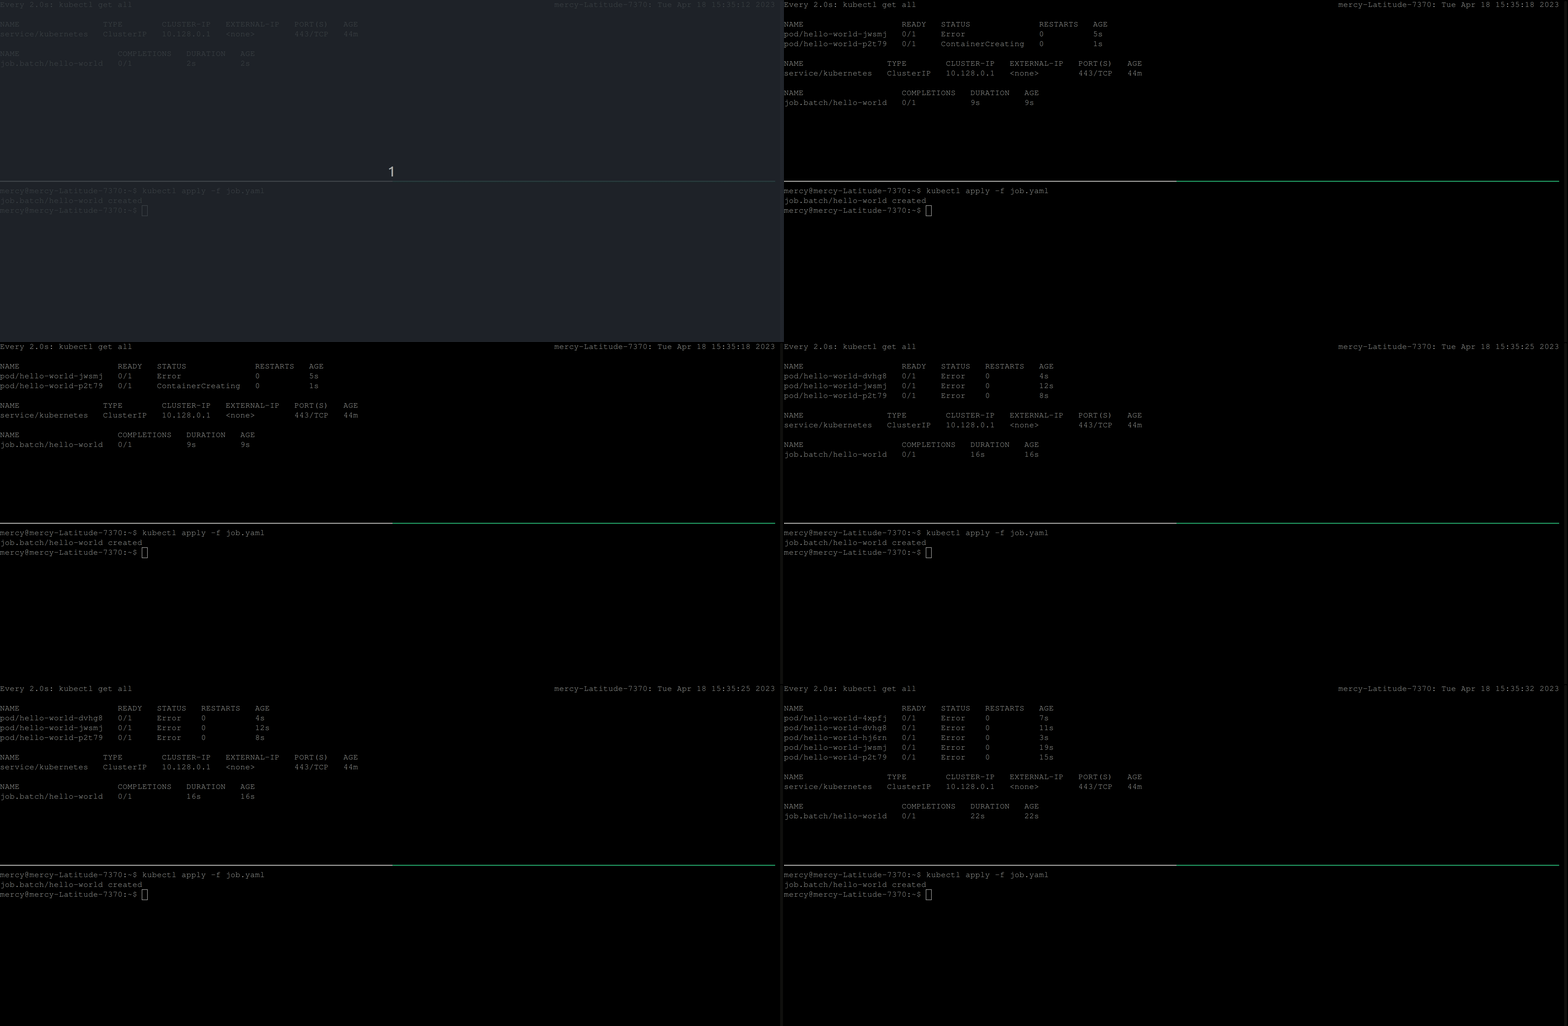
From the clip above, you can see that the job continues to create pods until it succeeds. But, certainly in this case the job won’t run to completion. So to resolve this, you’ll need to add the backoffLimit specification in the job configuration file.
Delete the job and edit the job.yaml file to look like the following:
#job.yaml
apiVersion: batch/v1
kind: Job
metadata:
  name: hello-world
spec:
  backoffLimit: 2
  template:
    spec:
      containers:
      - name: busybox
        image: busybox
        command: ["cat",  "job.yaml"]
      restartPolicy: Never
Once you create this job, you should have the following output; which illustrates that the maximum number of retries the job controller should attempt before considering the Job as failed is 2.
💡 However, keep in mind that there’s also an initial attempt to run the pod, so if it fails on the first try, there will still be two retries for a total of three attempts.
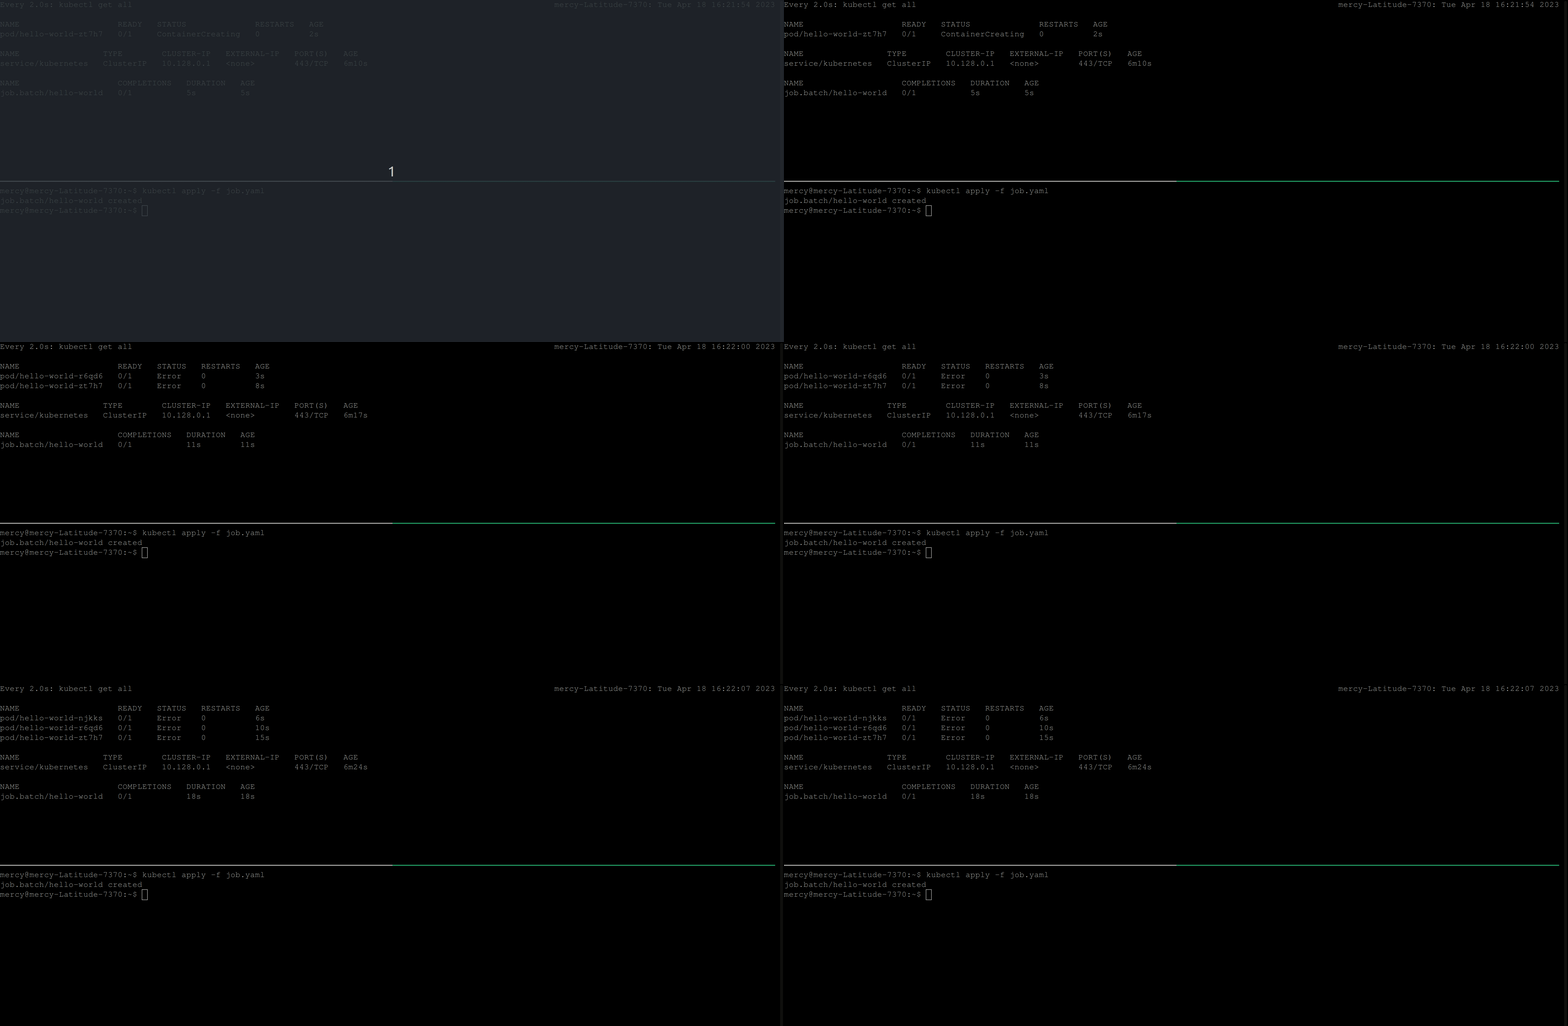
backOffLimit for hello-world jobActiveDeadlineSeconds
ActiveDeadlineSeconds specifies the maximum amount of time a job can run before it is terminated. This can be useful for workloads with strict time constraints or prevent a job from running indefinitely.
Delete the current job and edit the job.yaml file to look like the following:
#job.yaml
apiVersion: batch/v1
kind: Job
metadata:
  name: hello-world
spec:
  activeDeadlineSeconds: 15
  template:
    spec:
      containers:
      - name: busybox
        image: busybox
        command: ["sleep",  "45"]
      restartPolicy: Never
In the code above, the activeDeadlineSeconds field is set to 15, which specifies that the job should be automatically terminated if it has been running for more than 15 seconds.
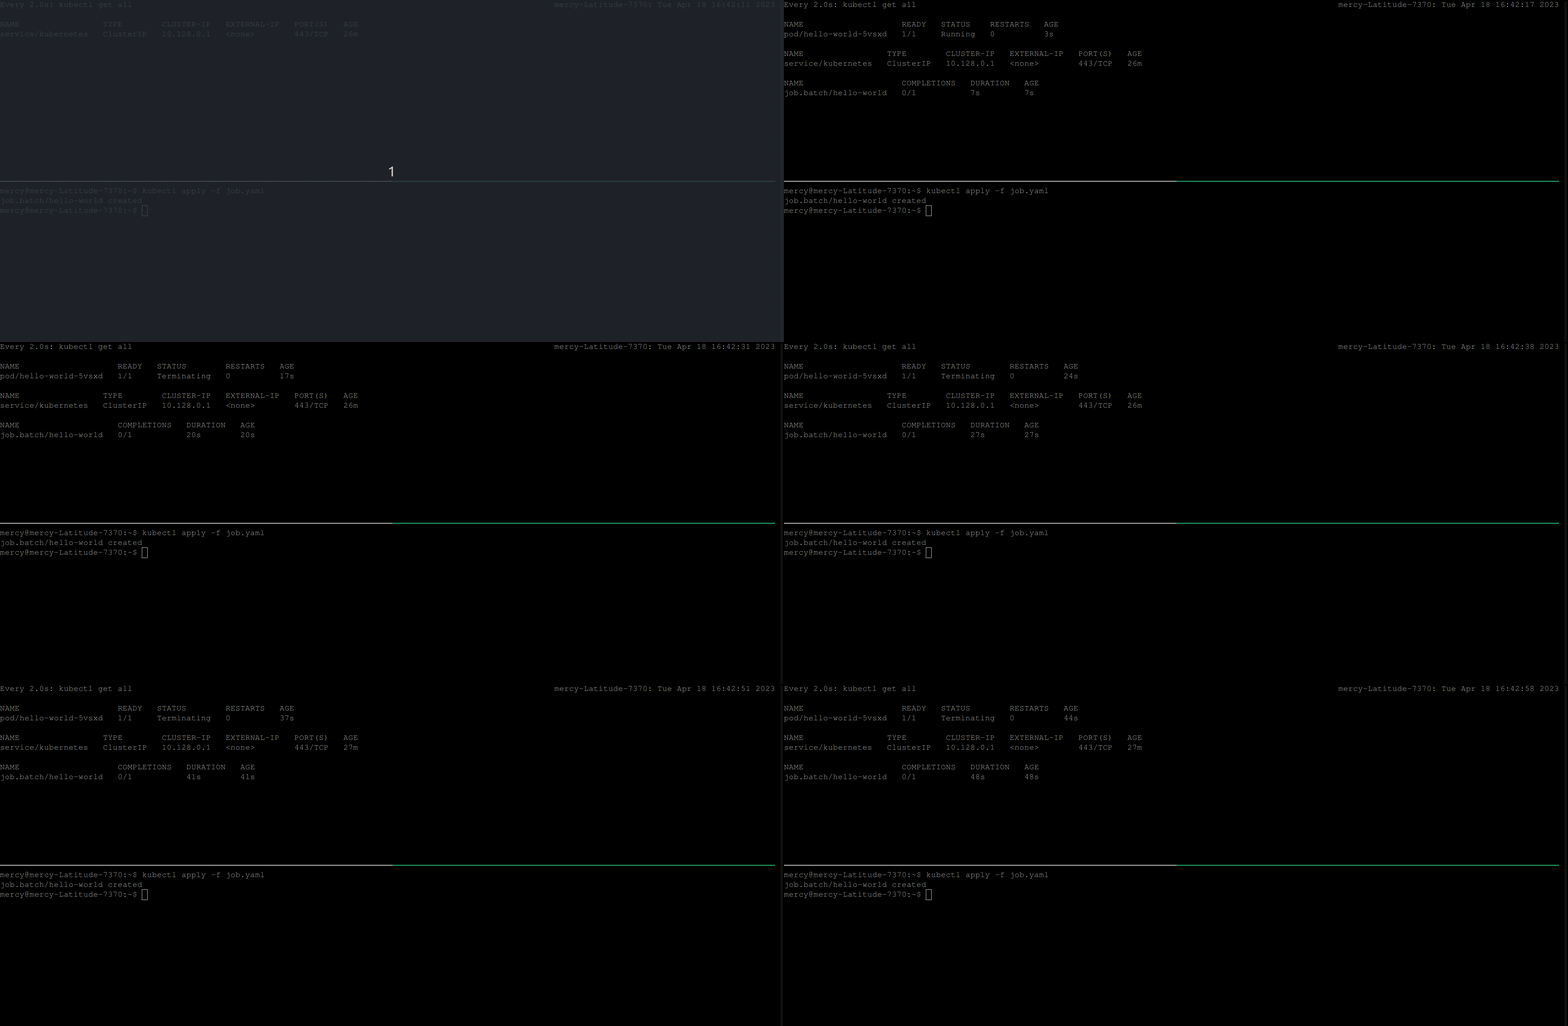
activeDeadlineSeconds for hello-world jobCreating and Managing CronJobs in Kubernetes
Creating and managing CronJobs in Kubernetes involves using the Kubernetes CronJob API to develop, monitor, and manage time-based scheduled jobs. As we know, a CronJob is a Kubernetes object that creates a job at a scheduled time interval using the Cron syntax. A CronJob definition includes the schedule of the job and the job template that specifies the container images, commands, and arguments to be executed.
Creating a CronJob Manifest File
A CronJob manifest file in Kubernetes looks similar to a job manifest file but with additional and specific properties. Creating a CronJob manifest file involves defining the CronJob’s schedule and job specifications using a YAML file. The YAML file should contain details such as the image, command, and other relevant specifications.
Create a yaml file and paste in the following configuration settings, this tutorial calls this file, cron-job.yaml:
# cron-job.yaml
apiVersion: batch/v1
kind: CronJob
metadata:
  name: hello-kubernetes
spec:
  schedule: "* * * * *"
  jobTemplate:
    spec:
      template:
        spec:
          containers:
          - name: busybox
            image: busybox
            command: ["echo", "Hello-Kubernetes!!!"]
          restartPolicy: Never
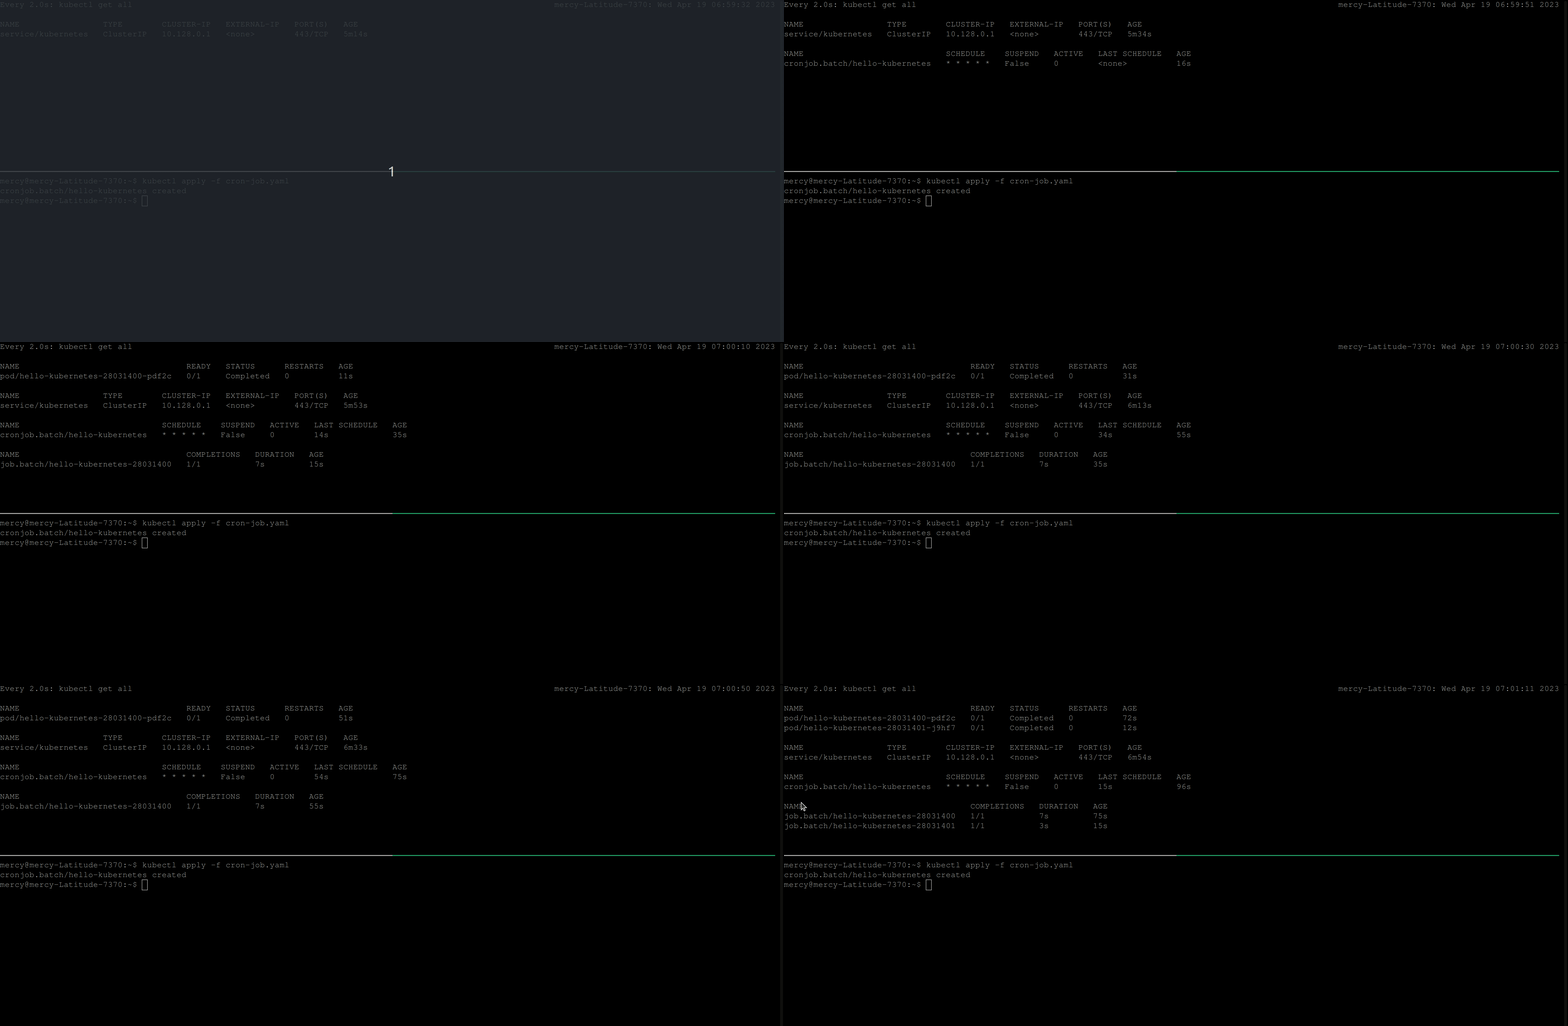
The configuration settings above will create a CronJob resource named hello-kubernetes. This CronJob will run a job every minute as specified by the schedule field which is set to * * * * *.
The job to be run is defined in the jobTemplate section of the CronJob spec. This job runs a container named busybox with the echo command, which will output the text Hello-Kubernetes!!! as the standard output.
Execute the following kubectl command to create this CronJob:
kubectl apply -f cron-job.yamlThe below behavior is expected:
Understanding CronJob Properties and Options
Just like jobs, CronJobs also have several specifications that can be customized depending on the requirement of your workload. These specifications include successfulJobHistoryLimit, which specifies the number of completed jobs to keep in the history, and failedJobsHistoryLimit, which specifies the number of failed jobs to keep in the history. Other options include specifying concurrencyPolicy, which can be set to Allow, Forbid or Replace, and Idempotency, which ensures that a job is only run once.
To illustrate the successfulJobHistoryLimit and failedJobsHistoryLimit specifications, delete the CronJob kubectl delete cronjob hello-kubernetes and edit the cron-job.yaml file to look like the following:
# cron-job.yaml
apiVersion: batch/v1
kind: CronJob
metadata:
  name: hello-kubernetes
spec:
  schedule: "* * * * *"
  successfulJobsHistoryLimit: 0
  failedJobsHistoryLimit: 0
  jobTemplate:
    spec:
      template:
        spec:
          containers:
          - name: busybox
            image: busybox
            command: ["echo", "Hello-Kubernetes!!!"]
          restartPolicy: Never
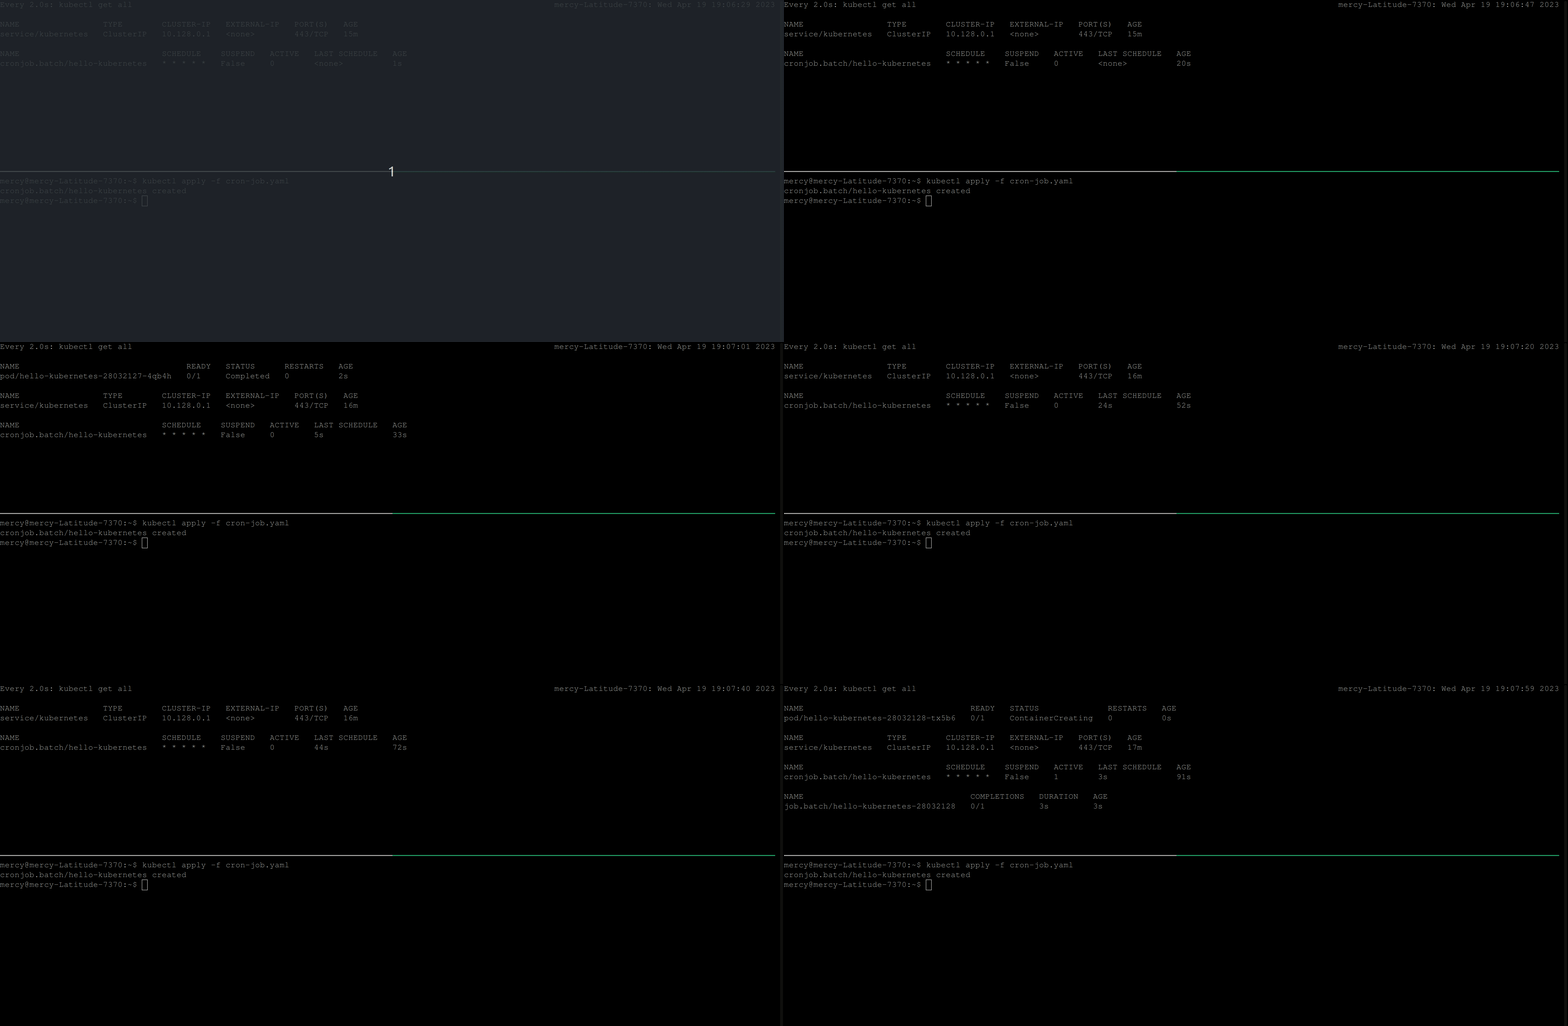
The code above specifies the maximum number of successful and failed jobs to keep in the job history to 0.
💡 If the successfulJobsHistoryLimit or failedJobsHistoryLimit are not specified in the CronJob specification, Kubernetes sets their default values to 3, which means that the CronJob controller will keep the history of the last three successful and failed jobs, respectively.
concurrencyPolicy (Allow, Forbid & Replace)
ConcurrencyPolicy specifies how the CronJob handles concurrent job execution. Allow which is the default, allows concurrent execution of the same job, Forbid prevents concurrent execution of the same job (where jobs are run sequentially), and Replace cancels the currently running job and replaces it with a new one.
To manage concurrency policies, the CronJob manifest file is expected to look like the following:
# cron-job.yaml
apiVersion: batch/v1
kind: CronJob
metadata:
  name: hello-kubernetes
spec:
  schedule: "* * * * *"
  concurrencyPolicy: #Either Allow, Forbid, or Replace
  jobTemplate:
    spec:
      template:
        spec:
          containers:
          - name: busybox
            image: busybox
            command: ["echo", "Hello-Kubernetes!!!"]
          restartPolicy: Never
Idempotency
In the context of CronJobs in Kubernetes, idempotency means that if a CronJob is applied or executed multiple times, the result should be the same as if it had been executed only once. This is important for preventing unintended or duplicate actions, and ensuring that the system remains consistent and predictable.
💡 When using a CronJob in Kubernetes, there may be cases where a job object is not created or two job objects are created. This can result in problems if the jobs are not idempotent, meaning they can be run multiple times without causing side effects.
To mitigate this, it is important to ensure that the jobs are designed to be idempotent. That is, the job should produce the same result regardless of how many times it is executed.
To ensure idempotency, you should avoid relying on external states or resources that could be affected by multiple executions of the job, and instead use techniques like caching, deduplication, and transactional processing. You should also monitor the job and handle any errors or exceptions that may occur to ensure that the job runs smoothly and reliably.
Suspending a CronJob
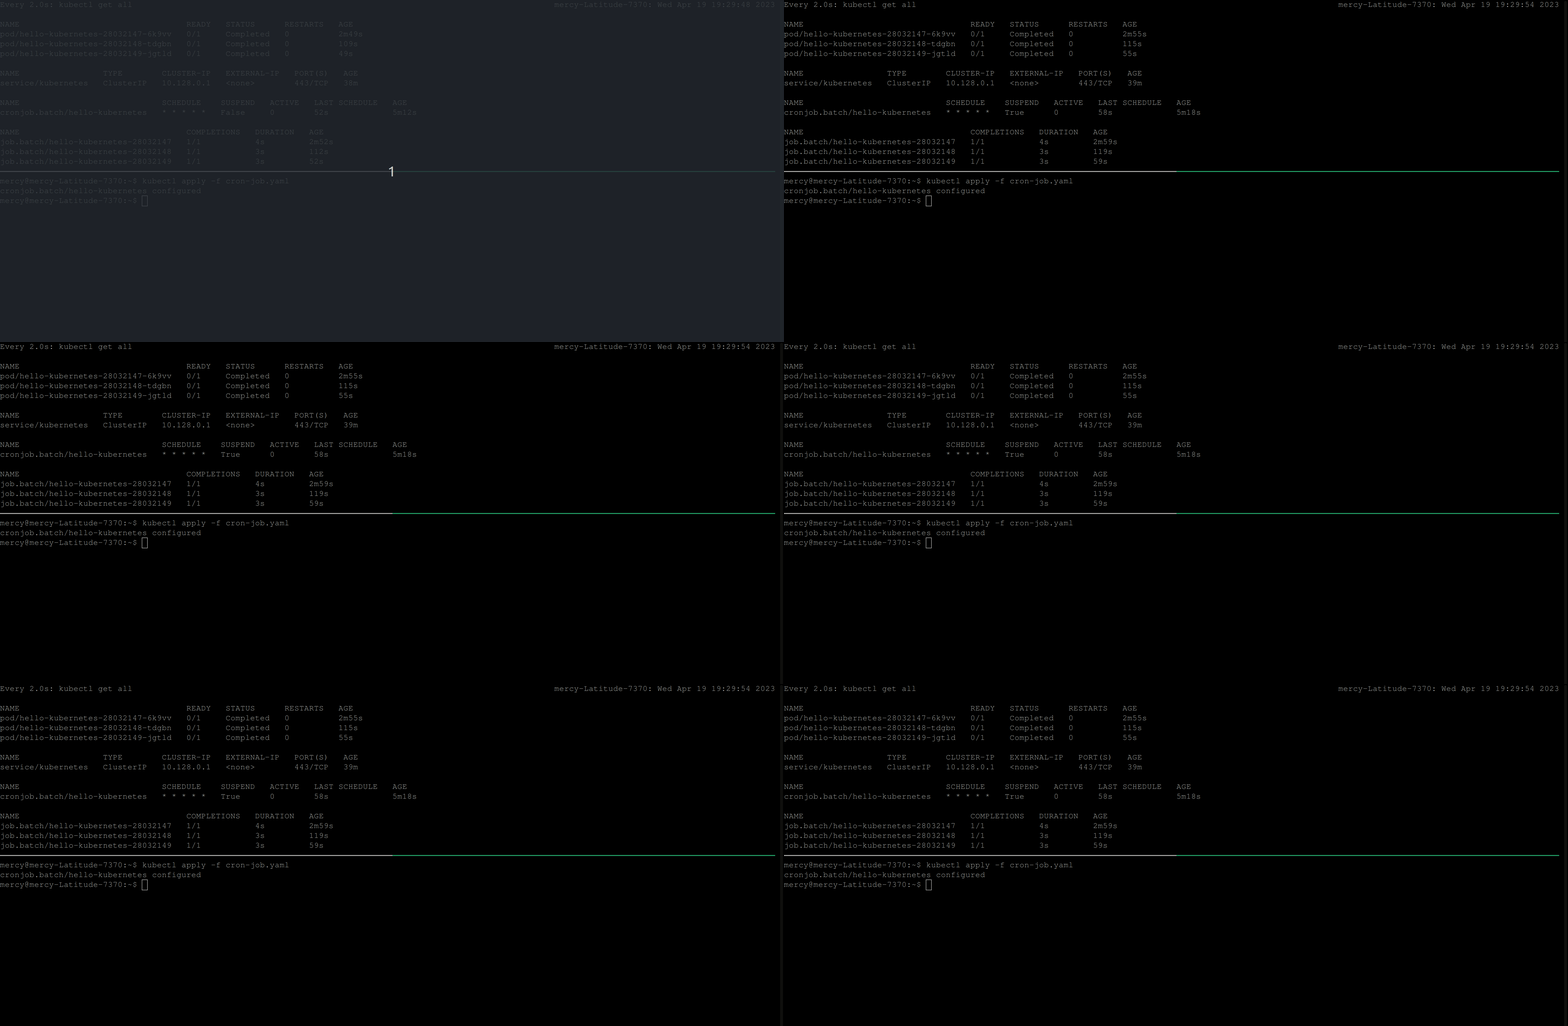
Suspending a CronJob can be done using kubectl apply or patch commands. This can be useful when you need to temporarily stop the execution of a CronJob without deleting it.
To suspend this CronJob, edit the cron-job.yaml file to look like the following:
# cron-job.yaml
apiVersion: batch/v1
kind: CronJob
metadata:
  name: hello-kubernetes
spec:
  schedule: "* * * * *"
  suspend: true
  jobTemplate:
    spec:
      template:
        spec:
          containers:
          - name: busybox
            image: busybox
            command: ["echo", "Hello-Kubernetes!!!"]
          restartPolicy: Never
From the CronJob manifest file above, The suspend field is added to suspend the execution of a CronJob. If it is set to true, no new CronJob runs will be created based on the defined schedule.
Resuming a CronJob
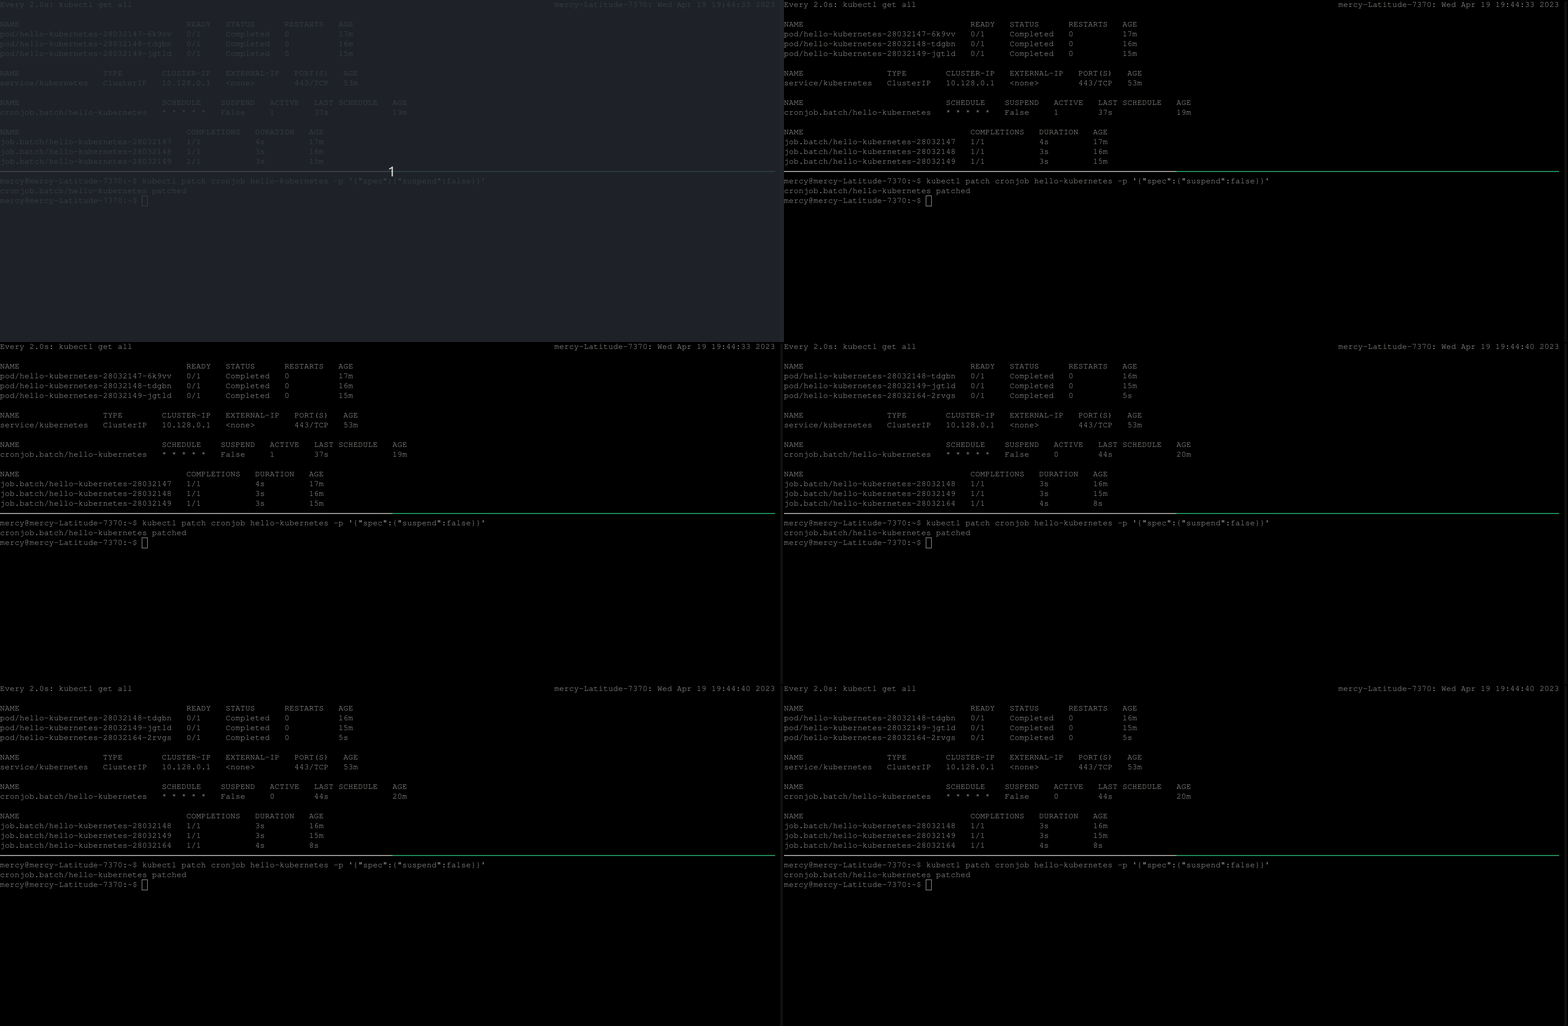
When you are ready to resume the CronJob, you can simply set suspend to false. Additionally, you can use the patch command directly without editing the cron-job.yaml file. The following command kubectl patch cronjob <name-of-the-cronjob> -p '{"spec":{"suspend":false}}' will set the suspend spec to false.
Conclusion
In this tutorial, you’ve learnt how to manage and monitor Jobs and CronJobs in Kubernetes. For reliable and efficient execution, always keep a check on their performance, control concurrent executions using a cluster-wide policy, configure restart policies for resilience, and assign appropriate resource requests and limits.
Equipped with these skills and tools, you can now schedule tasks in your Kubernetes cluster more efficiently.
As you continue to work with Kubernetes, you might find yourself looking for ways to improve your container build process. If that’s the case, you might want to check out Earthly. It’s a tool that can significantly enhance your build process, making it more efficient and reliable.
Earthly makes CI/CD super simple
Fast, repeatable CI/CD with an instantly familiar syntax – like Dockerfile and Makefile had a baby.


