Creating and Deploying a Facial Recognition System with Jupyter Notebooks and Anvil
We’re Earthly. We make building software simpler and therefore faster using containerization. If you’re dealing with deploying applications developed originally developed in Jupyter Notebooks, Earthly can streamline the process. Check it out.
The process of building systems to deploy the models that data scientists and machine learning engineers have created is non-trivial. This is because other developers and designers are not always available to create the required APIs and user interfaces. You could decide to learn to use the technologies required for this, but that takes considerable effort and could extend project completion by months. Due to this, you may just resort to leaving the models in notebooks on Github.
But what if you could still move ahead? What if you could serve models from your notebooks and build minimal interfaces quickly?
In this tutorial, you will build a facial recognition system. As you implement this, you will learn to use Deepnote to build the logic and Anvil to build the interface, as well as how to link them. The process of identifying people’s faces in an image or video feed by comparing them to a database of registered faces is known as facial recognition. In some cases, it can also be used to identify the faces of other animals.
Deepnote is a company that offers cloud-based collaborative data science notebooks that are compatible with Jupyter. Anvil, on the other hand, is an application that gives you the ability to build interfaces using Python and pre-defined components. Thus, to use these applications, all you need is an understanding of the Python programming language.
More on Deepnote and Anvil
Deepnote is a cloud-hosted notebook-based application that provides data teams with a platform where they can easily collaborate and ideate seamlessly. All this happens in an interface similar to and compatible with the popular Jupyter notebook. It, however, does not stop there. First, deepnote supports Python, R, and SQL all at the same time. It also supports scheduling (so you can set your notebook to run periodically), a console (for running scripts in an integrated terminal), and special cells (SQL, Inputs, and Charts blocks) in addition to the popular code and markdown blocks. The SQL block can be connected to your data source using any of Deepnote’s available integrations. Once the data source is connected, you can make queries within your notebook.
In addition, you can publish and share notebooks as apps or articles with Deepnote. Deepnote supports long-running jobs, custom initializations, and integrations. Some supported integrations are Github, Telegram, Slack, PostgreSQL, MongoDB, Amazon S3, Google Cloud Storage, Google Drive, Docker Hub, and so on.
Anvil is an application that enables developers to build applications without traditional web development experience. Yes, with Anvil, you can design user interfaces via a drag and drop editor, customise the application using Python (and its various libraries), and deploy it easily either in the cloud or on a self-hosted server. These applications can be APIs, in-house software, data analysis dashboards, machine learning applications, and so on. Anvil also has an in-built database where you can store data when necessary and an up-link feature which lets you connect it to any external Python script.
Building the Facial Recognition System
You will now use Anvil and a notebook-like interface to implement facial recognition. To begin, you would first have to set up the stage. Starting with Deepnote.
Setting Up the Deepnote Project
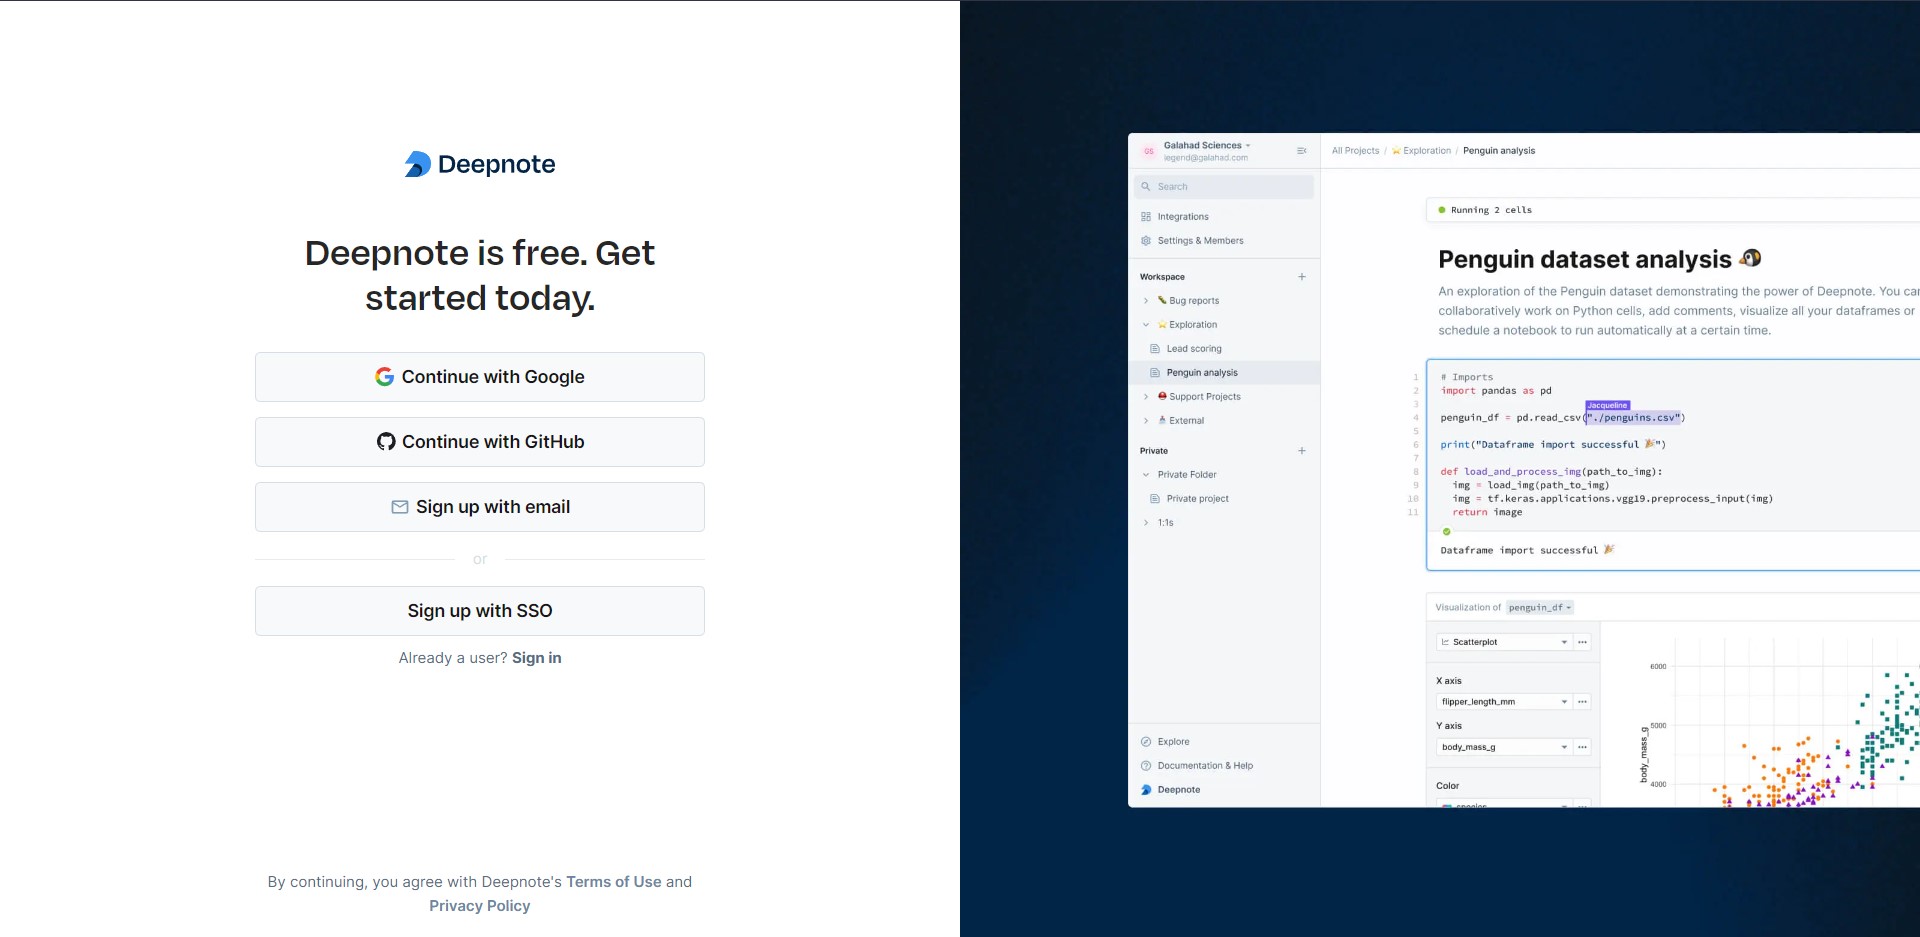
First, o go to the Deepnote sign-up page. Once there, use any of the available options to create an account.
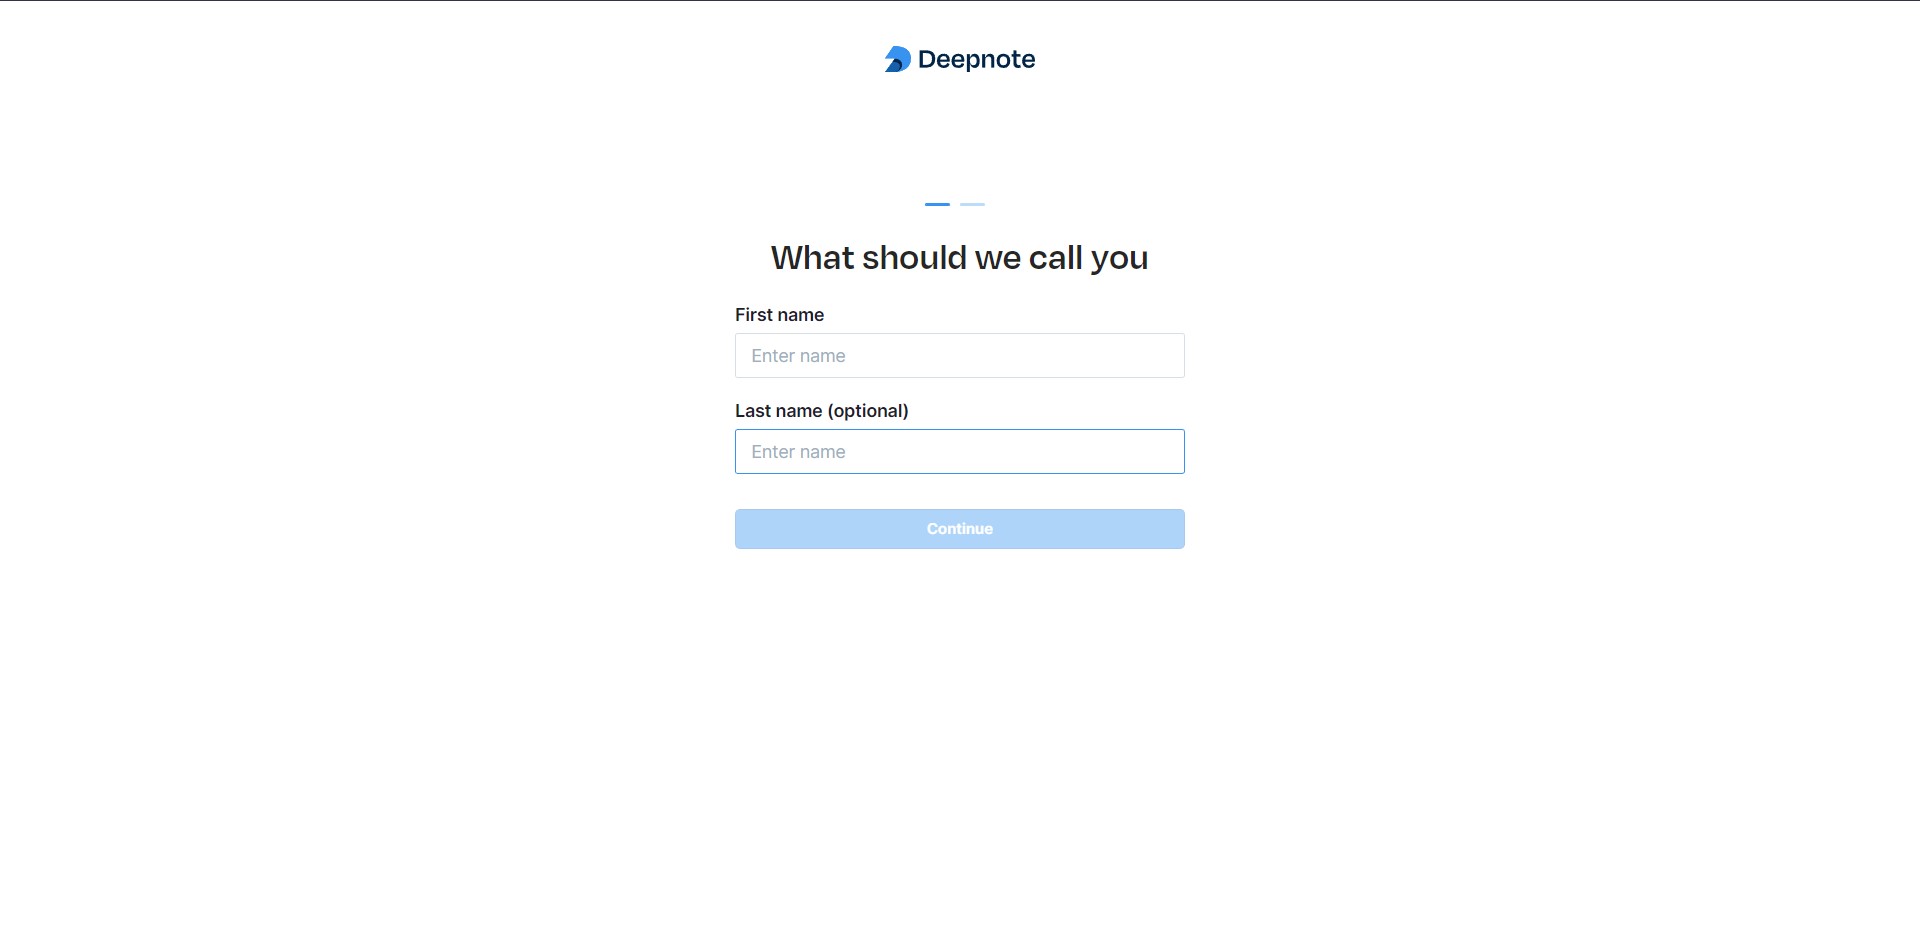
The onboarding screens come next. Enter the necessary information in the fields provided, and respond to all of the questions.
Finally, give your workspace a name and click “Next” to access it and see a screen like the one below.
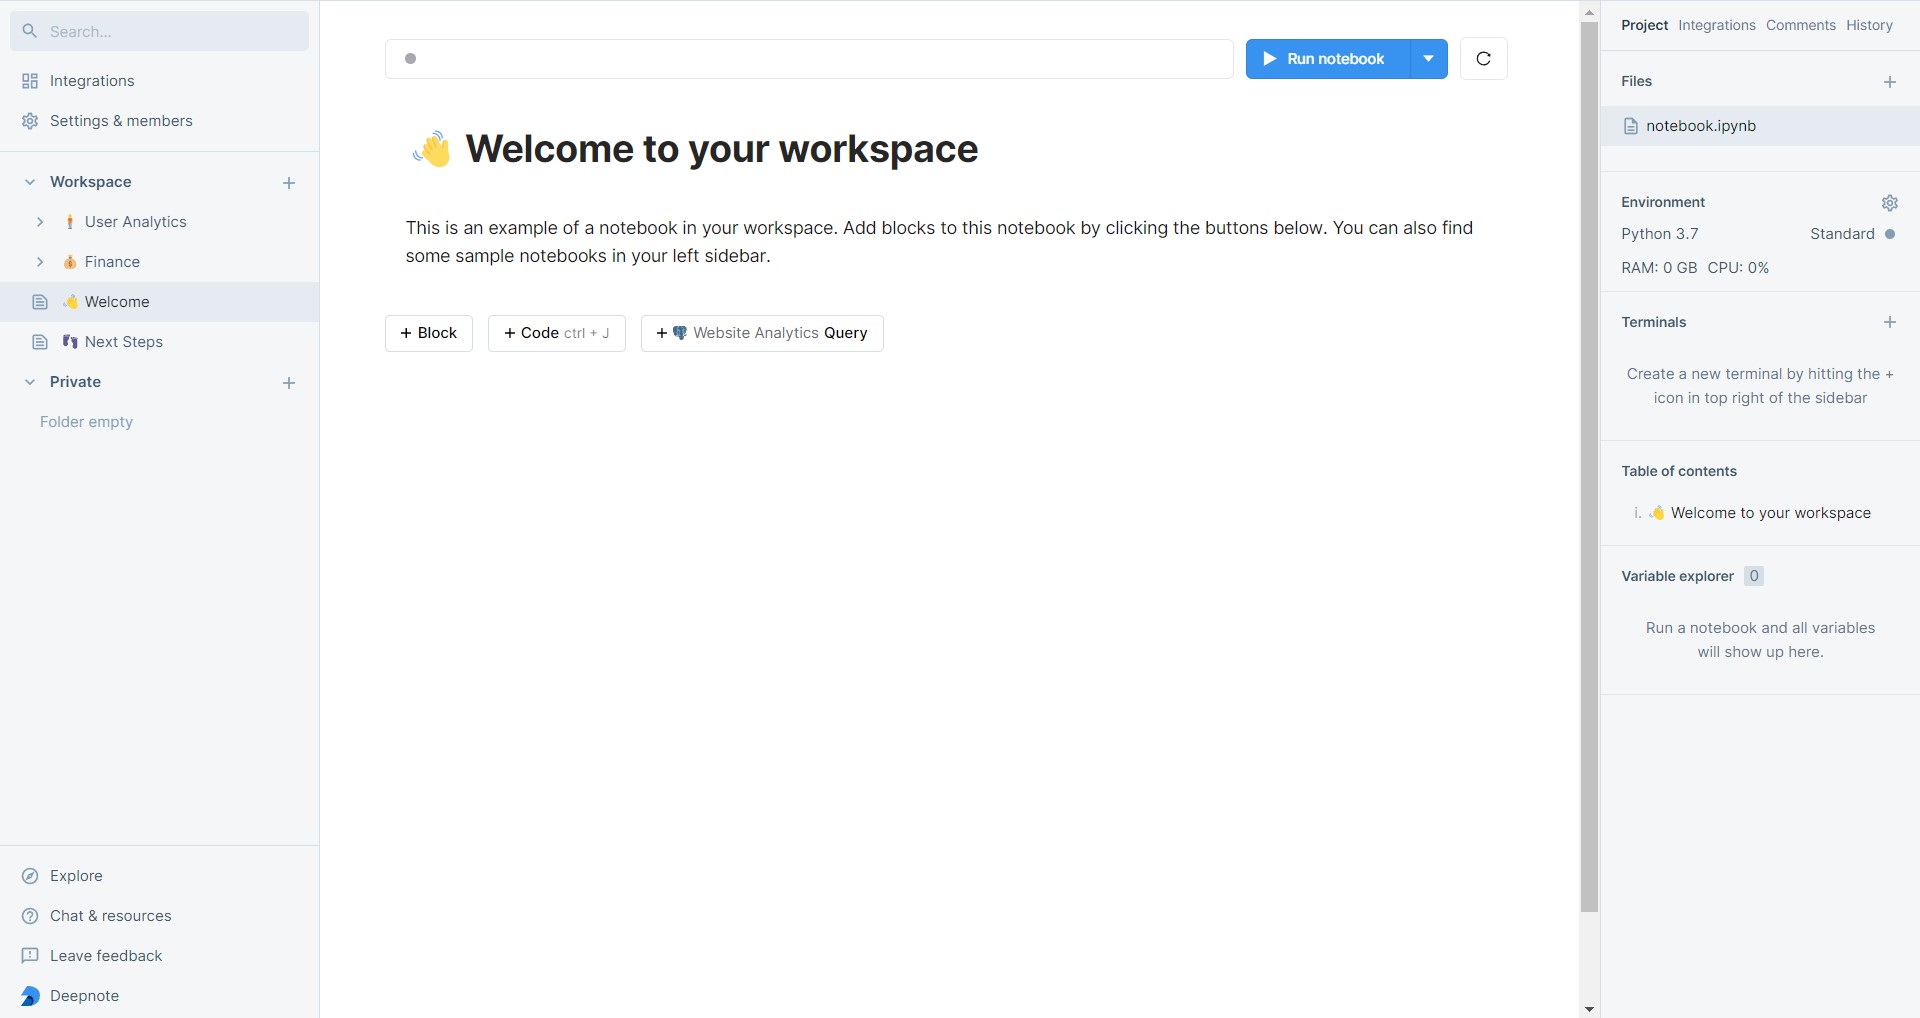
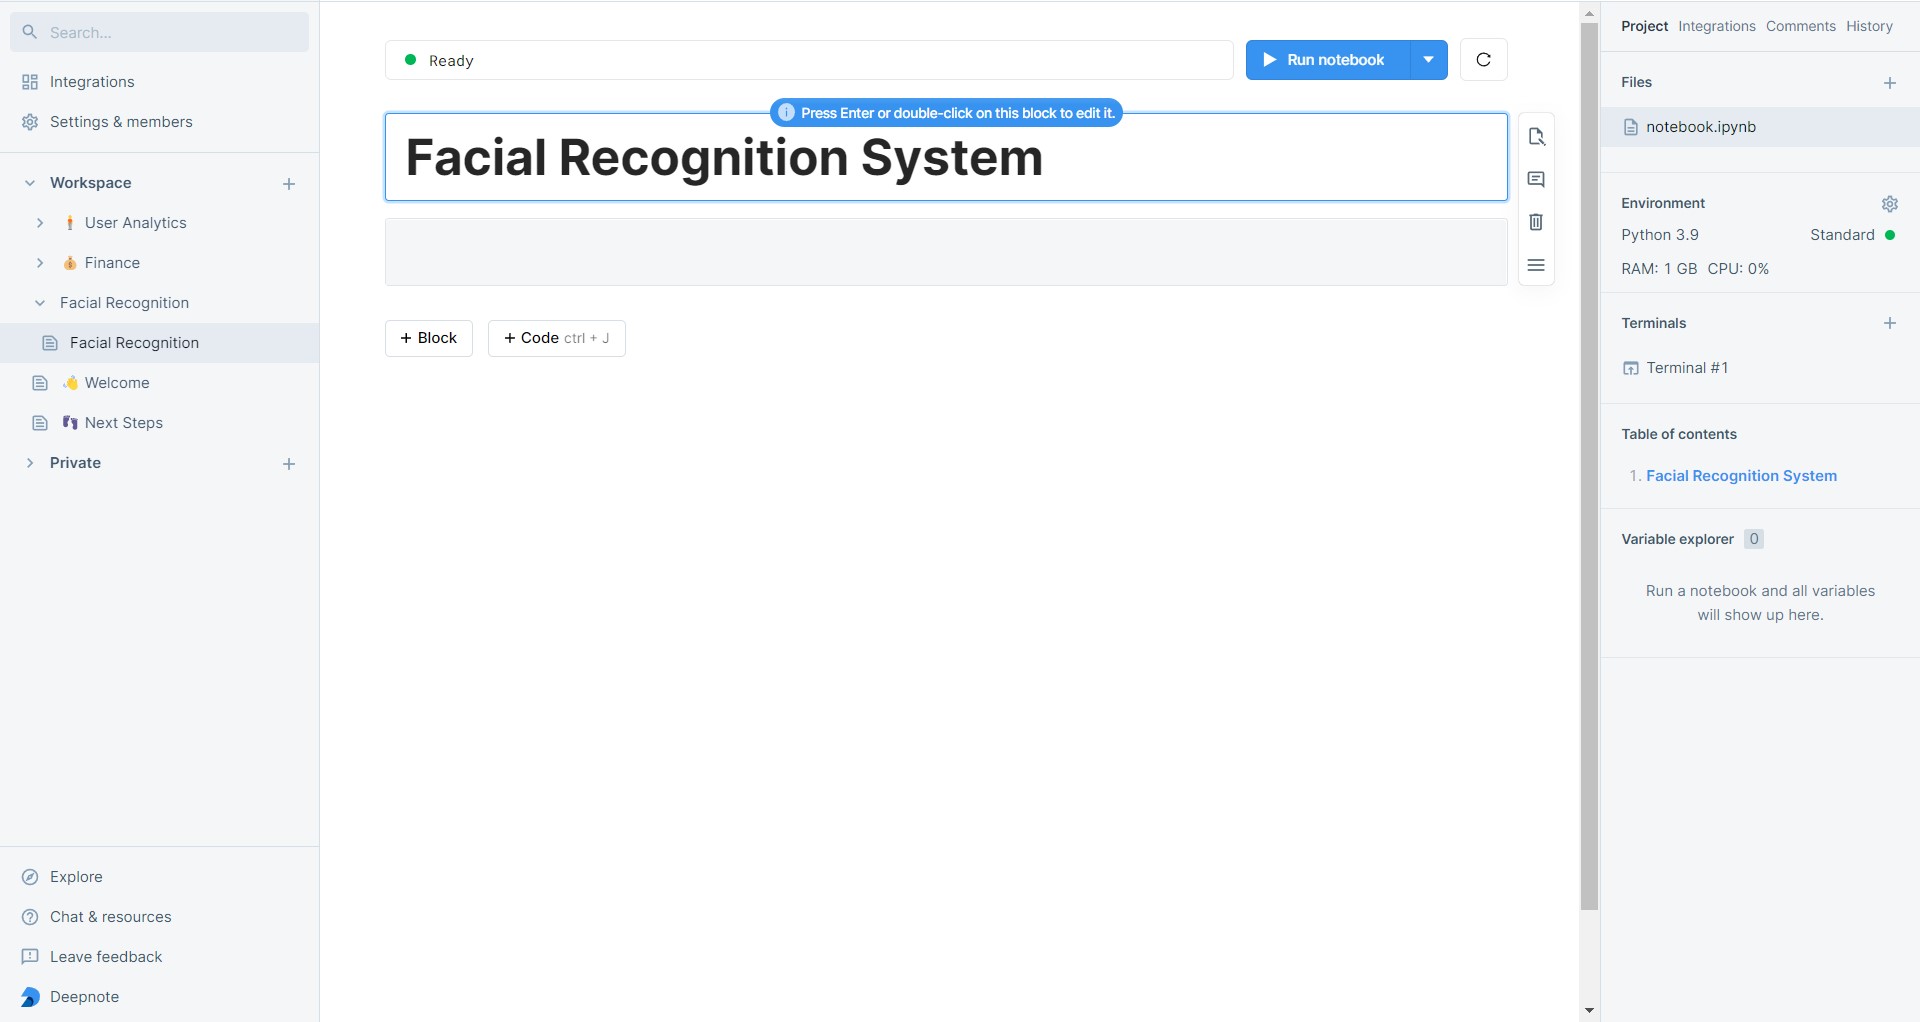
When you’re inside the workspace, go to the left section and click the + icon next to the Workspace tab to see a list of options. On this list, click the New project option to create a notebook. Rename the project to Facial Recognition by clicking the ... icon next to it.
Then, create a markdown cell in the notebook and enter the text “# Facial Recognition System”.
Implementing Facial Recognition
Facial recognition systems are typically used to verify the identity of individuals before they gain access to a physical or digital system. In the case of a building, the facial recognition system will receive images from a video feed and determine whether any of the individuals in it are known and authorized.
You will be building the admin panel of this system. The building, in this case, is the Umbrella Academy. The initially authorised individuals are any of the Hargreaves and their robot mother. The images used were gotten from the Umbrella Academy Wiki and can be downloaded from the umbrella and test folders.
In the top-right section of the page, click the + icon by the files section to upload the downloaded files into folders named umbrella and test.
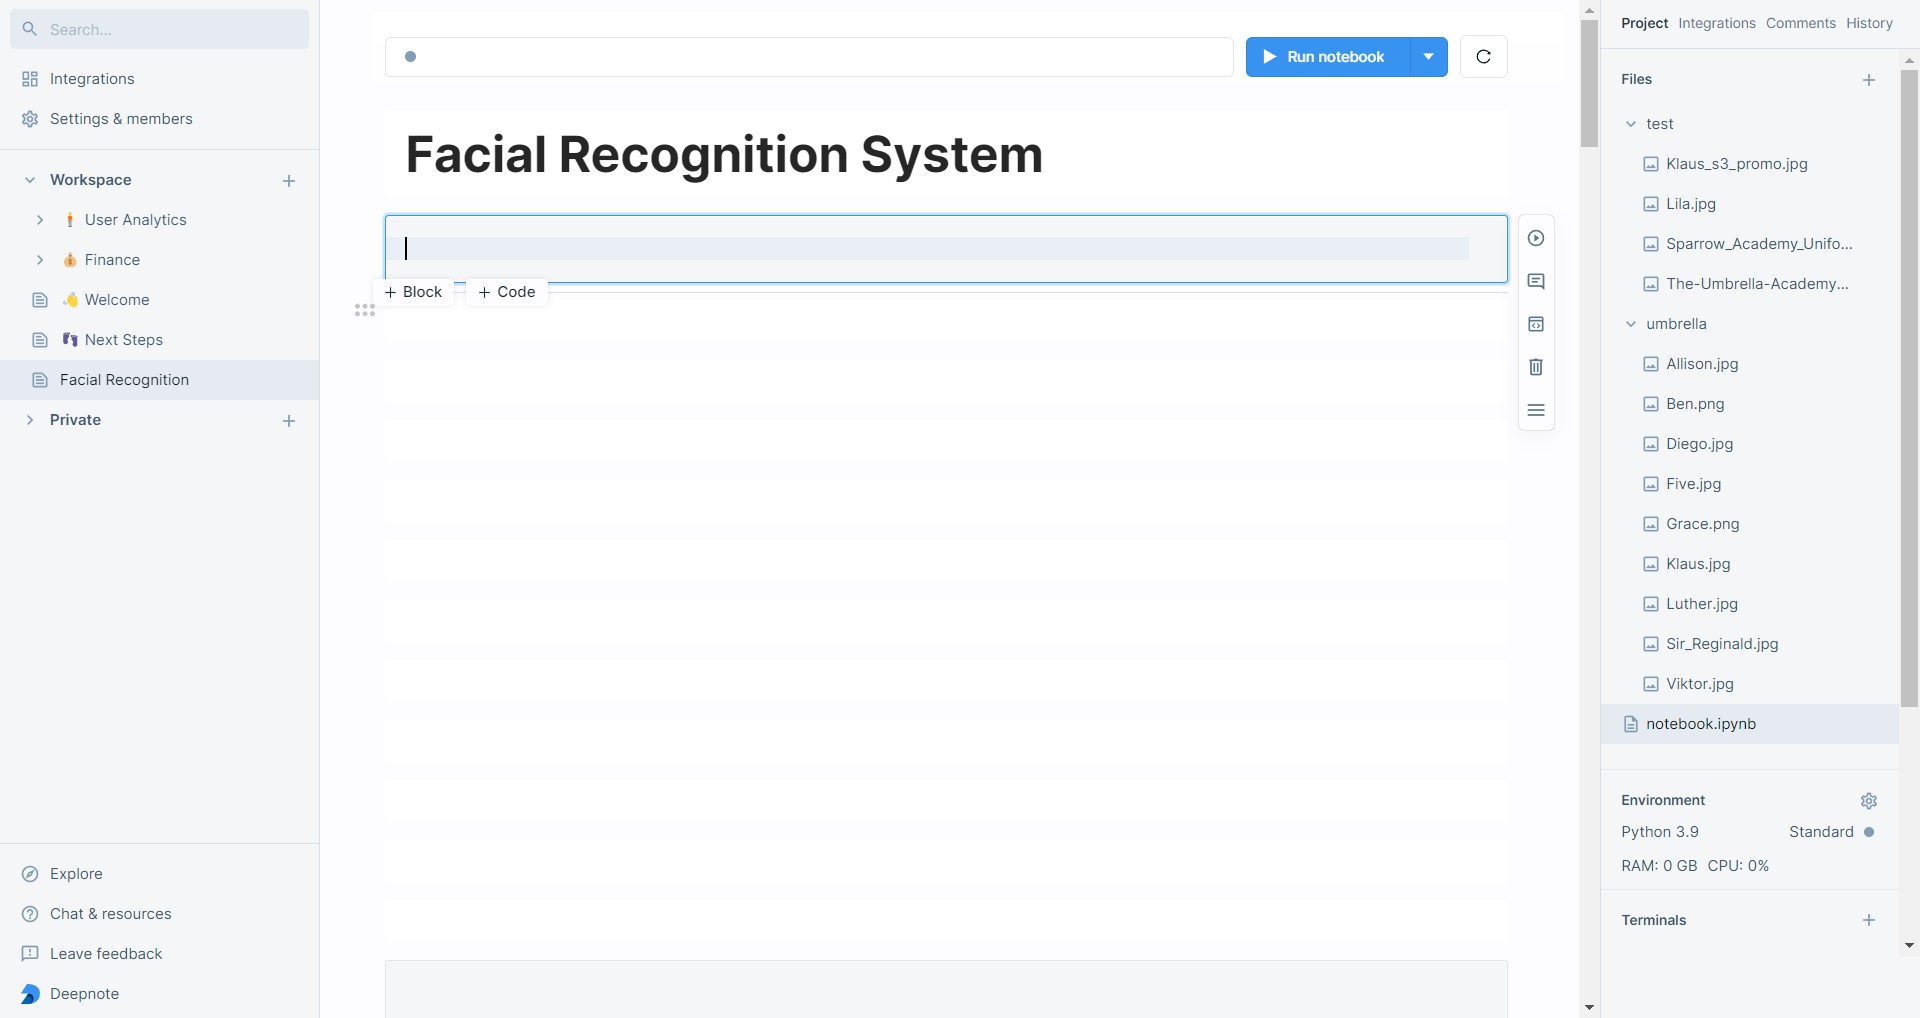
Click the icon in the Terminals section on the lower left to create a new terminal. Then, install the face-recognition package by running pip install face-recognition. Move on to the next section while this installs.
Creating and Saving the Face Encodings
Start by importing the os, numpy, joblib and face_recognition packages.
import os
import numpy as np
import joblib
import face_recognition
Then, create two list objects to store the registered face encodings and the corresponding people’s first names.
face_encodings = []
names = []
To make this easy (specifically the name matching part), images that contain single individuals will be used. Loop through all of the previously uploaded filenames in the umbrella/ directory. To get the complete image path for each iteration, add the directory name to the file name. Then, print this information to monitor progress and ensure that everything was done correctly.
for image in os.listdir('umbrella'):
    image_path = f"umbrella/{image}"
    print(image_path)
Next, load the file using the face_recognition.load_image_file method and pass the loaded file object as a parameter into the face_recognition.face_encodings method. This returns a list of 1 x 128 arrays.
resident = face_recognition.load_image_file(image_path)Each array represents a face encoding, and since you know that the current images have only one, simply access the first index to get the array.
face_encoding = face_recognition.face_encodings(resident)[0]Append the array to the face encodings list and the file name (without the extension) to the names list.
face_encodings.append(face_encoding)
names.append(image.split('.')[0])
When this loop is completed, use the joblib.dump method to save the names and face encodings. This acts as our local database.
joblib.dump([names, face_encodings], 'face_encodings.jl')Create the function check_image to check an input image for recognized individuals. The image path is passed to this function as a string.
def check_image(image):In the function’s body, load the image from its path and store the unknown face encoding(s) in the image.
visitors = face_recognition.load_image_file(image)
visitors_face_encodings = face_recognition.face_encodings(visitors)
After this, load the registered face encodings and create an empty list for storing the output.
names, face_encodings = joblib.load('face_encodings.jl')
output = []
At this point, images with multiple faces can be processed. Loop through the face encodings in the input image and call the face_recognition.compare_faces method. This method uses the list of registered face encodings as well as a single visitor’s face encoding. The method compares the unknown face encoding to each registered face encoding and returns a True value if there is a match. It then returns a list of booleans equal in length to the database of face encodings loaded.
for visitors_face_encoding in visitors_face_encodings:
    results = face_recognition.compare_faces\
    (face_encodings, visitors_face_encoding)
. To see if any true values were recorded, use Python’s any function. If this is the case, use NumPy’s np.argmax method to find the index of the true value. This works since True values are greater than False in Python (1 > 0). To obtain the individual’s name, the name at this index in the names list is accessed and then stored in the output array.
if any(results):
    person = names[np.argmax(results)]
    print(f"Welcome {person}!")
    output.append(person)
Finally, return the output list and the number of unknown individuals in the image.
return output, len(visitors_face_encodings) - len(output)To test this function, loop through the previously uploaded files in the test directory. After that, append the directory name to the filename so that it can be accessed directly and print the resulting file path.
for unknown in os.listdir('test'):
    image_path = f"test/{unknown}"
    print(image_path)
Call the check_image function, pass in the image path, and unpack its output into two variables named residents and n_visitors.
residents, n_visitors = check_image(image_path)The n_visitors variable is used to print the number of unknown individuals at the door (which could be zero).
if n_visitors > 1:
    visitors_text = f" There are {n_visitors} unknown individuals
    at the door."
else:
    visitors_text = f" There is an unknown individual at
    the door." if n_visitors else ""
The residents variable, on the other hand, is used to display the names of the recognised individuals.
if len(residents) > 1:
    residents_text = f"Welcome {', '.join(residents[:-1])}
    and {residents[-1]}."
else:
    residents_text = f"Welcome {residents[0]}." if residents else ""
The resulting texts are combined and printed.
response_text = residents_text + visitors_text
print(response_text)
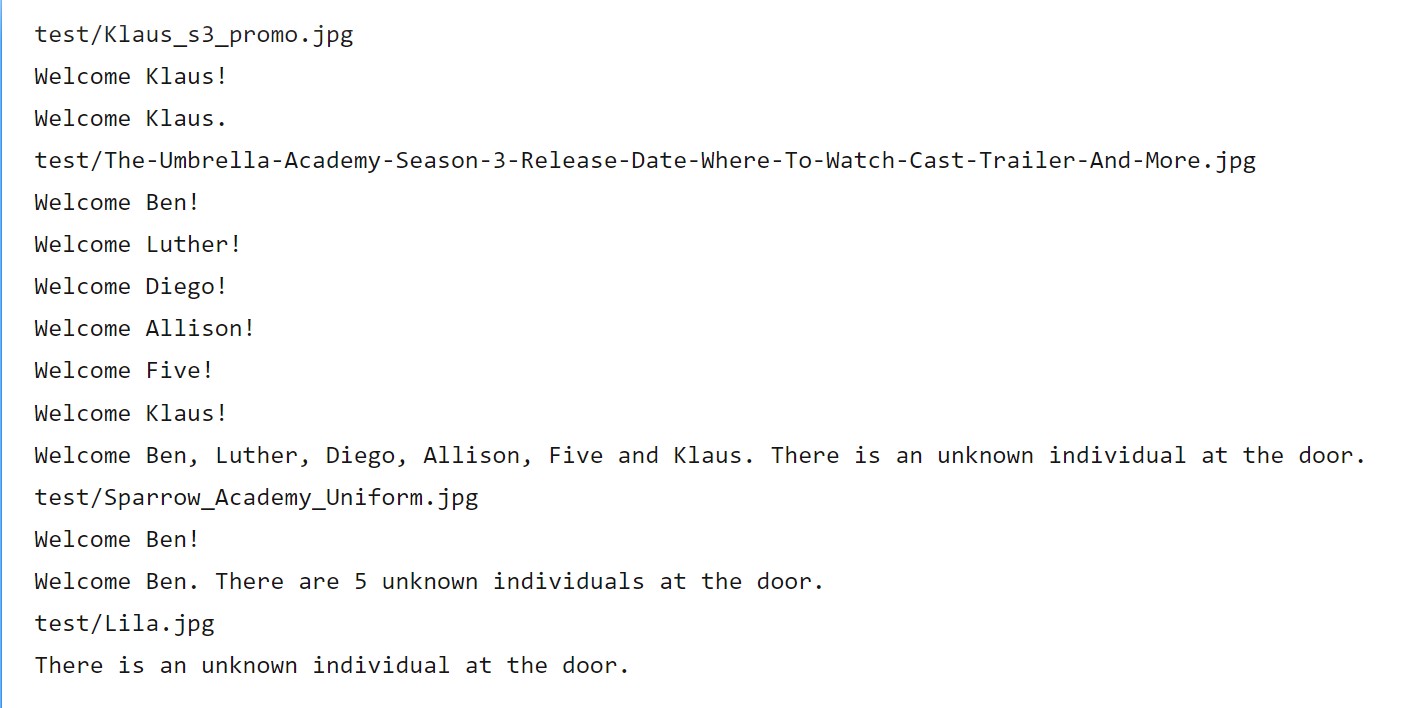
When this is run, the following is expected.
Adding Residents
Define a function named add_resident which takes in an image path as a string.
def add_resident(image):In a try block, load the image, get the unknown face encoding, and load the resident face encodings as well as the corresponding names from memory.
try:
    visitor = face_recognition.load_image_file(image)
    visitor_face_encodings = face_recognition.face_encodings(visitor)
    assert len(visitor_face_encodings) == 1
    visitor_face_encoding = visitor_face_encodings[0]
    names, face_encodings = joblib.load('face_encodings.jl')
Since only images with single faces should be used, confirm that only one face is found. If this is not the case, the process terminates. Otherwise, access the face encoding and compare it to that of the already registered residents.
results = face_recognition.compare_faces(face_encodings,\
visitor_face_encoding)
if not any(results):
    face_encodings.append(visitor_face_encoding)
    names.append(image.split('/')[-1].split('.')[0].title())
If a face is already a resident, you need not add it, as that could lead to a duplicate entry. Thus, only unregistered faces are saved alongside their names. Finally, the storage is updated by saving the newly modified registered face encodings and names to memory.
joblib.dump([names, face_encodings], 'face_encodings.jl')In the case of exceptions, the except block logs the error message and returns False. If things go well, the function returns True.
except Exception as e:
    print(f"Error: {e}")
    return Falsen_visitors
return True
To put the addition of residents to the test, make the image path a variable. A picture of Lila is used here.
lila = 'test/Lila.jpg'Then, ensure that Lila is not recognized. If this is the case, print a message indicating that she is unknown.
result = check_image(lila)

if not result[0] and result[1] > 0:
    print('There is an unknown individual at the door.')
else:
    print(f"Welcome, {result[0][0]}")
Next, using the image path, call the add_resident function and print the output.
print(add_resident(lila))Check again to ensure that Lila is recognized.
result = check_image(lila)
if not result[0] and result[1] > 0:
    print('There is an unknown individual at the door.')
else:
    print(f"Welcome, {result[0][0]}.")
The output below shows that Lila was successfully registered.
When the script is run, the output shown below is obtained.
There is an unknown individual at the door.
True
Welcome  Lila!  # printed from check_image()
Welcome, Lila.  # printed from our if statement
Removing Residents
The required parameter for removing a resident is their first name. Replace any white space in the first name with an underscore in a try block, and ensure that it is in the title case.
def remove_resident(firstname):
    try:
        firstname = firstname.replace(' ', '_').title()
Then, load the registered face encodings and get the index associated with the name.
names, face_encodings = joblib.load('face_encodings.jl')
idx = names.index(firstname)
Delete the name and face encoding at this index using this index and the del keyword.
del names[idx]
del face_encodings[idx]
Finally, save the updated face encodings and names to memory.
joblib.dump([names, face_encodings], 'face_encodings.jl')In the event of an exception, the except block prints the error message and returns False. If everything goes well, the function returns True.
except Exception as e:
    print(f"Error: {e}")
    return False
return True
To test the remove method, parse in the string 'Lila' to the remove_resident function and call the check_image method again.
remove_resident('Lila')
result = check_image(lila)
if not result[0] and result[1] > 0:
    print('There is an unknown individual at the door.')
The output shown below indicates that Lila has been removed from the list of registered residents.
There is an unknown individual at the door.You have now successfully developed a facial recognition system for the Umbrella Academy. You cannot, however, assume that they will use the code from your notebook. Continue to the following section to create an admin-friendly interface.
Setting Up Anvil
Visit the Anvil sign-up page and follow the on-screen directions to create an account. Once this is finished, log in to see the dashboard as displayed below.
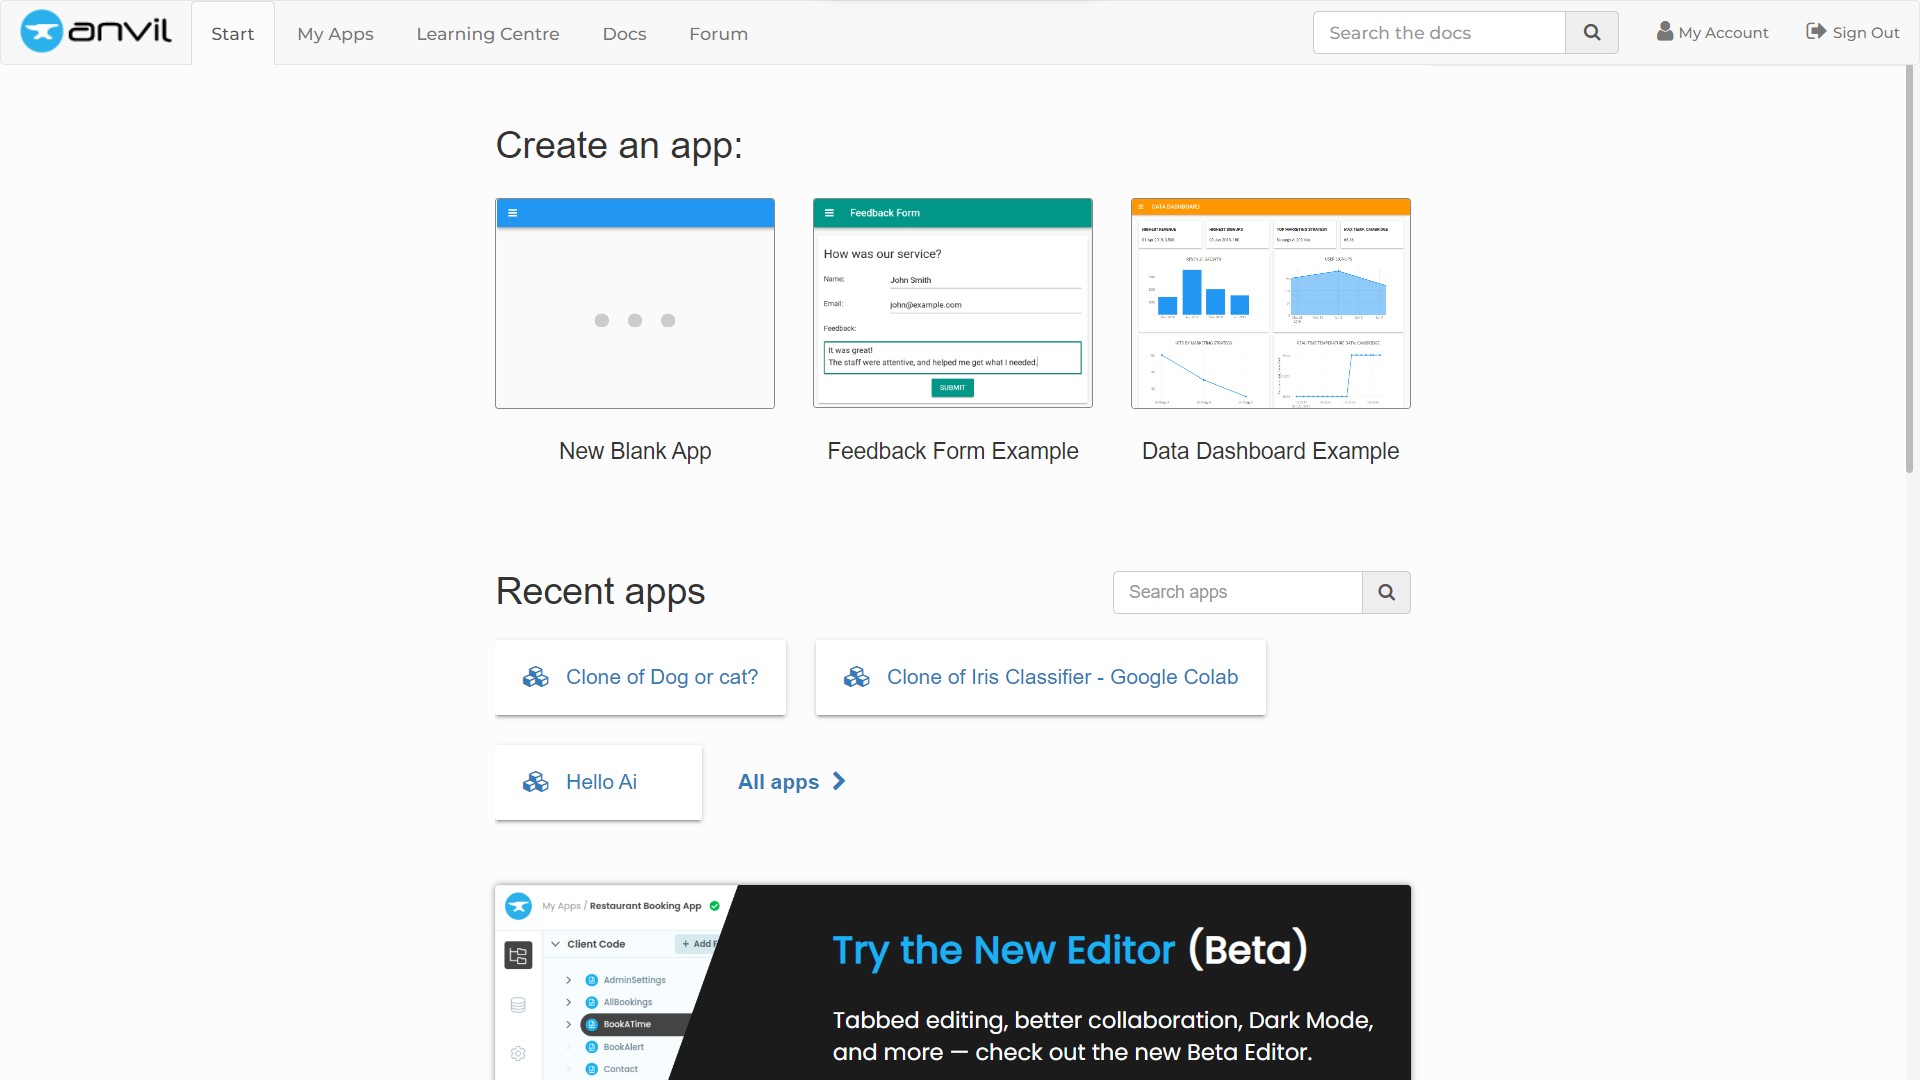
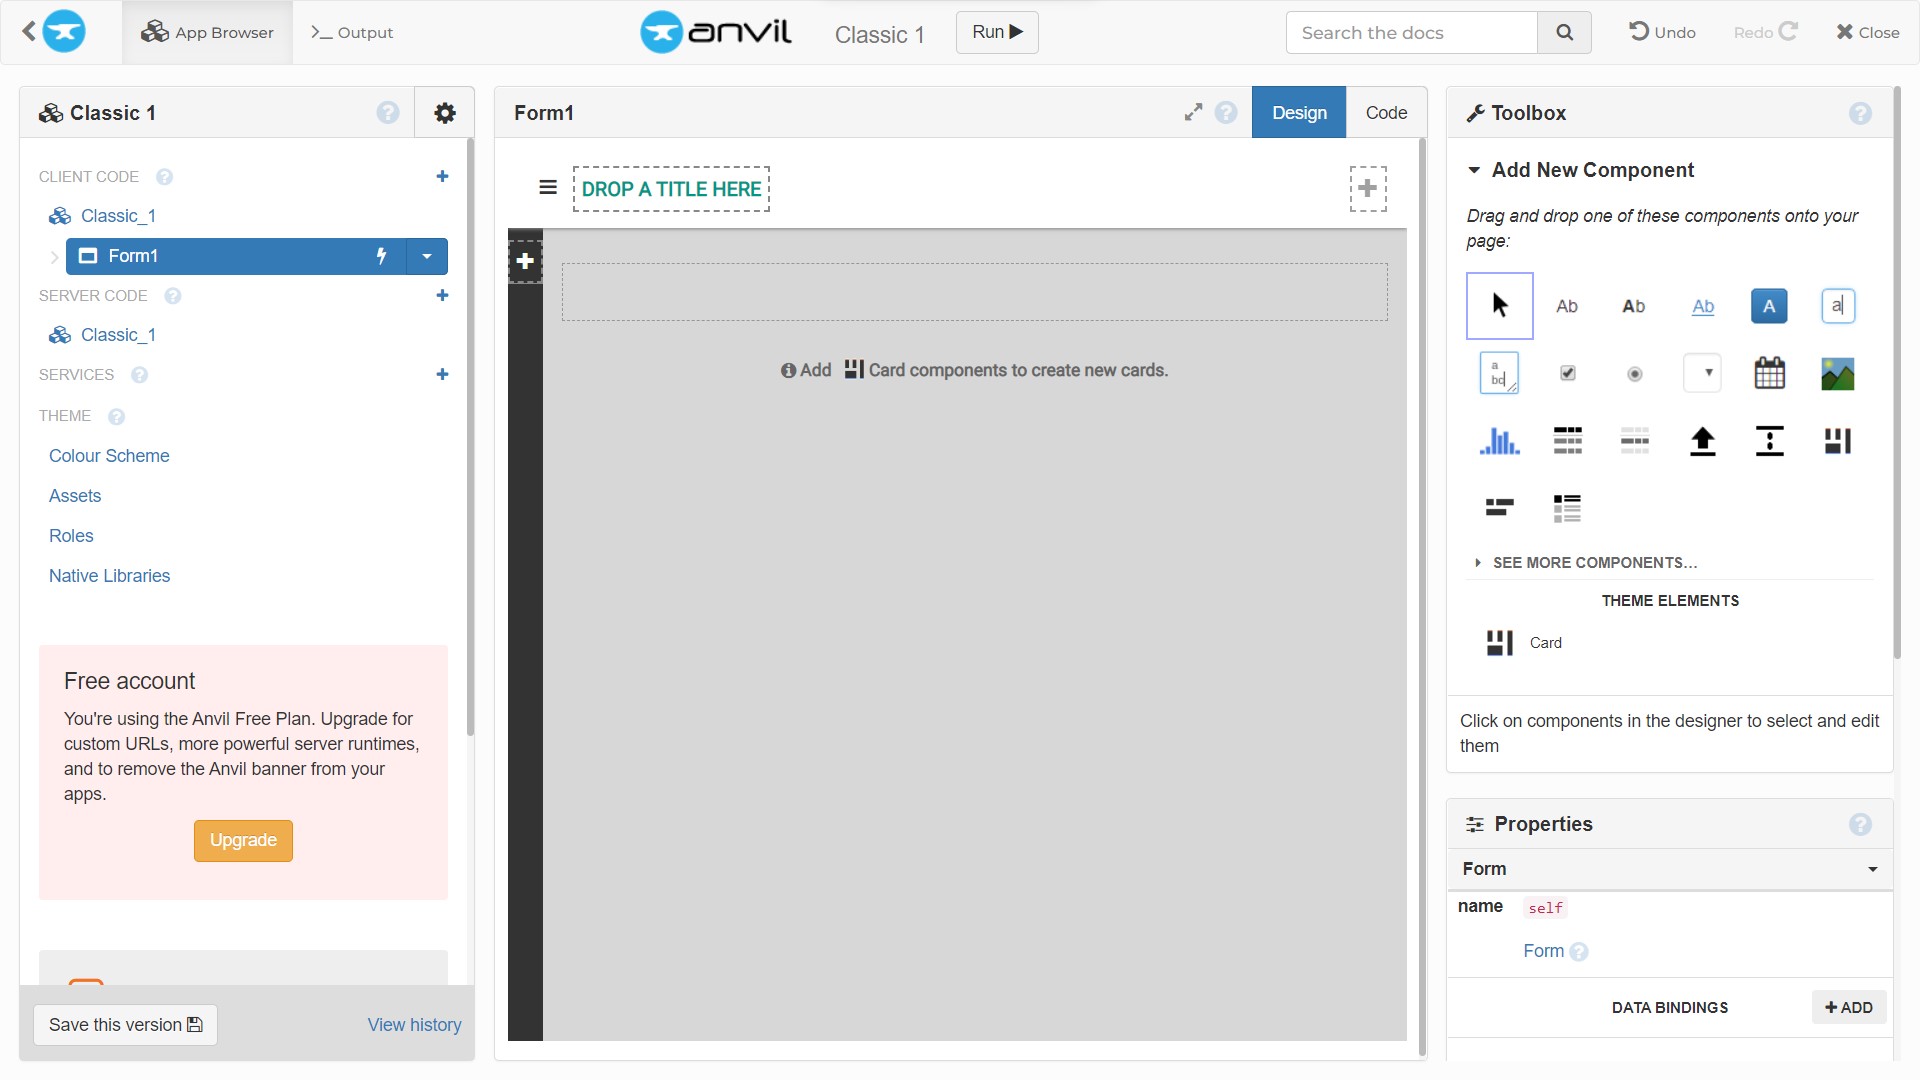
Then choose the “blank app” option, the “classic” theme, and “card-based layout with sidebar” in the following window that appears. The screen below then appears.
The client code, server code, services, and theme (which includes the color scheme, assets, and other elements) are all visible in the left section. In essence, this is similar to a file browser. The form being used at the moment is shown in the middle section. Its associated code can also be viewed here by switching to the code view via the top right buttons. The toolbox on the left allows you to add components. This includes text boxes, labels, images, and so on. It also has a properties section at the bottom that can be used to change the components.
The app will have an initial page where a user can check images, as well as two additional pages for adding and removing residents. A navigation bar will control page transitions.
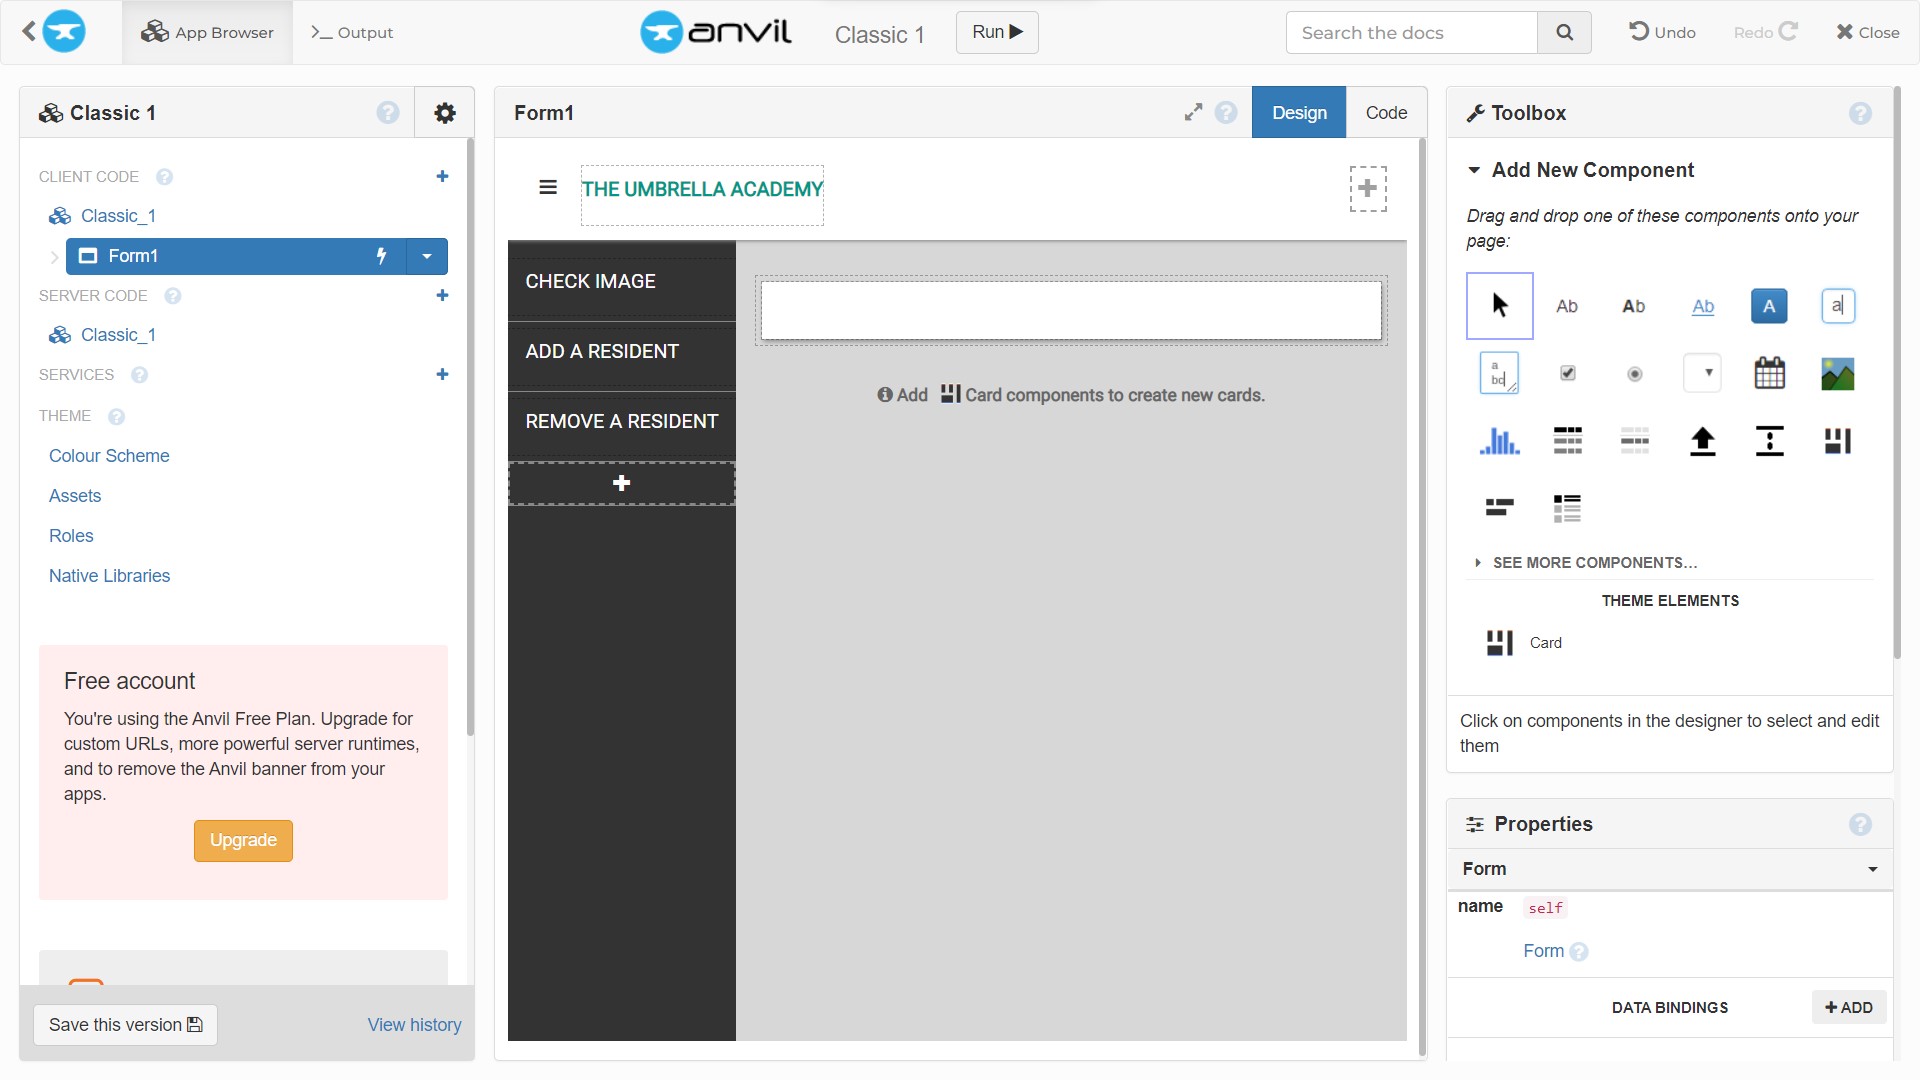
To add a title to the page, drag the “Rich Text” component to the “DROP A TITLE HERE” box by the sandwich button. Its properties section on the right is highlighted. Enter “THE UMBRELLA ACADEMY” in the content field and change the text format to “plain_text.”
Next, drag, and drop three link text components from the toolbox to the sidebar’s plus icon. These help with accessing other pages. Click on each newly added link component to open its properties and type “CHECK IMAGE,” “ADD A RESIDENT,” and “REMOVE A RESIDENT” into the appropriate fields. Finally, place a card component on the screen by dragging and dropping it. This will contain the rendered components from other forms. The view should look like this:
Click the drop-down arrow on the left pane to rename the first form to “EntryPointForm.” Then, by client code, click the “+” icon to add a new blank form. Rename this form to “CheckForm.”
Creating the CheckForm
This form will accept an image, send it to the notebook, and return relevant information about the people in the image.
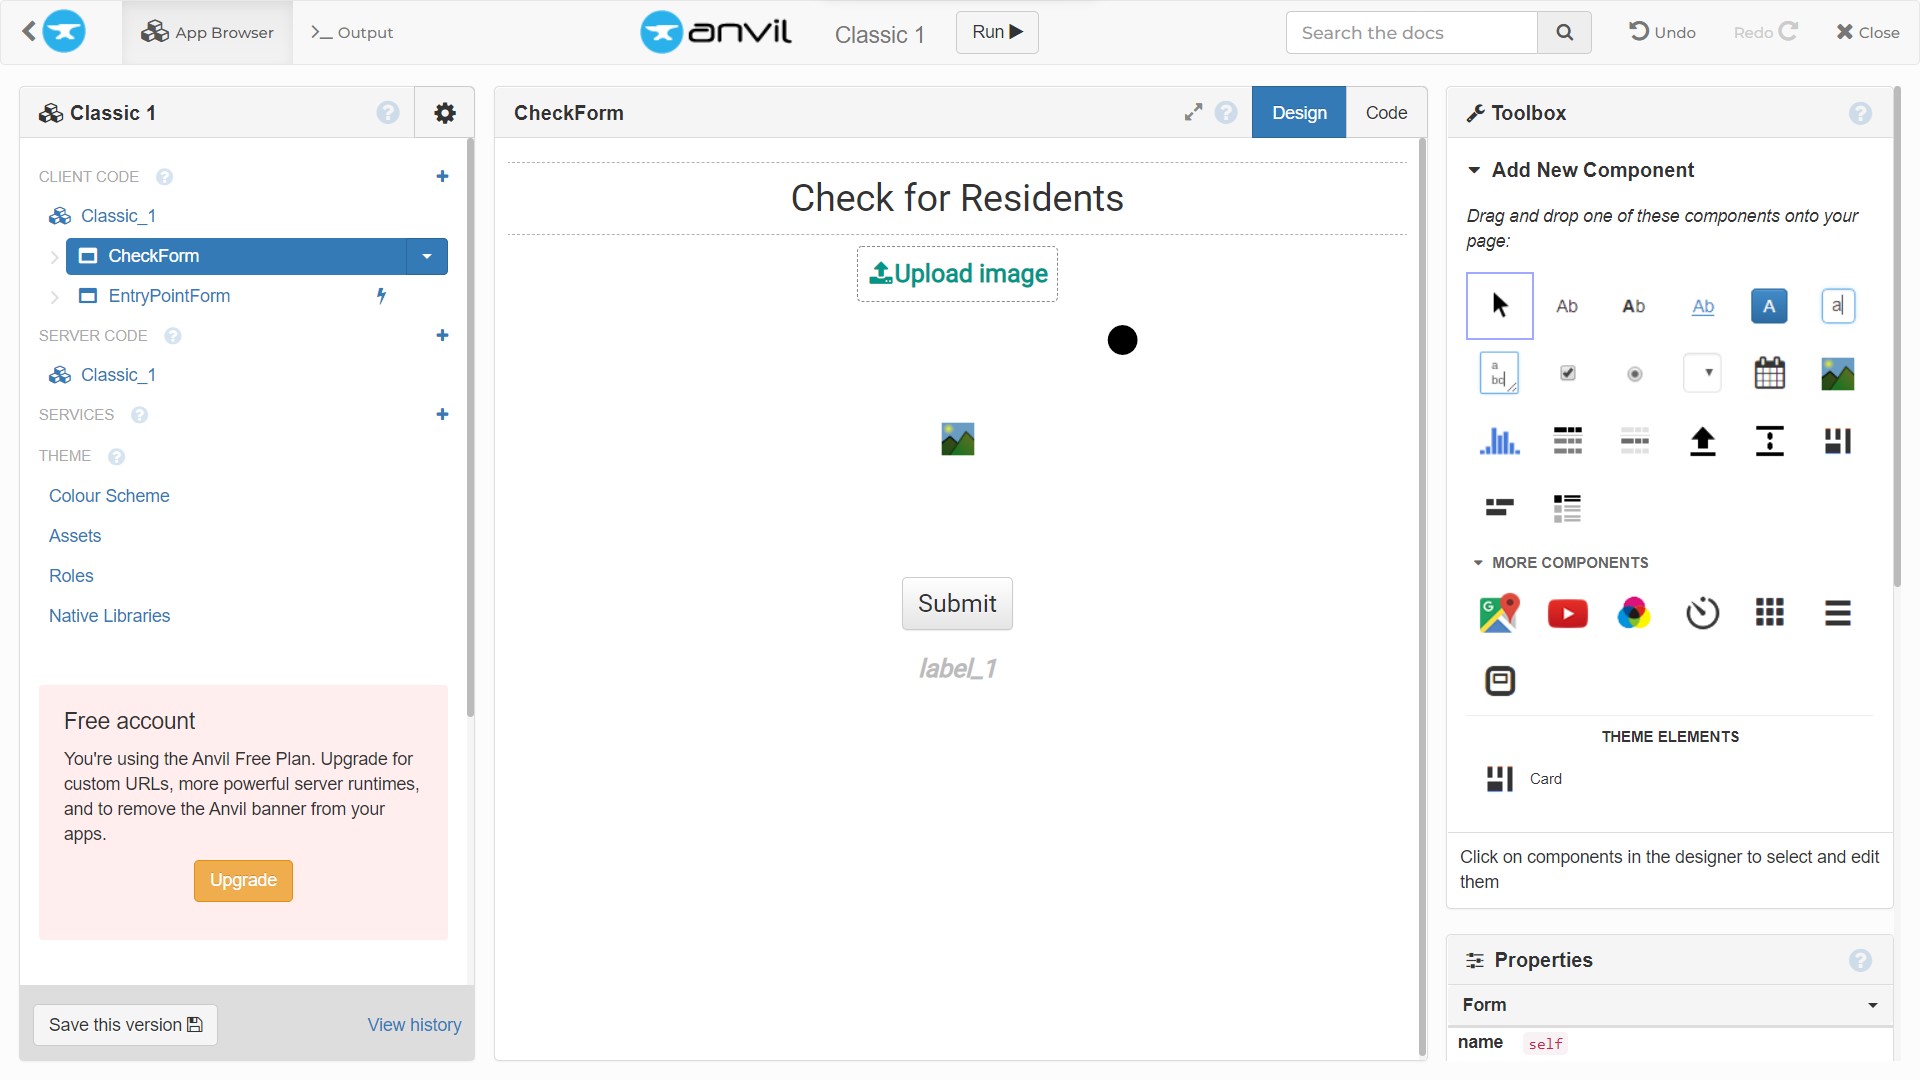
On the screen, a series of components will be arranged vertically. To begin, move the rich text component to the top of the page to indicate its function. Add “Check for Residents” to the properties tab’s content box and change the format to plain text as before. Then, in the text properties, change the alignment to “center” and the font size to 30.
Then, from the toolbox, drag the “FileLoader” component and drop it just beneath the first component. To open the properties section, click the component. Fill in the file type field with ‘image’, the text field with ‘Upload image’, and the font size field with ‘20.’
Under this, add an image component (to render the uploaded image) and a button component (to submit the form). Change the text to ‘Submit,’ the alignment to ‘centre,’ and the font size to ‘20’ by clicking the button component and navigating to its properties tab.
Finally, drag a label component to display the face recognition system’s output. Scroll down in the properties bar for this component and change the text alignment field to center,’ check the ‘bold’ checkbox, and enter a font size of ‘20.’
After you’ve configured the interface, double-click the submit button to open the code tab and automatically define a method that will be called when the button is clicked. Every form is a class, and events related to its components are defined as methods of that class. The anvil library is also imported by the autogenerated script. In the ‘button_1_click’ method, you will receive a response from the backend (notebook) and display it.
First, get the response by calling the server.call method. This method accepts a string representing the name of the function to be called from the notebook and an argument representing the uploaded file to be parsed.
def button_1_click(self, **event_args):
    response = server.call('check_image', self.file_loader_1.file)
The function name is check_image and the file is accessed via self.file_loader_1.file. Here you see that the uploaded file can be accessed from the file_loader_1 object using the.file` method. If you renamed your file loader object, get the new name from the right-hand Code Snippet panel. The response is then unpacked into two variables.
residents, n_visitors = responseThe text to be sent as a response is composed as done in the notebook.
if n_visitors > 1:
    visitors_text = f" There are {n_visitors} unknown
    individuals at the door."
else:
    visitors_text = f" There is an unknown individual at
    the door." if n_visitors else ""

if len(residents) > 1:
    residents_text = f"Welcome {', '.join(residents[:-1])}
    and {residents[-1]}."
else:
    residents_text = f"Welcome {residents[0]}." if residents else ""

response_text = residents_text + visitors_text
Finally, the generated response text is self.label_1.text, which represents the text to be rendered.
if response_text:
    self.label_1.text = response_text
else:
    self.label_1.text = "There is no one at the door."
Back on the Design tab, double-click the file loader component. This returns you to the code tab, where you can see a method that was created to track a change in the file loader. Set the image component source to the uploaded file in this method, as shown below.
def file_loader_1_change(self, file, **event_args):
    """This method is called when a new file is loaded
    into this FileLoader"""
    self.image_1.source = file
Creating the AddForm
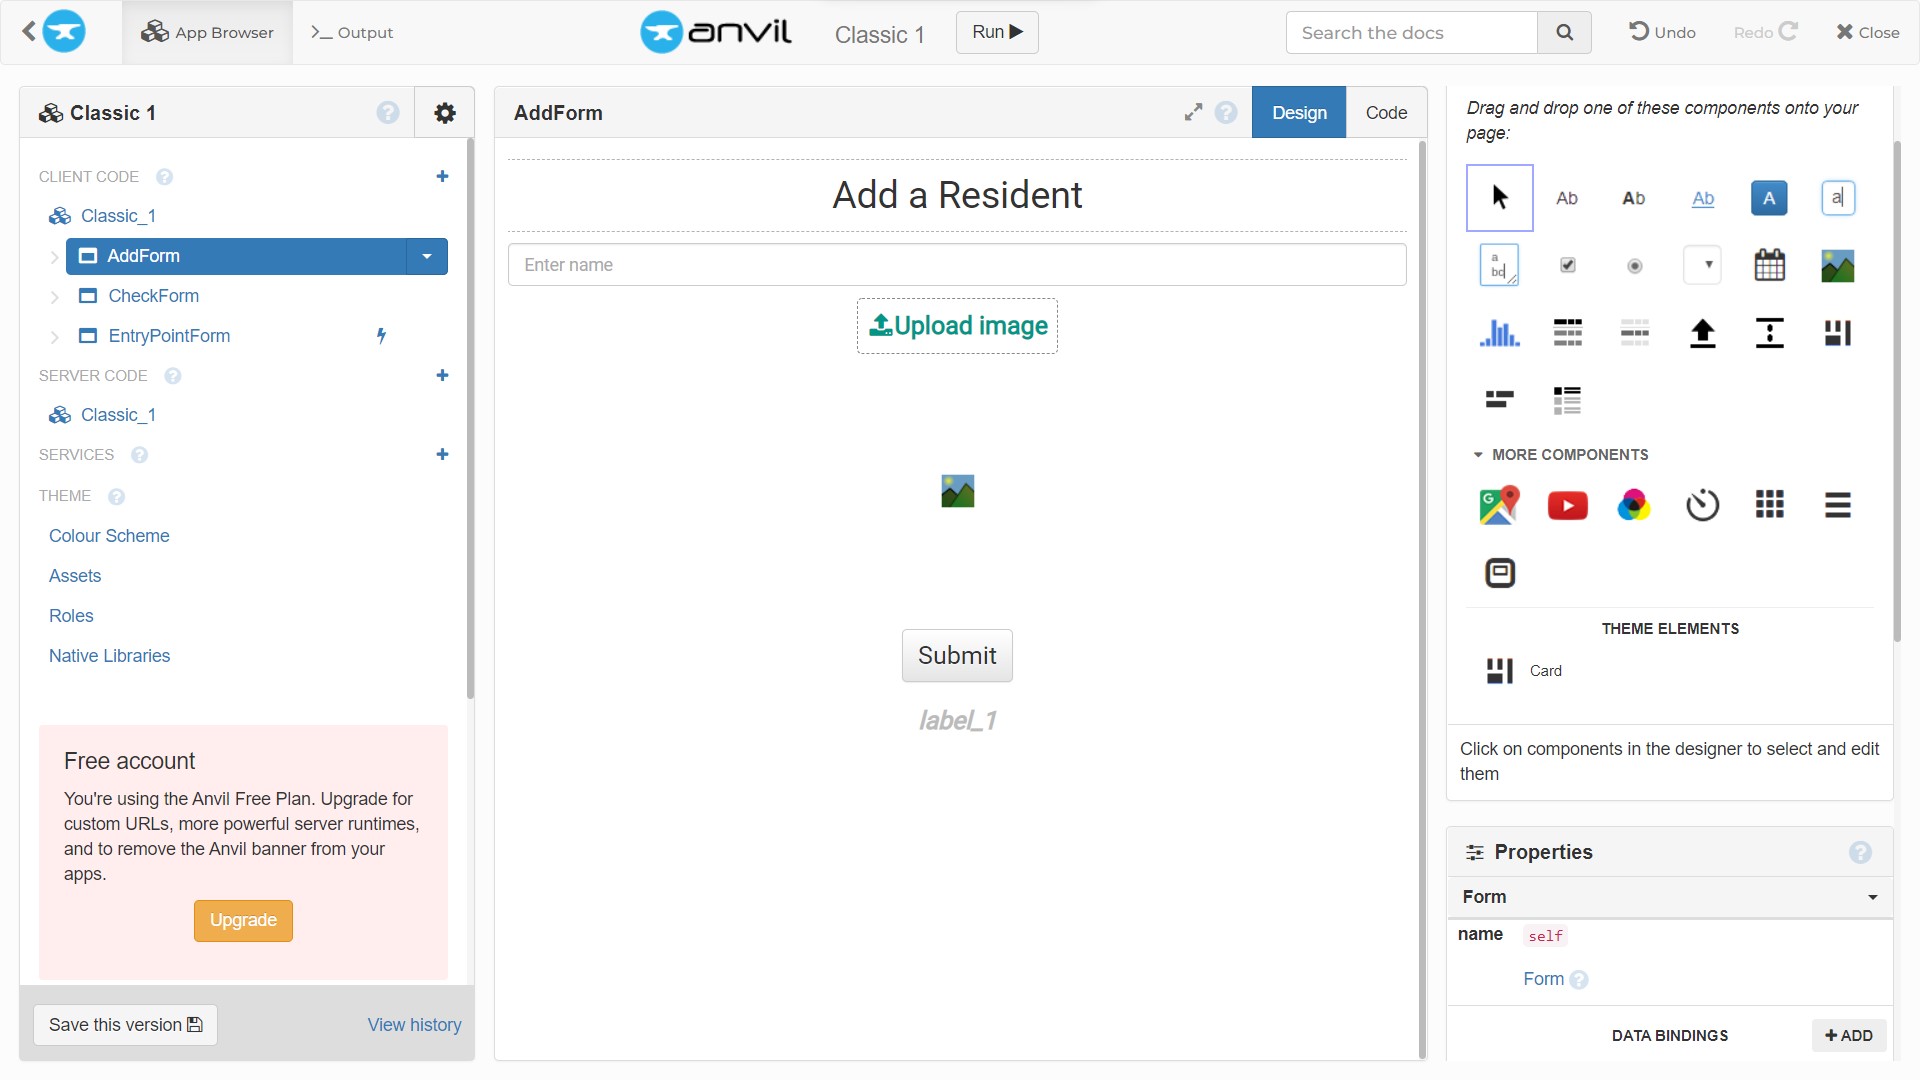
Next, as previously described, create a new form and name it ‘AddForm’. This form will include the components and code needed to add residents to the system. It will also contain all the components on the CheckForm. First, add all of the components from the CheckForm. In the content field of the rich text component at the top of the page, type “Add a Resident.” Add a text box component from the toolbox beneath that one. Change the placeholder field in its properties panel to “Enter name.” The form should now look like the image below.
Double-click the submit button to open the code tab and create the empty method. In this method, pass the add_resident function name to the server.call `function. Also, pass in a tuple that contains the uploaded file and the text entered in the textbox.
def button_1_click(self, **event_args):
    """This method is called when the button is clicked"""

    response = server.call('add_resident',
                    (self.file_loader_1.file, self.text_box_1.text))
The response in this case is a boolean value. Based on this value, parse in "Successful!" or "Failed!" into the self.label_1.text to display the feedback.
self.label_1.text = "Successful!" if response else "Failed!"Back on the Design tab, double-click the file loader component. Set the image source to the uploaded file in the function that is created, just as you did in the CheckForm code tab.
Creating the Remove Form
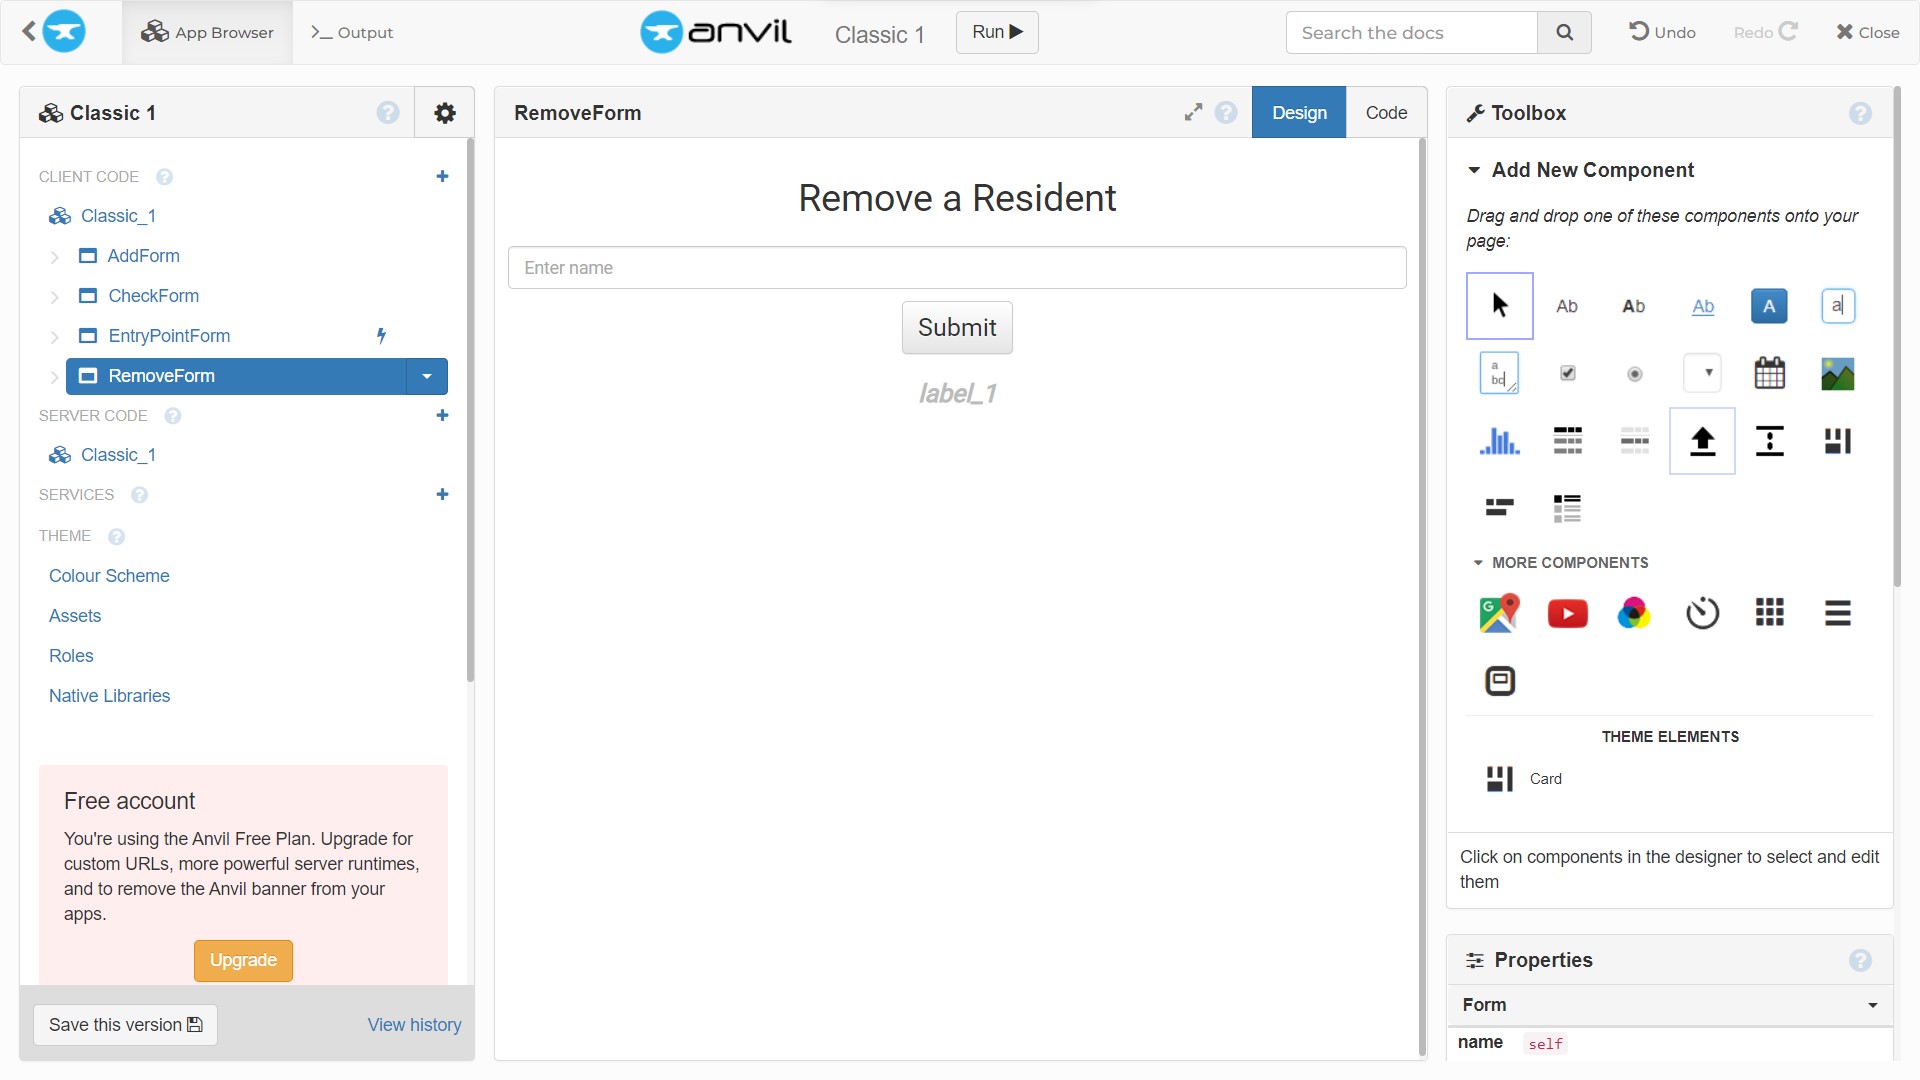
[Make](/blog/using-cmake a new form called “RemoveForm.” This form will include the elements required to manage the removal of residents. Add a rich text component to this form with the content field set to “Remove a Resident”. Add a text box component to collect the person’s name, a button component to submit the form, and a label component to display the response under this. Format the properties of these components in the same way that you did the AddForm components. The resulting form should look like the image below.
Then, in the code tab, double-click the submit button to access the generated function. Here, parse in 'remove_resident' and the text entered into the textbox as arguments to the sever.call method.
def button_1_click(self, **event_args):
    """This method is called when the button is clicked"""
    response = server.call('remove_resident', self.text_box_1.text)
The boolean response is then rendered on the screen as "Successful!" or "Failed!".
self.label_1.text = "Successful!" if response else "Failed!"You have now created all the required forms. However, if you click the “run” button at the top center, you will see a non-functional navigation bar. This is because you still need to link the auxiliary forms to the navigation bar components on the EntryPointForm.
To do this, navigate to the EntrypointForm and double click “CHECK IMAGE” to reveal the code panel and the generated method in the form class. First, add the following lines of code to import the other forms.
from ..AddForm import AddForm
from ..CheckForm import CheckForm
from ..RemoveForm import RemoveForm
Next, in the link_1_click method, call the self.reset_links() method. This has not yet been created, but it will be responsible for resetting the roles of the various link components. In this case, the role is what determines whether a link is selected or unselected.
def link_1_click(self, **event_args):
    """This method is called when the link is clicked"""
    self.reset_links()
Following that, modify the role of link_1 to 'selected', clear the content panel component with the self.content_panel.clear method and finally, pass CheckForm as a parameter to the self.content_panel.add_component method to connect it to the link component.
self.link_1.role = 'selected'
self.content_panel.clear()
self.content_panel.add_component(CheckForm())
Repeat this process for the “ADD A RESIDENT” (link_2) component and “REMOVE A RESIDENT” (link_3) component parsing in the AddForm and RemoveForm respectively.
def link_2_click(self, **event_args):
    """This method is called when the link is clicked"""
    self.reset_links()
    self.link_2.role = 'selected'
    self.content_panel.clear()
    self.content_panel.add_component(AddForm())

def link_3_click(self, **event_args):
    """This method is called when the link is clicked"""
    self.reset_links()
    self.link_3.role = 'selected'
    self.content_panel.clear()
    self.content_panel.add_component(RemoveForm())
When this is done, create a method to implement self.reset_links.
In this method, you simply set the role parameter of all link components to an empty string, indicating that none of them is selected.
def reset_links(self, **event_args):
    self.link_1.role = ''
    self.link_2.role = ''
    self.link_3.role = ''
If you run the app, you will notice that initially nothing is displayed but on clicking the items on the navigation bar, you can view the pages. This is because no default view is set. To do this, call the self.link_1_click function in the forms __init__ method. Now the application defaults to the check image screen.
def __init__(self, **properties):
    # Set Form properties and Data Bindings.
    self.init_components(**properties)

    # Any code you write here will run before the form opens.
    self.link_1_click()
At this point, you have created the interface and determined how it would get results from the notebook. However, it still would not work as they have not been linked. To do this, the Anvil uplink feature is used.
Linking the Notebook to the Anvil App
This is the final operation to be carried out. To do this, first, the uplink key string must be obtained. Click the settings icon on the left section and then the Uplink option. In the window that pops up, click the green button and copy the key string.
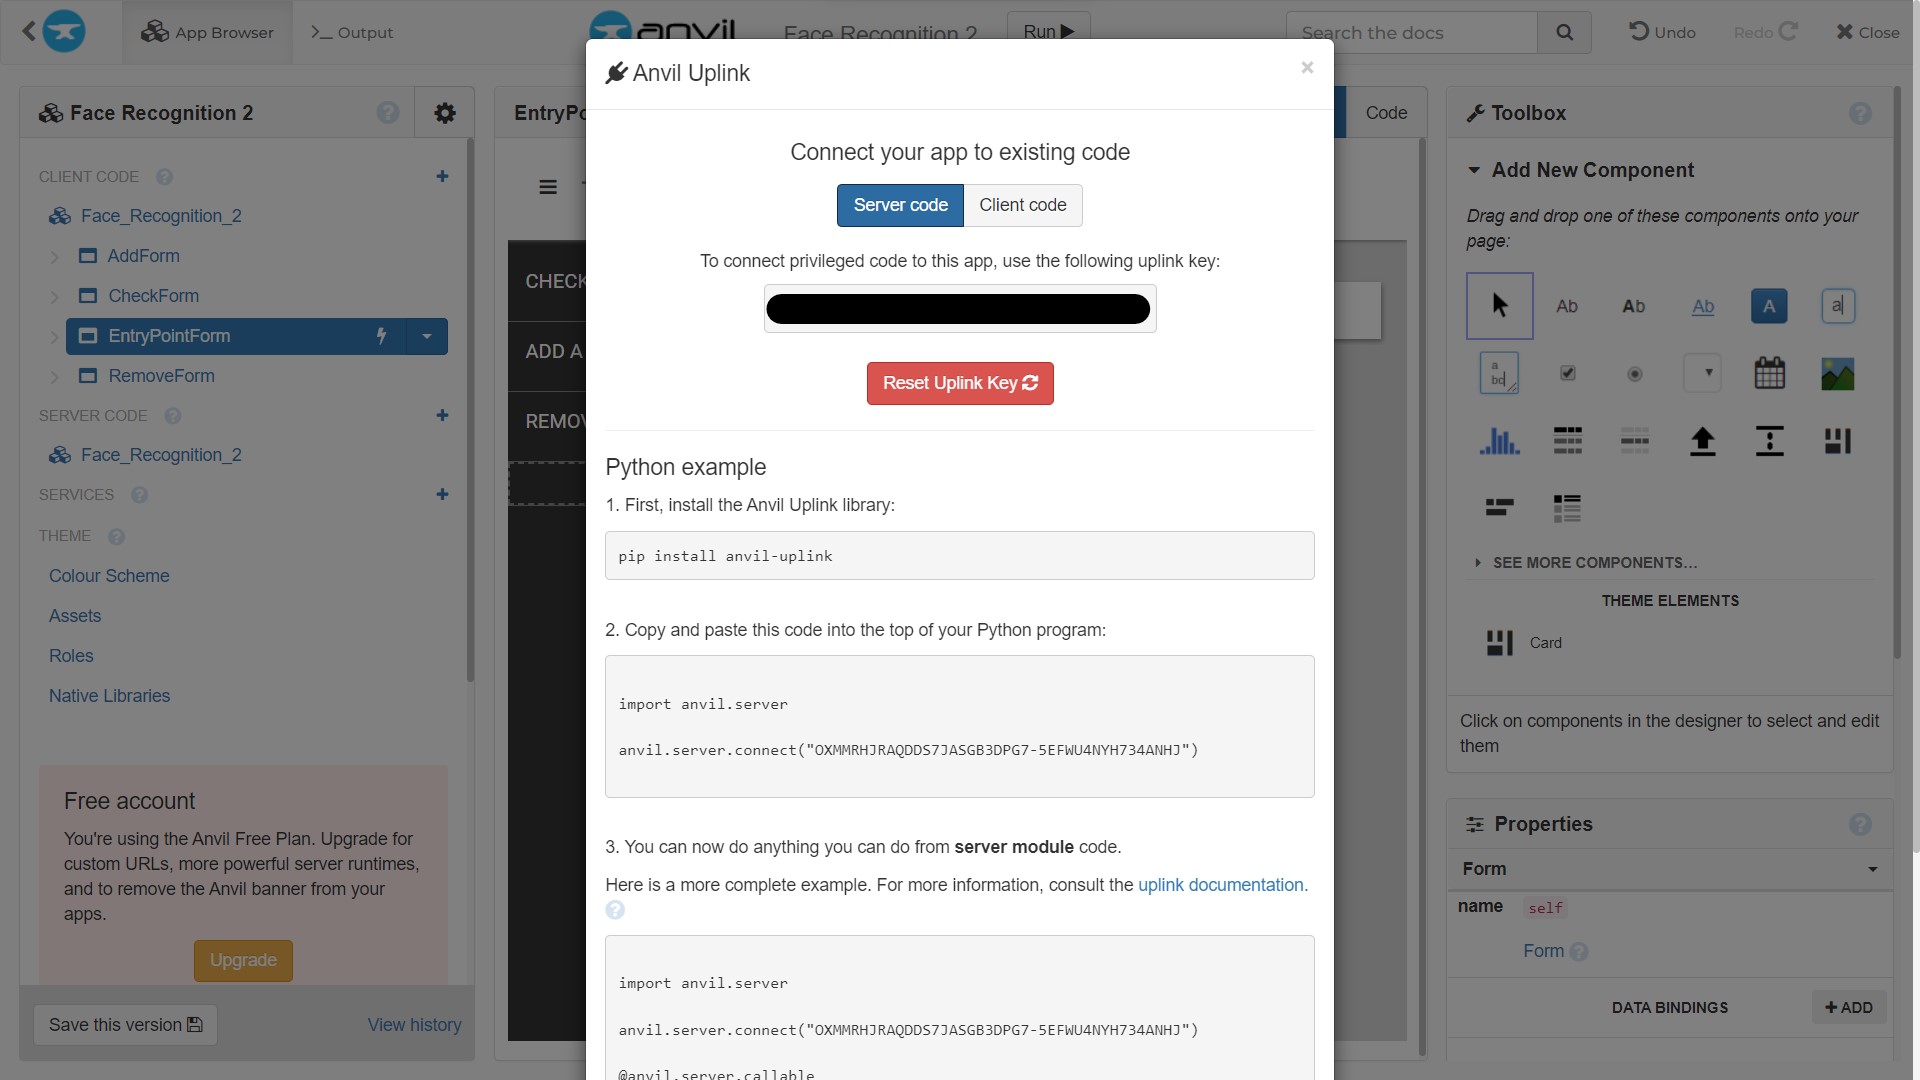
Move over to Deepnote and open the terminal to install the anvil-uplink package via pip install anvil-uplink. Then, import the getpass method to securely add your uplink key. Also, import the anvil.server and then the anvil.media method.
from getpass import getpass
import anvil.server
import anvil.media
Next, use the getpass method to store the link in a variable and pass that variable to the anvil.server.connect method.
uplink_key = getpass('Enter your Uplink key: ')
anvil.server.connect(uplink_key)
Following this, the different methods will be slightly modified. First, add the @anvil.server.callable decorator above the check image method to indicate that Anvil can call the function.
@anvil.server.callable
def check_image(image):
Next, in the check_image function, use a context manager to load the image from Anvil as a temporary file using anvil.media.TempFile.
with anvil.media.TempFile(image) as filename:This filename should then be passed to the face_recognition.load_image_file method. The remainder of the function remains the same. The modified function can be found in this notebook.
visitors = face_recognition.load_image_file(filename)
visitors_face_encodings = face_recognition.face_encodings(visitors)
Also, add the decorator above the add_resident method.
@anvil.server.callable
def add_resident(image):
From Anvil, a tuple named image is sent. Unpack this tuple into the image and name variables.
image, name = imageAs done above, use a context manager and the anvil.media.TempFile method to load the image.
try:
    with anvil.media.TempFile(image) as filename:
        visitor = face_recognition.load_image_file(filename)
    visitor_face_encodings = face_recognition.face_encodings(visitor)
Also, change the new name to name.title() when appending it to the names list.
if not any(results):
    face_encodings.append(visitor_face_encoding)
    names.append(name.title())
Finally, for the remove_resident method, just add the @anvil.server.callable decorator above it. No other changes are made to this method. With these done and run, in a new cell, run anvil.server.wait_forever(). As the name implies, this method keeps the notebook running till it is terminated.
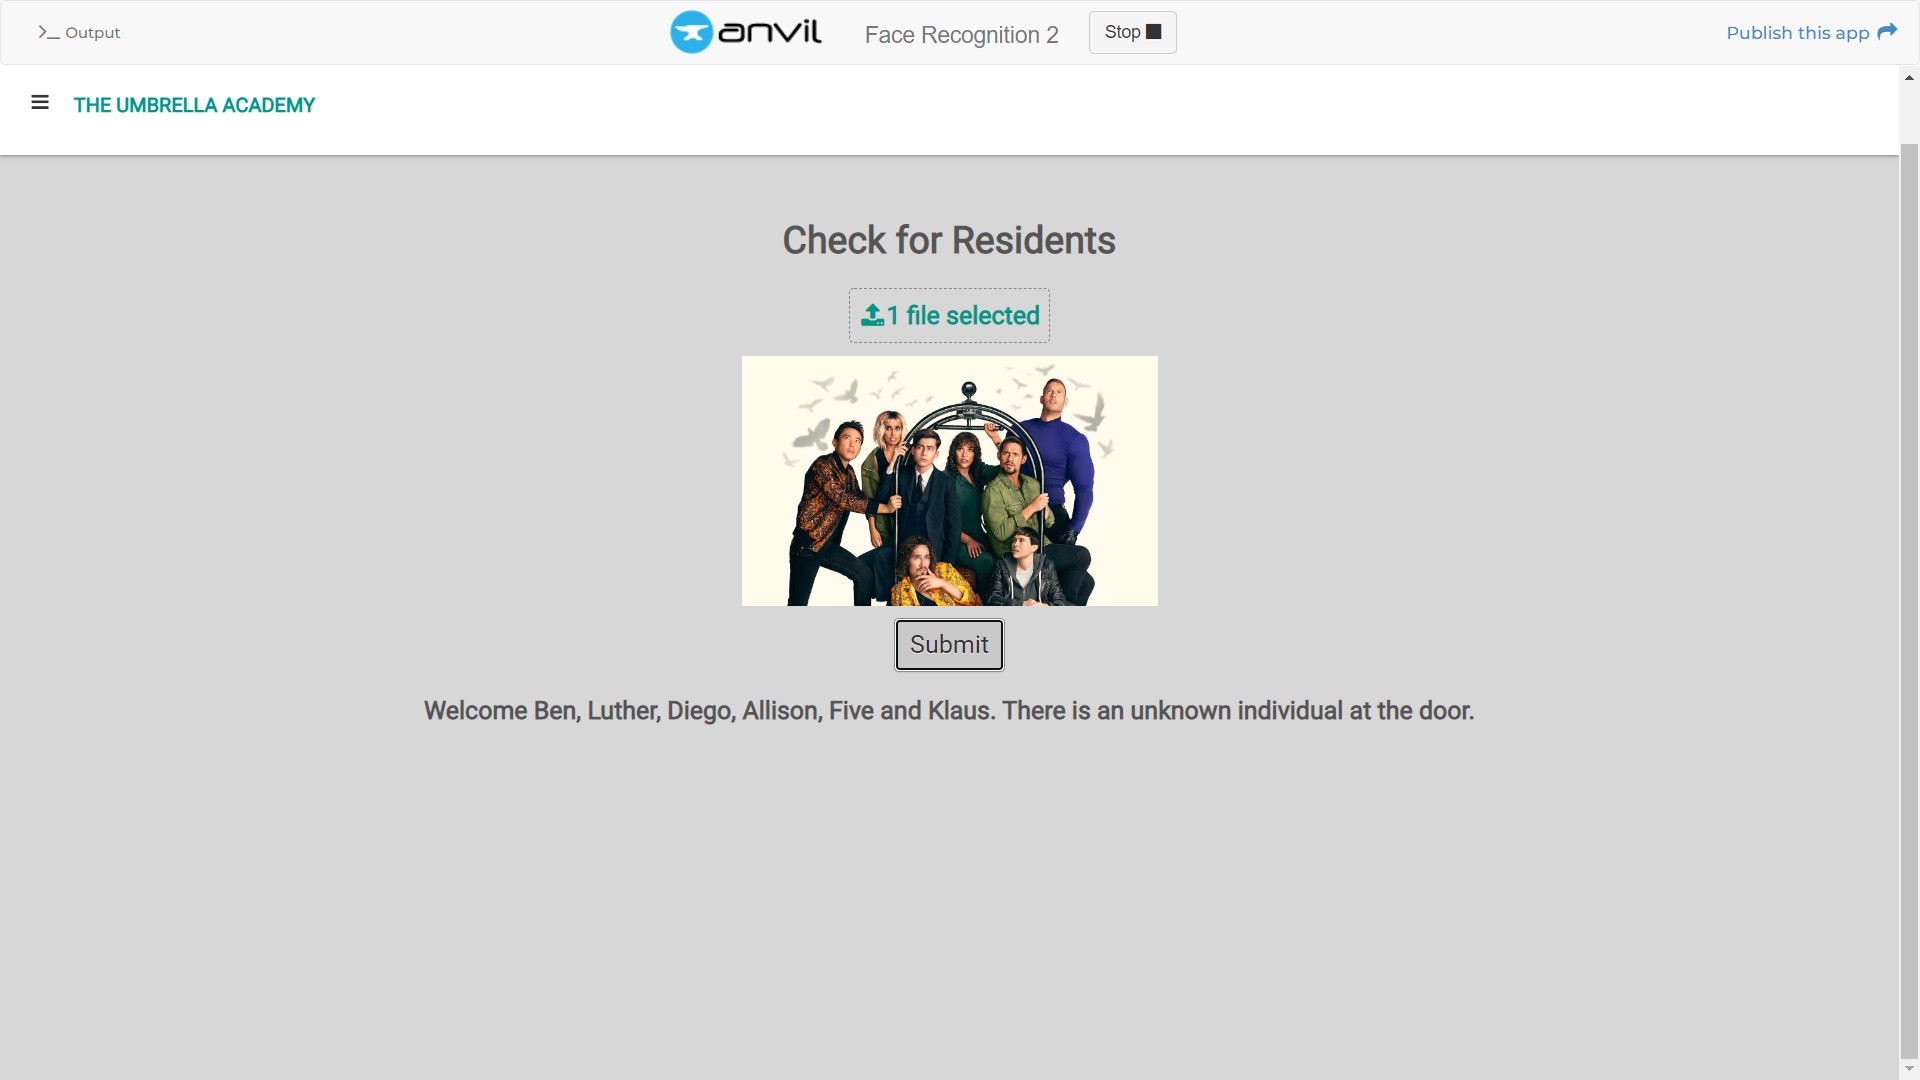
Now, return to Anvil, run the app, and try checking an image. Also, try adding a resident and removing them. Below is the response I get when I upload this image on the check screen.
Finally, to share and test your app on another device, click the “Publish this app” button in the top right corner and copy the link.
Conclusion
This tutorial guided you through leveraging Deepnote and Anvil to build a face recognition system using Python. The process highlights that mastering a framework isn’t a prerequisite for rapidly developing or enhancing a tool. What you’ve learned here can be applied to any Python script running on a server.
If you’re looking to optimize your Python builds further, you might want to give Earthly a shot. It’s designed for efficiency and reproducibility.
And remember, you can upscale your Deepnote for more complex applications. Stay creative.
Earthly makes CI/CD super simple
Fast, repeatable CI/CD with an instantly familiar syntax – like Dockerfile and Makefile had a baby.


