External Secret Operators (ESO) with HashiCorp Vault
We’re Earthly. We make building software simpler and faster using containerization. If you’re using HashiCorp Vault, you might like Earthly. Check it out.
Are you interested in learning more about Kubernetes security? While it’s true that Kubernetes secrets provide a secure way to manage sensitive data in your applications, it’s also wise to consider additional security measures. In my previous articles, I’ve covered how to get started with Kubernetes secrets and how to secure them effectively within the cluster.
How about keeping your secrets outside of the Kubernetes cluster? This provides an extra layer of security that can protect your applications in the event of a cluster breach. That’s where external secret operators (ESOs) come in. By using an ESO, you can store your secrets securely outside of the Kubernetes cluster while still allowing your applications to access them.
External secret operators (ESO) is a Kubernetes operator that allows you to use secrets from centralized third-party secret management systems. This operator reads data from a third-party secret manager and automatically injects their values as Kubernetes secrets.
These centralized third-party secret management systems include AWS Secrets Manager, HashiCorp Vault, and Google Secrets Manager, among others. These centralized third-party secret management systems provide a higher level of security and flexibility for managing secrets within your Kubernetes deployment compared to the native Kubernetes secret management.
This tutorial will teach you how to use the external secret operator with HashiCorp vault.
Prerequisites
To follow along in this tutorial, you’ll need to have the following:
- A Linux virtual machine for running your vault instance; this tutorial uses the Ubuntu 22.04 LTS distribution.
- A Kubernetes cluster with at least two nodes. This tutorial uses Kind.
How Does the External Secret Operator Work with Vault?
An External Secret Operator is essentially a Kubernetes controller that manages secrets stored outside of the cluster, such as in a HashiCorp Vault or a cloud-based secrets management system like AWS Secrets Manager. When a pod requires access to a particular secret, the External Secret Operator is responsible for retrieving the secret from the external system and making it available to the pod as a Kubernetes secret.
The External Secret Operator works by creating three custom resource definitions (CRDs); the ClusterSecretStore, the SecretStore, and the ExternalSecret CRD.
The ClusterSecretStore CRD is used to define the connection details to the external secret store, such as the endpoint, authentication details, and other configuration settings. The SecretStore CRD is just like the ClusterSecretStore resource but it is namespaced. The ExternalSecret CRD is used to create and manage the Kubernetes secrets based on the configuration defined in either the ClusterSecretStore CRD or the SecretStore CRD.
The External Secret Operator watches for changes to ExternalSecret resources and dynamically creates Kubernetes secrets as needed, populating them with the retrieved secret data. This way, the secrets remain secure and can be rotated regularly with no disruption to the applications using them.
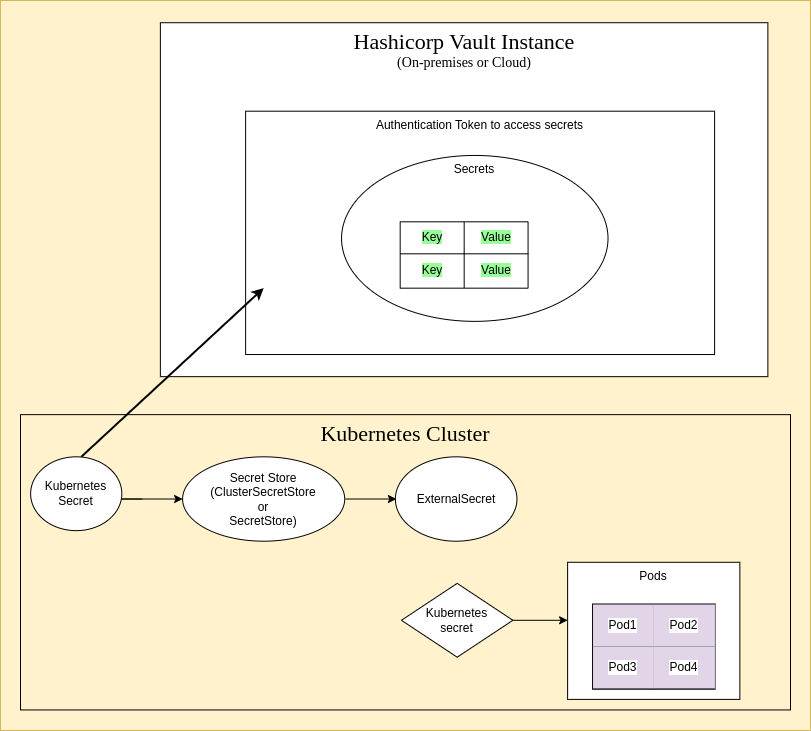
Firstly, the ESO authenticates with Vault using a Vault token created as a secret in the Kubernetes cluster, then the SecretStore or ClusterSecretStore uses this secret to connect to the Vault server. Next, the ExternalSecret CRD uses either the SecretStore or ClusterSecretStore to gain access to the actual secret from the Vault server and creates a Kubernetes secret based on the actual secret from Vault to be utilized by the resources configured in the Kubernetes cluster.
Why Should You Use an External Secret Operator?
ESO allows you to manage secrets outside a Kubernetes cluster, while still allowing the secrets to be used within the cluster. Other reasons why this is useful are:
- Improved security: ESO allows you to store sensitive information, such as passwords and API keys, outside of your Kubernetes cluster. This makes it more secure, as sensitive information is not stored within the cluster, reducing the risk of compromise.
- Centralized management: With an ESO, you can manage your secrets in a centralized location, making it easier to manage and maintain.
- Better scalability: External Secret Operators are designed to handle large-scale secrets, making them a great solution for clusters that need to scale.
- Improved performance: External Secret Operators can provide improved performance as they are designed to handle secrets efficiently, reducing the load on your cluster.
- Integration with other tools: External Secret Operators can be integrated with other tools and systems, allowing you to leverage existing tools and processes to manage your secrets.
Configuring a Vault Production-Ready Server
You can find the manifest files and vault configuration files in this GitHub repository.
Prior to getting started with the external secret operator, we’ll configure the vault first by installing the vault and spinning up a vault production-ready server as the vault server provides a secure and centralized location to store and manage secrets. In this server, we will create two keys POSTGRES_USER and POSTGRES_PASSWORD, stored them in a vault, which we will use later to deploy a PostgreSQL database.
To start, retrieve, and add the GPG key for the Hashicorp apt repository into your package manager. This allows your system to verify signed packages from the Hashicorp package repository:
curl -fsSL https://apt.releases.hashicorp.com/gpg | sudo apt-key add -
Add the Hashicorp release repository to the apt sources list, allowing for the installation of the Hashicorp software on your machine:
sudo apt-add-repository "deb [arch=amd64] \
https://apt.releases.hashicorp.com $(lsb_release -cs) main"
Install the Vault package via APT using the following command.
sudo apt install vault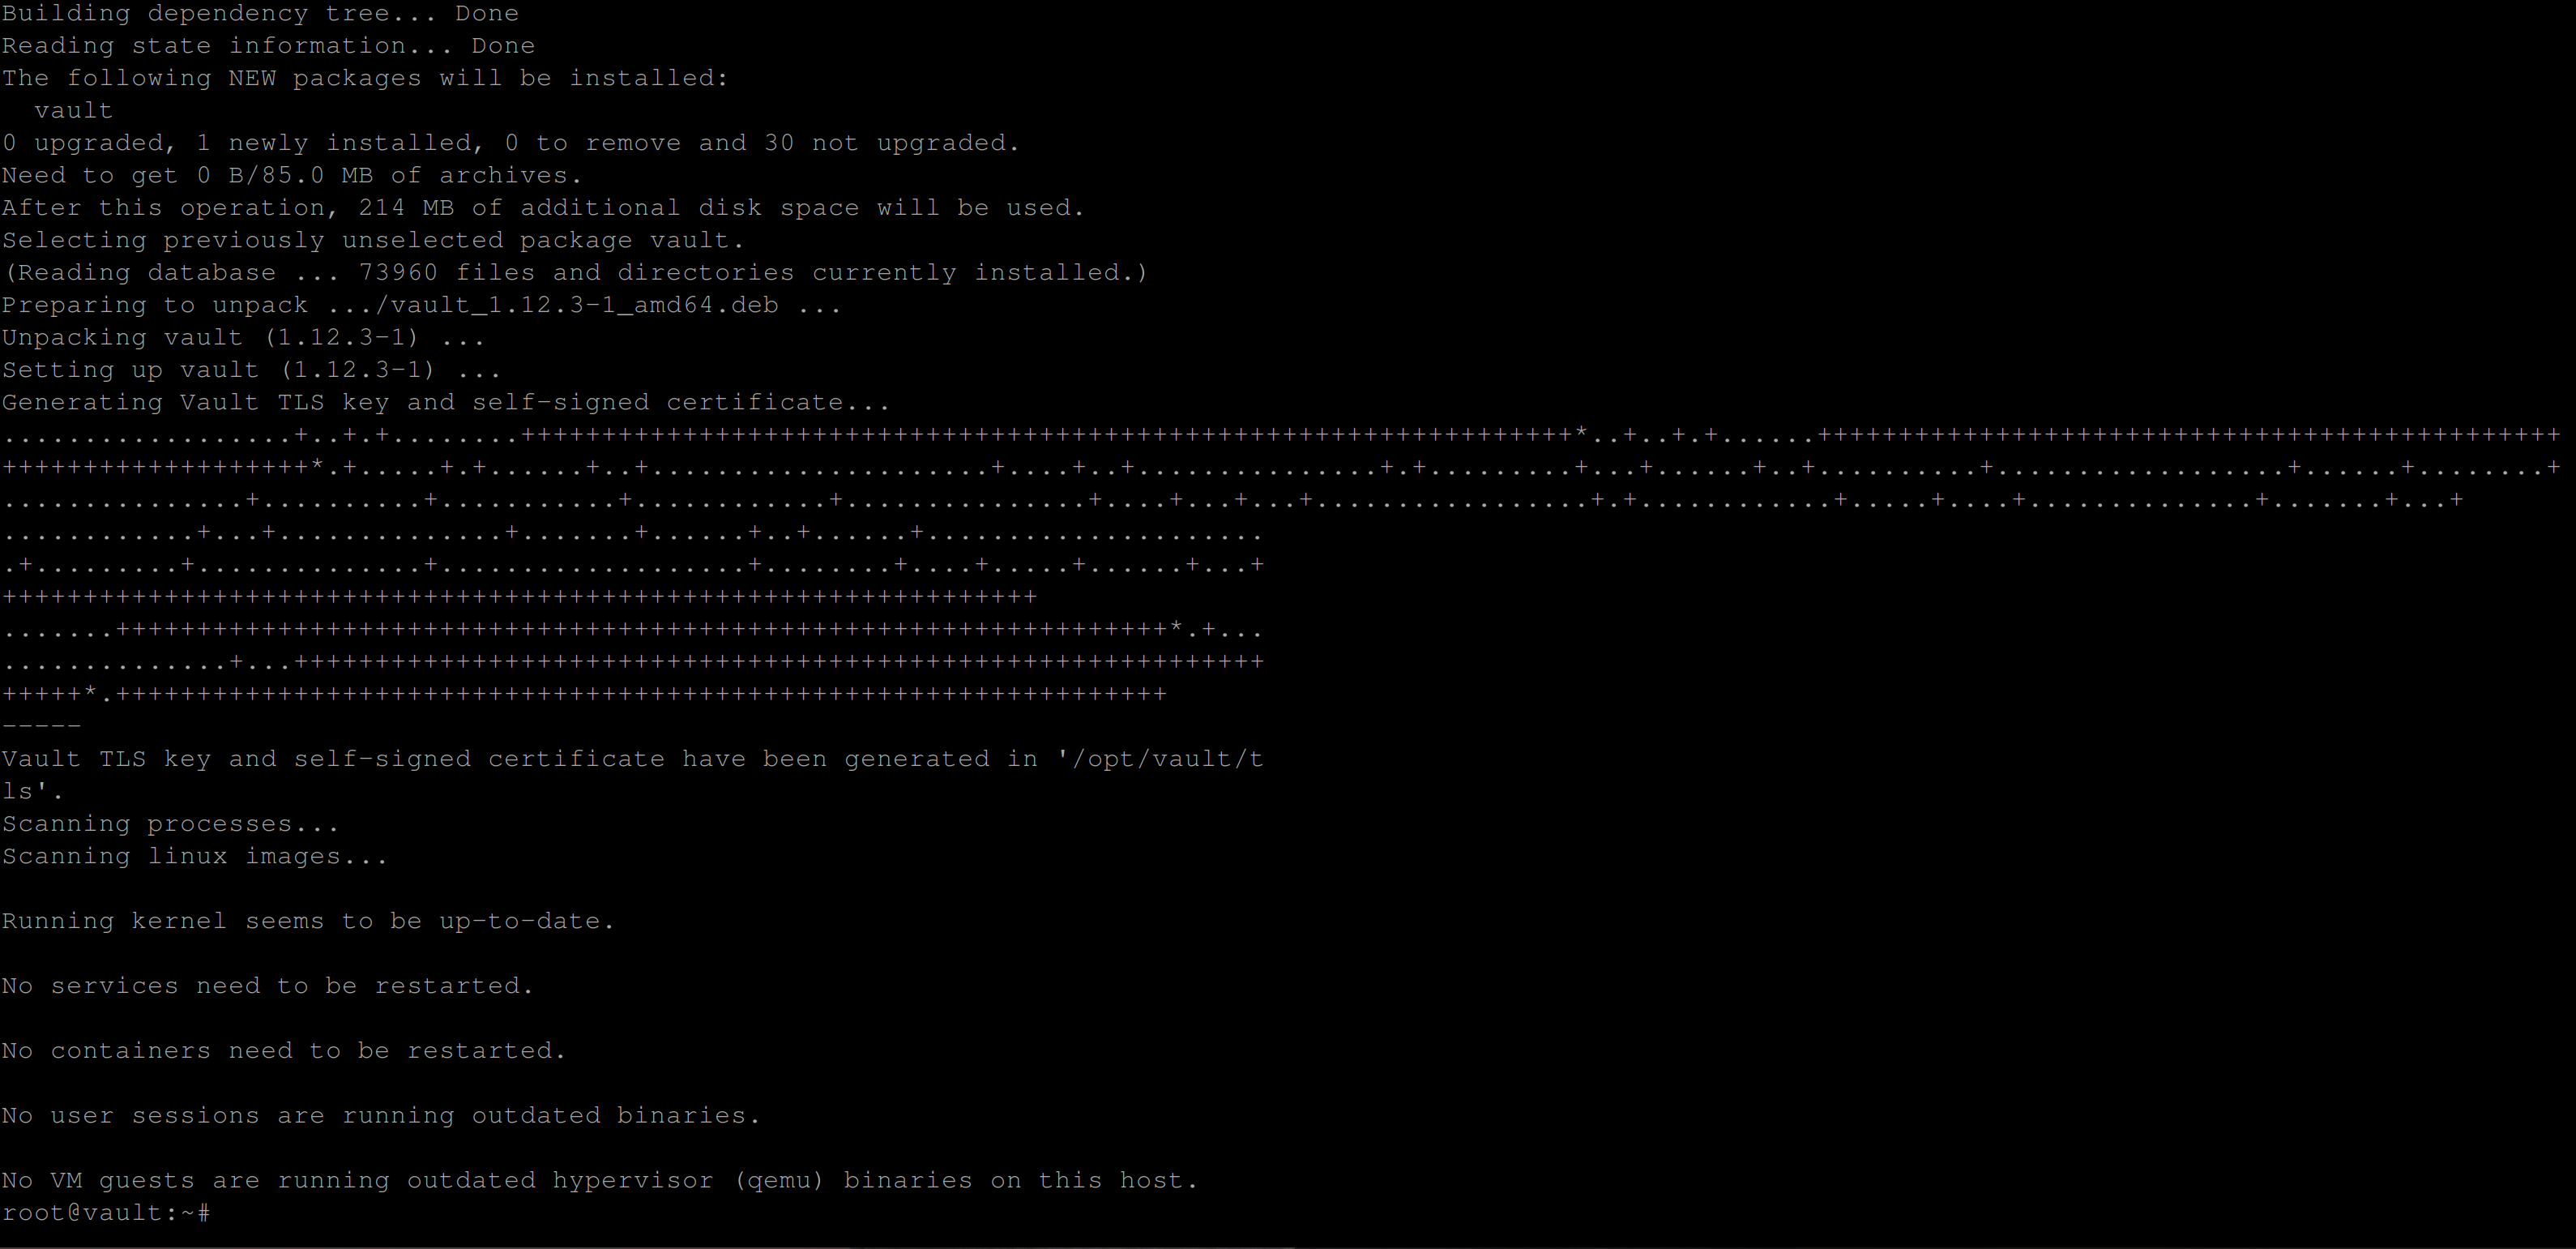
With the Vault package installed, we can spin up a vault server /instance to use as a centralized platform for managing secrets.
Confirm if vault was installed successfully with the below command:
vault --versionYou should have some version outputted to you if the installation was successful:

Spinning Up a Vault Server
Since you now have vault installed, the next step is to spin up a vault server and create some secrets in it. This step is important as the vault server serves as the main component of all our vault operations (creating secrets, deleting secrets, etc)
Create a hcl file and paste in the following configuration settings, you can name this file what you want, this tutorial uses vault-config.hcl.
This configuration file will create a standalone instance of HashiCorp Vault:
cat <<EOF >> vault-config.hcl
listener "tcp" {
address = "0.0.0.0:8200"
tls_disable = "true"
}

storage "raft" {
path = "./vault/data"
node_id = "node1"
}
cluster_addr = "http://127.0.0.1:8201"
api_addr = "http://127.0.0.1:8200"
EOF
Confirm the file was created and populated with the configuration settings by executing the command below:
cat vault-config.hclIf you have the below output then the file exists and is populated with the configuration settings:

Create the vault directory that vault will use to store the data when running in server mode with the raft storage backend:
The command below will create this directory if it doesn’t exist.
mkdir -p vault/dataInitialize the vault server using the vault-config.hcl file:
vault server -config=vault-config.hclOnce the server is up, take note of the Api address. You’ll need this address when you want to connect to the vault server.

Open up another terminal and execute the following command, this command allows you to connect to the vault server:
export VAULT_ADDR=http://127.0.0.1:8200Initialize the vault server with the following command:
vault operator initThis command will return five unseal keys and an initial root token once executed. Make sure to copy the unseal keys and the initial root token to where you can easily access them as they will be used to gain administrative access to the vault server. If you lose access to them, you lose administrative access to the vault server.

Export the VAULT_TOKEN environment variable to the value of your Initial root Token using the following command:
This will provide the root token value which will be used to perform privileged operations on the vault server.
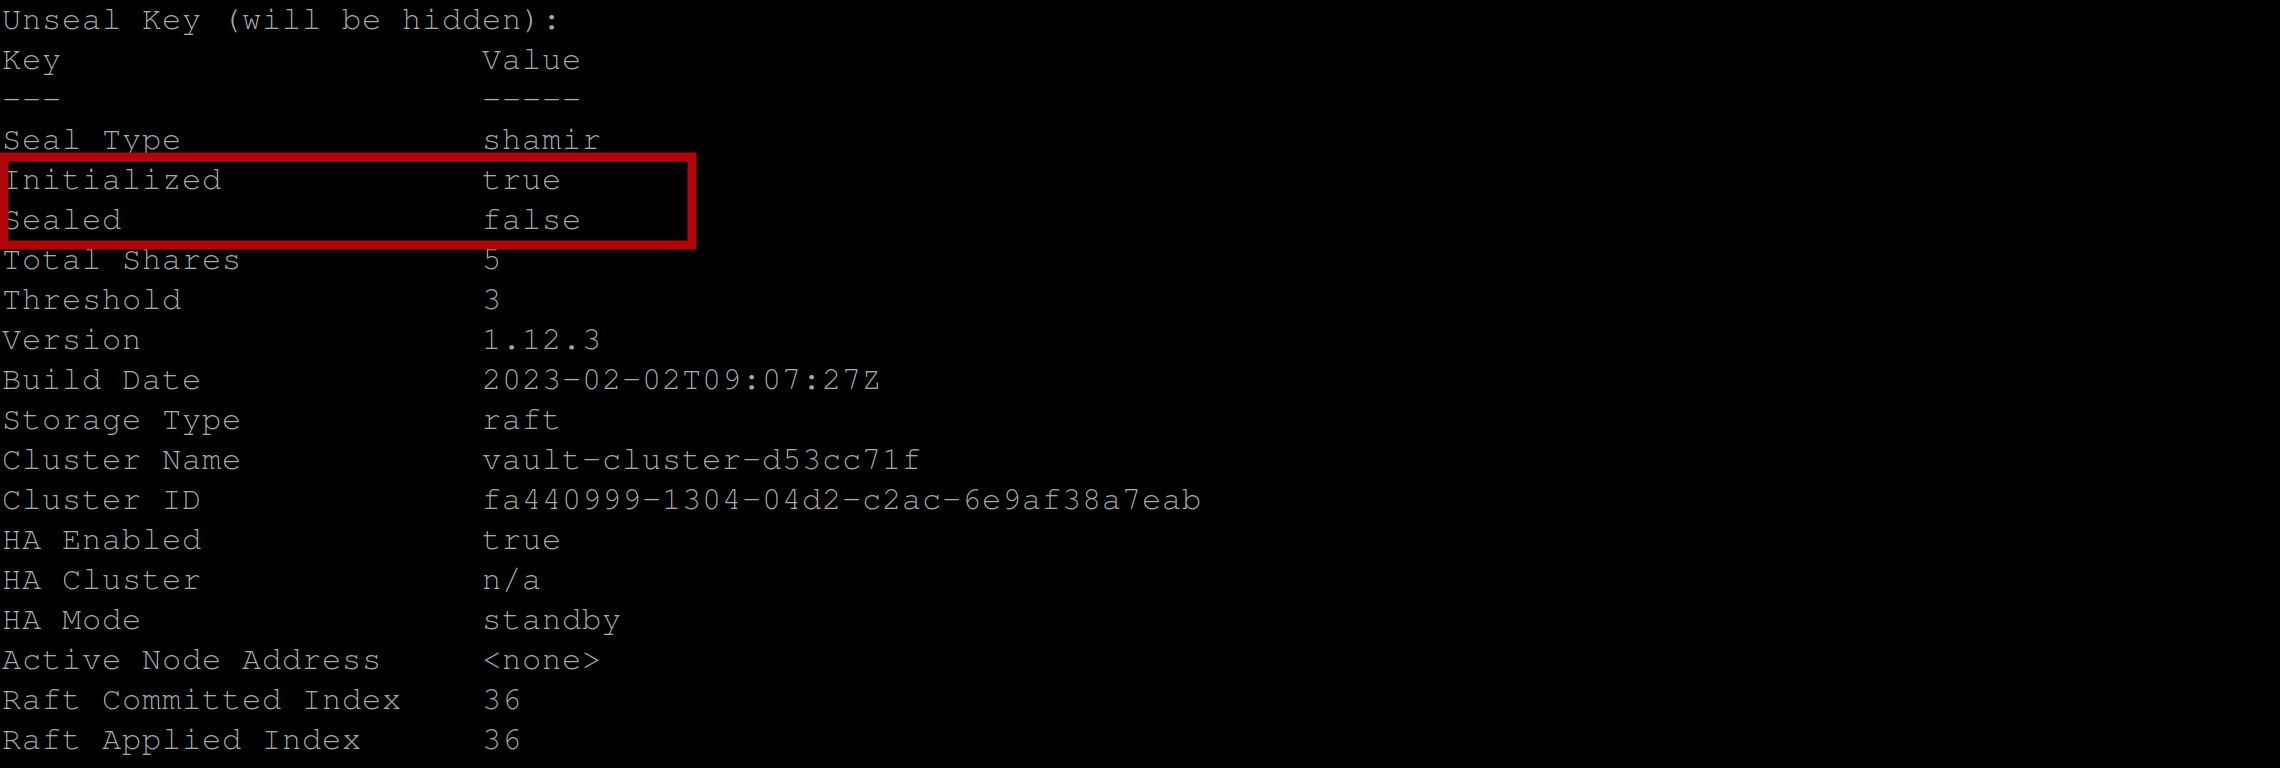
export VAULT_TOKEN=<INITIAL_ROOT_TOKEN_VALUE>A vault server is sealed by default when it is started, you need to unseal the Vault server so you can get access to the vault server and the data stored in it. To unseal the server, a quorum of key shares must be provided.
Run the command below to provide one of the key shares and unseal the server:
vault operator unsealBe sure to repeat this step thrice with different unseal keys until you have the below output:
Enable a key-value secrets engine secret engine at a specified path in Vault using the following command, this configures Vault to allow secrets to be stored and retrieved using a key-value (K-V) store approach:
The command below will use a key-value secret engine (kv) at a specified path called data. You can choose to name your path whatever you like.
vault secrets enable -path=data kv
Insert a secret using the following command:
This command stores a key-value pair in a data path called postgres in the Vault server. The values stored are POSTGRES_USER=admin and POSTGRES_PASSWORD=123456.
vault kv put data/postgres POSTGRES_USER=admin POSTGRES_PASSWORD=123456
Now run the following command to read this secret:
The command retrieves the key-value pairs stored in the postgres path of the datasecret engine in Hashicorp Vault.
vault kv get data/postgres
Define the policy rules to allow the ESO to read and retrieve secrets stored in Vault using the following command:
vault policy write external-secret-operator-policy -<<EOF
path "data/postgres" {
  capabilities = ["read"]
}
EOF
Assign the policy to the ESO by creating an authentication token with the necessary permissions using the command below:
vault token create -policy="external-secret-operator-policy" -n exampleBe sure to copy the token to somewhere you can easily access:

Fetching Secrets from Hashicorp Vault With Eso
Now that you have the Vault server up and have added some secret to it, you are now ready to use the External Secret Operator (ESO) to fetch and use that secret from your HashiCorp vault server.
Installing the External Secret Operator via Helm
To use the External Secret operator, you need to first install it in your Kubernetes cluster. We will install it via Helm. You can check for other means of installation guide.
First, you need to add the External Secrets repository using the following command:
helm repo add external-secrets https://charts.external-secrets.io
This command adds the external-secrets repository to your local Helm chart repository list, located at the URL “https://charts.external-secrets.io”.
Ensure that you have access to the latest version of the external secret operator chart using the following command:
helm repo update
Now install the External Secret Operator using the following command:
helm install external-secrets \
    external-secrets/external-secrets \
    -n external-secrets \
    --create-namespace \
    --set installCRDs=true
This command installs the external-secrets package using the Helm package manager. The package is sourced from the external-secrets repository and the installation process creates a new namespace named external-secrets and sets the installCRDs option to true so the Custom Resource Definitions for External Secrets Operator are installed with it (the ClusterSecretStore, SecretStore and ExternalSecret CRDs).
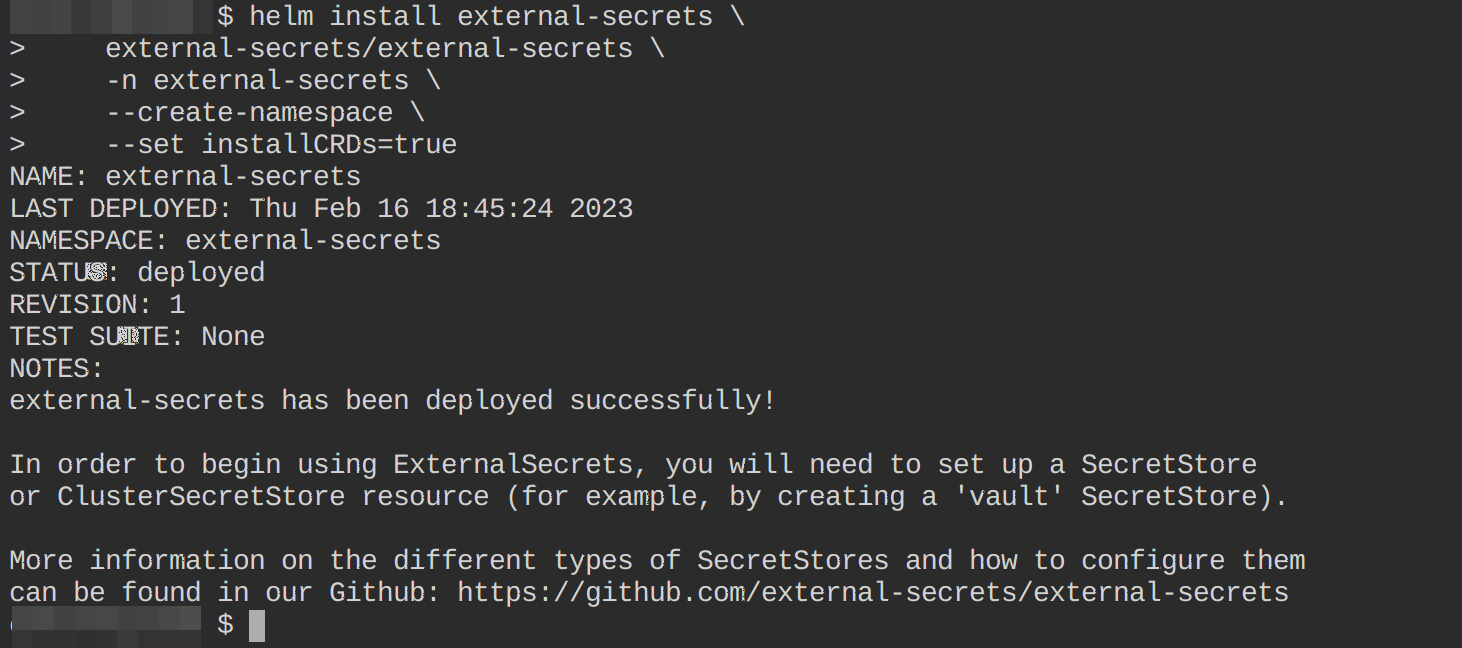
Confirm if the external-secret chart is up and running using the following command:
kubectl get all -n external-secrets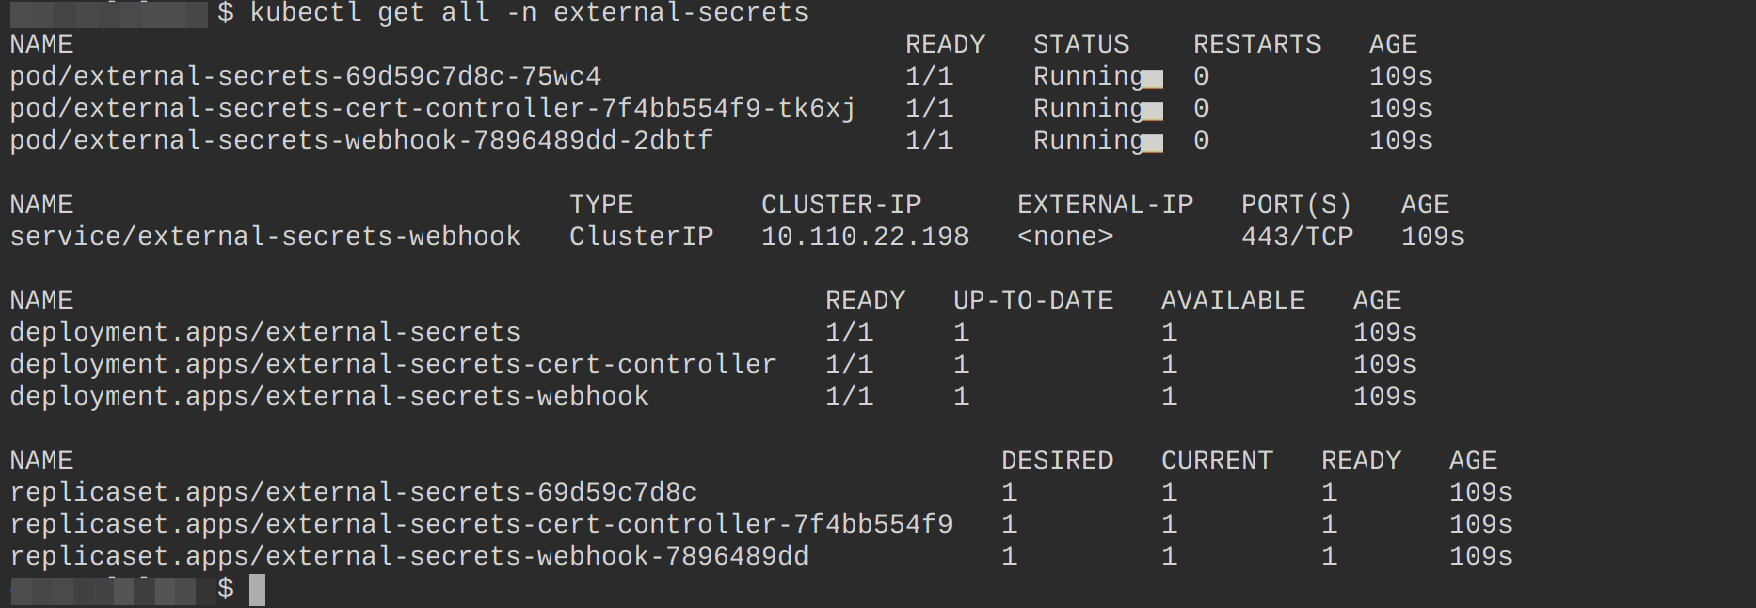
Creating a Cluster Secret Store
A clusterSecretStore is a resource that contains references to the secrets that have the credentials to access a third-party secret management system (HashiCorp Vault in this context). It is one of the Custom Resource Definitions that the External secret operator comes with and It can be referenced from all namespaces within your cluster to provide a central gateway to your secrets management system.
Prior to creating the clusterSecretStore resource, you need to add your vault token inside your Kubernetes cluster. This could be a policy token or your initial root token. Doing this will enable Kubernetes to communicate with Vault.
Use the following command to create this token:
kubectl create secret generic vault-token --from-literal=token=POLICY-TOKEN
Confirm this secret is up and running using the following kubectl command;
kubectl get secretsYou should have the following output:

Create a file cluster-store.yaml and paste into it the following configuration settings; you can name this file whatever you want.
This file will create a ClusterSecretStore resource in your Kubernetes cluster using Vault as the provider.
#  cluster-store.yaml
apiVersion: external-secrets.io/v1beta1
kind: ClusterSecretStore #Kubernetes resource type
metadata:
  name: vault-backend #resource name
spec:
  provider:
    vault: #specifies vault as the provider
      server: "https://your-domain:8200" #the address of your vault instance
      path: "data" #path for accessing the secrets
      version: "v1" #Vault API version
      auth:
        tokenSecretRef:
          name: "vault-token" #Use a secret called vault-token
          key: "token" #Use this key to access the vault token
Go ahead and apply this file to your Kubernetes cluster using the following kubectl command:
kubectl apply -f cluster-store.yaml
Confirm this resource is active by executing the following kubectl command:
kubectl get clustersecretstoreThe below output indicates that this resource is Valid:

Creating an External Secret
Now, we will fetch our Vault secrets using the ExternalSecret CRD. An ExternalSecret resource is the second custom resource definition that comes with the external secret operator. When this resource is created, the external secret operator will interact with the ClusterSecretStore to retrieve the specified secret and create the corresponding Kubernetes secret resource in the cluster.
Create a file and add the below configuration settings - this tutorial calls the file ex-secrets.yaml
# ex-secrets.yaml
apiVersion: external-secrets.io/v1beta1
kind: ExternalSecret
metadata:
  name: external-secret
spec:
  refreshInterval: "15s" #This specifies the time interval at which \
  the ExternalSecret controller will refresh the secrets.
  secretStoreRef: # This object contains the reference to the \
  Vault secret store to be used.
    name: vault-backend
    kind: ClusterSecretStore
  target: #This specifies the target Kubernetes secret that the \
  #ExternalSecret will create.
    name: postgres-secret #The name of the Kubernetes secret that
    #will be created.
    creationPolicy: Owner # In this case, the ExternalSecret will \
    #act as the owner of the target Kubernetes Secret.
  data: # This is an array of secret key-value pairs that the \
  #ExternalSecret will retrieve from the Vault secret store and store \
  #in the Kubernetes secret.
    - secretKey: POSTGRES_USER #This specifies the key name for the \
    #secret value in the Kubernetes secret.
      remoteRef: #This is an object that contains the reference to the \
      #secret in the Vault secret store.
        key: data/postgres # This specifies the path to the secret \
        #in the Vault secret store
        property: POSTGRES_USER #This specifies the name of the \
        #secret property to retrieve from the Vault secret.
    - secretKey: POSTGRES_PASSWORD
      remoteRef:
        key: data/postgres
        property: POSTGRES_PASSWORD
This code defines a Custom Resource Definition (CRD) of type ExternalSecret in the cluster.
- The
ExternalSecretresource specifies the interval at which to refresh the target secret, the name of theClusterSecretStorethat contains the secret, the target secret to be updated and the properties in the remote secret that will be mapped to the target secret. - The
targetfield specifies the name of the target Kubernetes secret that the external secret data will be written to and the policy for creating it if it does not already exist. - The
datafield maps the properties in the remote secret to the target secret.
Create this resource by executing the below kubectl command:
kubectl apply -f ex-secrets.yaml
Confirm this resource has been successfully created by executing the following commands:
#lists all the external secret resources that have been \
#created in your cluster in the default namespace
kubectl get externalsecret
#lists all the CRDs that comes with the ESO that you have \
#configured in your cluster in the default namespace
kubectl get externalsecrets
Confirm the ExternalSecret resource created the postgres-secret and it was configured to using the command below:
kubectl get secretsYou should see the secret postgres-secret created as shown below:

Confirm the keys contained in this secret using the following command:
kubectl describe secret postgres-secret
Deploying a Postgres Database for Testing
Since we have used the ExternalSecret resource to create a secret in our Kubernetes cluster, let’s see if we can use this secret, by injecting it into a Pod. To confirm, we will create a PostgreSQL instance and use the postgres-secret as an environment variable.
Create a file and paste in the below configuration settings, this tutorial calls this file postgres.yaml
# postgres.yaml
apiVersion: v1
kind: Pod
metadata:
  name: postgres-pod
  labels:
    app: postgres
spec:
  containers:
    - name: postgres
      image: postgres
      env:
        - name: POSTGRES_USER
          valueFrom:
            secretKeyRef:
              name: postgres-secret
              key: POSTGRES_USER
        - name: POSTGRES_PASSWORD
          valueFrom:
            secretKeyRef:
              name: postgres-secret
              key: POSTGRES_PASSWORD
      ports:
        - containerPort: 5432
Create this resource and confirm if it is running using the following commands:
kubectl apply -f postgres.yaml
kubectl get pods
Run the following commands to see if you can utilize the postgres-secretcreated by the ESO to log into the postgres-pod container:
kubectl exec -it postgres-pod bash
psql --username=admin
Using a SecretStore with the ExternalSecret Resource
Just like I mentioned earlier, the external secrets operator extends the Kubernetes API with three custom resource definitions. And up until now, we have seen how to make use of two of those resources, the ClusterSecretStore and the ExternalSecret resources. In this section, we will use the third resource, the SecretStore.
What Is the SecretStore Resource?
The SecretStore resource is a name-spaced resource, which means that it can only be used to store secrets in the same namespace as the SecretStore object.
First, delete the ClusterSecretStore resource kubectl delete ClusterSecretStore vault-backend, the vault-token secret kubectl delete secret vault-token and the postgres-secret secret created earlier by the ExternalSecret resource.
Create a namespace - example. This is the namespace we will create the SecretStore resource in.
kubectl create namespace example
Creating a SecretStore Resource
First, create a secret that the ExternalSecret resource will use to gain access to your secret from Vault in a namespace - example
kubectl create secret generic vault-token \
--from-literal=token=YOUR-VAULT-POLICY-TOKEN -n example
Confirm this secret has been created, using the following command:
kubectl get secrets -n example
Create a file and paste into it the following configuration settings to create a SecretStore resource. This tutorial calls this file ss.yaml.
# ss.yaml
apiVersion: external-secrets.io/v1beta1
kind: SecretStore
metadata:
  name: vault-backend
  namespace: example
spec:
  provider:
    vault:
      server: "https://your-domain:8200"
      path: "data"
      version: "v1"
      auth:
        tokenSecretRef:
          name: "vault-token"
          key: "token"
Create and confirm this resource is up and running using the below command:
kubectl apply -f ss.yaml
kubectl get secretstore -n example
Now edit the ExternalSecret configuration file ex-secrets.yaml to use a SecretStore as the SecretStoreRef and configure it to be created in the example namespace as shown below:
apiVersion: external-secrets.io/v1beta1
kind: ExternalSecret
metadata:
  name: external-secret
  namespace: example
spec:
  refreshInterval: "15s"
  secretStoreRef:
    name: vault-backend
    kind: SecretStore
  target:
    name: postgres-secret
    creationPolicy: Owner
  data:
    - secretKey: POSTGRES_USER
      remoteRef:
        key: data/postgres
        property: POSTGRES_USER
    - secretKey: POSTGRES_PASSWORD
      remoteRef:
        key: data/postgres
        property: POSTGRES_PASSWORD
Execute the following commands to create this resource and confirm if it was created in the example namespace:
kubectl apply -f ex-secrets.yaml
kubectl get externalsecret -n example
Run the command to check for the secret postgres-secret that you expect the ExternalSecret resource to create using the command below:
kubectl get secret -n namespace
Conclusion
In this tutorial, you’ve learned to enhance the security of your Kubernetes secrets using the External Secret Operator and integrating it with HashiCorp vault. You’ve been guided through setting up a ClusterSecretStore, SecretStore, and an ExternalSecret resource. Feel free to experiment with different key management systems as per your requirements.
And now that you’ve boosted your Kubernetes security, why not level up your build automation too? Give Earthly a shot. It could be the next step in optimizing your development workflow.
Earthly makes CI/CD super simple
Fast, repeatable CI/CD with an instantly familiar syntax – like Dockerfile and Makefile had a baby.


