How To Deploy a Kubernetes Cluster Using the CRI-O Container Runtime
We’re Earthly. We make building software simpler and faster with containerization. If you’re using Kubernetes, Earthly could be your new best friend. It can streamline your container build process. Check it out.
Are you tired of managing your containerized applications manually? Do you want a more efficient and automated way to deploy and manage your applications? Look no further than Kubernetes!
Kubernetes is a powerful platform for managing containerized applications, providing a unified API for managing containers and their associated resources, such as networking, storage, and security. And with the ability to work with different container runtimes like Docker, Containerd, CRI-O etc. you can choose the runtime that’s best for your needs.
CRI-O is an optimized container engine specifically designed for Kubernetes. With CRI-O, you can enjoy all the benefits of Kubernetes while using a container runtime that is tailored to your needs.
In this article, you will learn how to deploy a Kubernetes cluster using the CRI-O container runtime. You’ll learn everything you need to know, from setting up the necessary components to configuring your cluster and deploying your first application.
Prerequisite
To follow along in this tutorial, you’ll need the following:
- Understanding of Kubernetes and Linux commands.
- This tutorial uses a Linux machine with an Ubuntu 22.04 LTS (recommended) distribution. Any other version will work fine too.
- Virtual machines (VMs) as master and worker with at least the minimum specifications below:
| Nodes | Specifications | IP Address |
|---|---|---|
| Master | 2GB RAM and 2CPUs | 170.187.169.145 |
| Worker | 1GB RAM and 1CPU | 170.187.169.226 |
What Is CRI-O?
CRI-O pronounced as (cry-oh) stands for Container Runtime Interface (CRI) for OpenShift (O); It is an open-source project for running Kubernetes containers on Linux operating systems and is designed specifically for Kubernetes, providing a lightweight and optimized runtime for running containers in a Kubernetes cluster. It implements the Kubernetes Container Runtime Interface (CRI), which is a standard interface between Kubernetes and container runtimes.
It is fully compatible with the Kubernetes Container Runtime Interface (CRI) and is designed to provide a secure, stable, and reliable platform for running containerized applications.
Deploying a Kubernetes cluster using the CRI-O container runtime can help you streamline your container management processes, improve the security of your applications, and simplify the overall management of your infrastructure.
Configuring Kernel Modules, Sysctl Settings, and Swap
Prior to setting up a cluster with CRI-O, the Kubernetes official documentation instructs that you have the following requirements setup on all your servers (both master and worker nodes) before you can begin to setup Kubernetes; these requirements include enabling kernel modules, configuring some sysctl settings, and disabling swap.
Swap is a space on a hard disk that is used as a temporary storage area for data that cannot be stored in RAM at that time. When the system runs out of physical memory (RAM), inactive pages from memory are moved to the swap space, freeing up RAM for other tasks. The swap space is used by the operating system as an extension of the RAM, allowing the system to run more programs or larger programs than it could otherwise handle. Swap is commonly used in modern operating systems like Linux and Windows.
Execute the following command on both of your servers (master and worker node) to disable swap. This step is crucial as leaving swap enabled can interfere with the performance and stability of the Kubernetes cluster:
swapoff -aIn the context of Kubernetes, it is recommended to disable swap space because it can interfere with the performance and stability of the Kubernetes cluster. This is because the Kubernetes scheduler may not be aware of the memory usage on the host system if swap space is enabled, which can lead to issues with pod scheduling and resource allocation.
So, the swapoff -a command disables all swap devices or files on a Linux system, ensuring that Kubernetes can manage the host system’s memory resources accurately.
Remove any reference to swap space from the /etc/fstab file on both servers using the command below:
sed -i '/swap/d' /etc/fstabThis ensures that your servers will not attempt to activate swap at boot time.
- The
/etc/fstabfile is used to define file systems that are mounted at boot time, including the swap partition or file. - The
sedcommand is a powerful utility used to manipulate text in files or streams. In this case, the command usessedto edit the/etc/fstabfile and remove any line containing the string “swap”.
Now display the status of swap devices or files on your servers using the following command:
swapon -sSince you have turned off swap, you should have no output:

Append the **overlay** and **br_netfilterkernel modules to the/etc/modulesload.d/crio.conf** file which is necessary for the proper functioning of the CRI-O container runtime when your servers reboot.
The overlay module is used to support overlay filesystems, which is a requirement for many container runtimes including CRI-O. Overlay filesystems allow the efficient use of storage space by creating layers on top of each other. This means that multiple containers can share a base image while having their own writable top layer.
Thebr_netfilter module is required for the iptables rules that are used for network address translation (NAT) with bridge networking. Bridge networking is a way to connect multiple containers together into a single network. By using a bridge network, all containers in the network can communicate with each other and with the outside world.
By adding the overlay and br_netfilter modules to the /etc/modules-load.d/crio.conf file, the modules will be loaded automatically at boot time. This ensures that the necessary kernel modules are available for the CRI-O container runtime to function properly. Without these modules, the CRI-O runtime would not be able to properly create and manage containers on the system.
cat >>/etc/modules-load.d/crio.conf<<EOF
overlay
br_netfilter
EOF
Enable the kernel modules for the current session manually using the following commands:
modprobe overlay
modprobe br_netfilter
By running the commands modprobe overlay and modprobe br_netfilter, the necessary kernel modules are loaded into the kernel’s memory. This ensures that the modules are available for use by the CRI-O container runtime for this current session.

Confirm that the kernel modules required by CRI-O are loaded and available on both servers using the following commands:
lsmod | grep overlay
lsmod | grep br_netfilter
Provide networking capabilities to containers by executing the following command:
cat >>/etc/sysctl.d/kubernetes.conf<<EOF
net.bridge.bridge-nf-call-ip6tables = 1
net.bridge.bridge-nf-call-iptables  = 1
net.ipv4.ip_forward                 = 1
EOF
This command will append the following lines net.bridge.bridge-nf-call-ip6tables = 1, net.bridge.bridge-nf-call-iptables = 1, and net.ipv4.ip_forward = 1 to the /etc/sysctl.d/kubernetes.conf file.
These lines set some important kernel parameters that are required for Kubernetes and CRI-O to function properly:
net.bridge.bridge-nf-call-ip6tables = 1andnet.bridge.bridge-nf-call-iptables = 1enable the kernel to forward network traffic between containers using bridge networking. This is important because Kubernetes and CRI-O use bridge networking to create a single network interface for all containers on a given host.net.ipv4.ip_forward = 1enables IP forwarding, which allows packets to be forwarded from one network interface to another. This is important for Kubernetes because it needs to route traffic between different pods in a cluster.
By appending these lines to /etc/sysctl.d/kubernetes.conf, the settings will be applied every time the system boots up. This ensures that the kernel parameters required for Kubernetes and CRI-O are always set correctly.
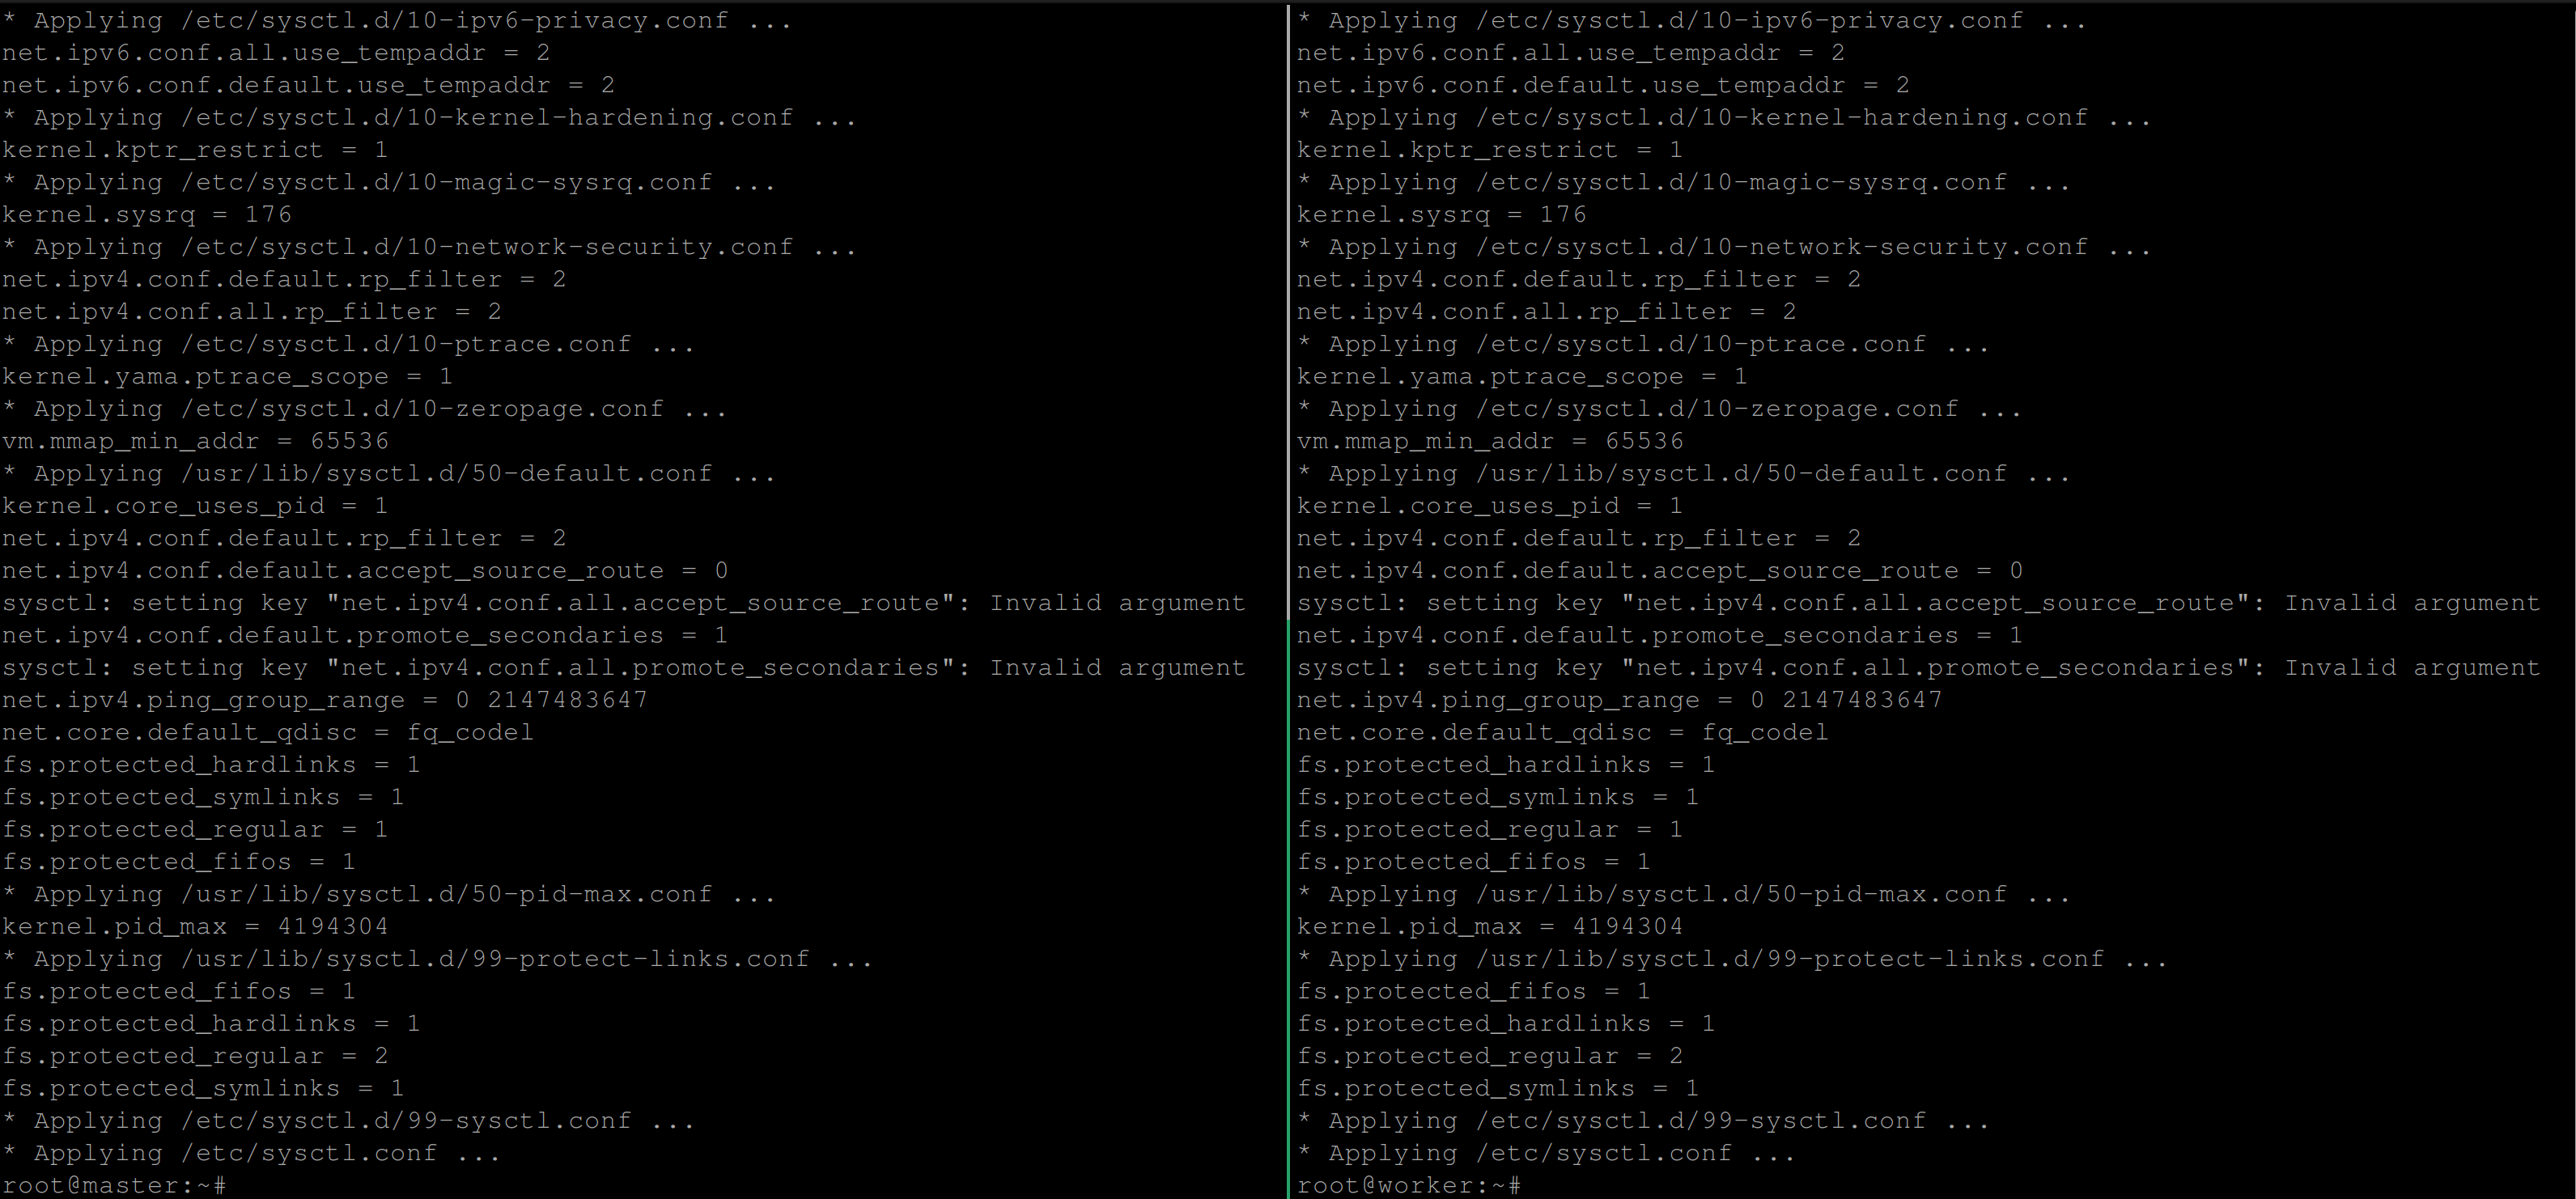
Be sure to run the command below so the sysctl settings above take effect for the current session:
sysctl --systemIf the settings are applied, you should have an output similar to the one below:
Setting Up Firewall
Setting up a firewall when deploying a Kubernetes cluster is important because it helps secure the cluster and prevent unauthorized access to the Kubernetes cluster by blocking incoming traffic from external sources that are not explicitly allowed. It also limits the scope of potential attacks, making it harder for attackers to gain unauthorized access to the cluster.
Therefore, you will follow the steps in this section to set up a firewall on your servers.
Firstly, execute the following command on both servers to enable the Uncomplicated Firewall (UFW) on the system. Once enabled, UFW will start automatically at boot and enforce the firewall rules you configure:
ufw enable
According to the Kubernetes official documentation, the required ports needed for your Kubernetes cluster are as follows. These ports are only to be open on the server you’d like to use as the control plane:
- Port
6443for the Kubernetes API server. - Port
2379:2380for the ETCD server client API. - Port
10250for the Kubelet API. - Port
10259for the kube scheduler. - Port
10257for the Kube controller manager.
# Opening ports for Control Plane
sudo ufw allow 6443/tcp
sudo ufw allow 2379:2380/tcp
sudo ufw allow 10250/tcp
sudo ufw allow 10259/tcp
sudo ufw allow 10257/tcp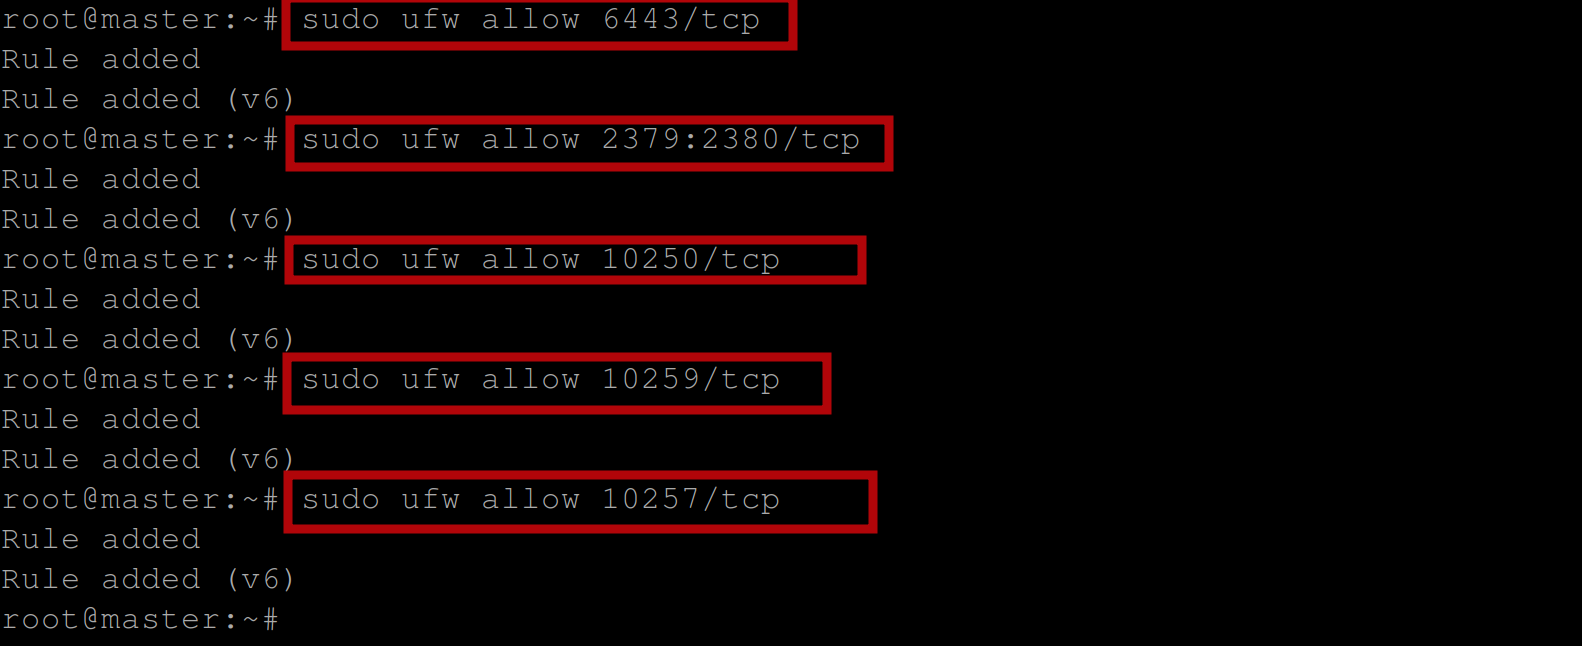
Then execute the following commands on the same server to open ports for the Calico CNI as this is the Kubernetes network plugin we will be using:
# Opening ports for Calico CNI
sudo ufw allow 179/tcp #allows incoming TCP traffic on port 179,
#which is used by the Kubernetes API server for communication
# with the etcd datastore
sudo ufw allow 4789/udp #allows incoming UDP traffic on port 4789,
#which is used by the Kubernetes networking plugin (e.g. Calico)
# for overlay networking.
sudo ufw allow 4789/tcp #allows incoming TCP traffic on port 4789,
#which is also used by the Kubernetes networking plugin for
# overlay networking.
sudo ufw allow 2379/tcp #allows incoming TCP traffic on port 2379,
#which is used by the etcd datastore for communication
# between cluster nodes.
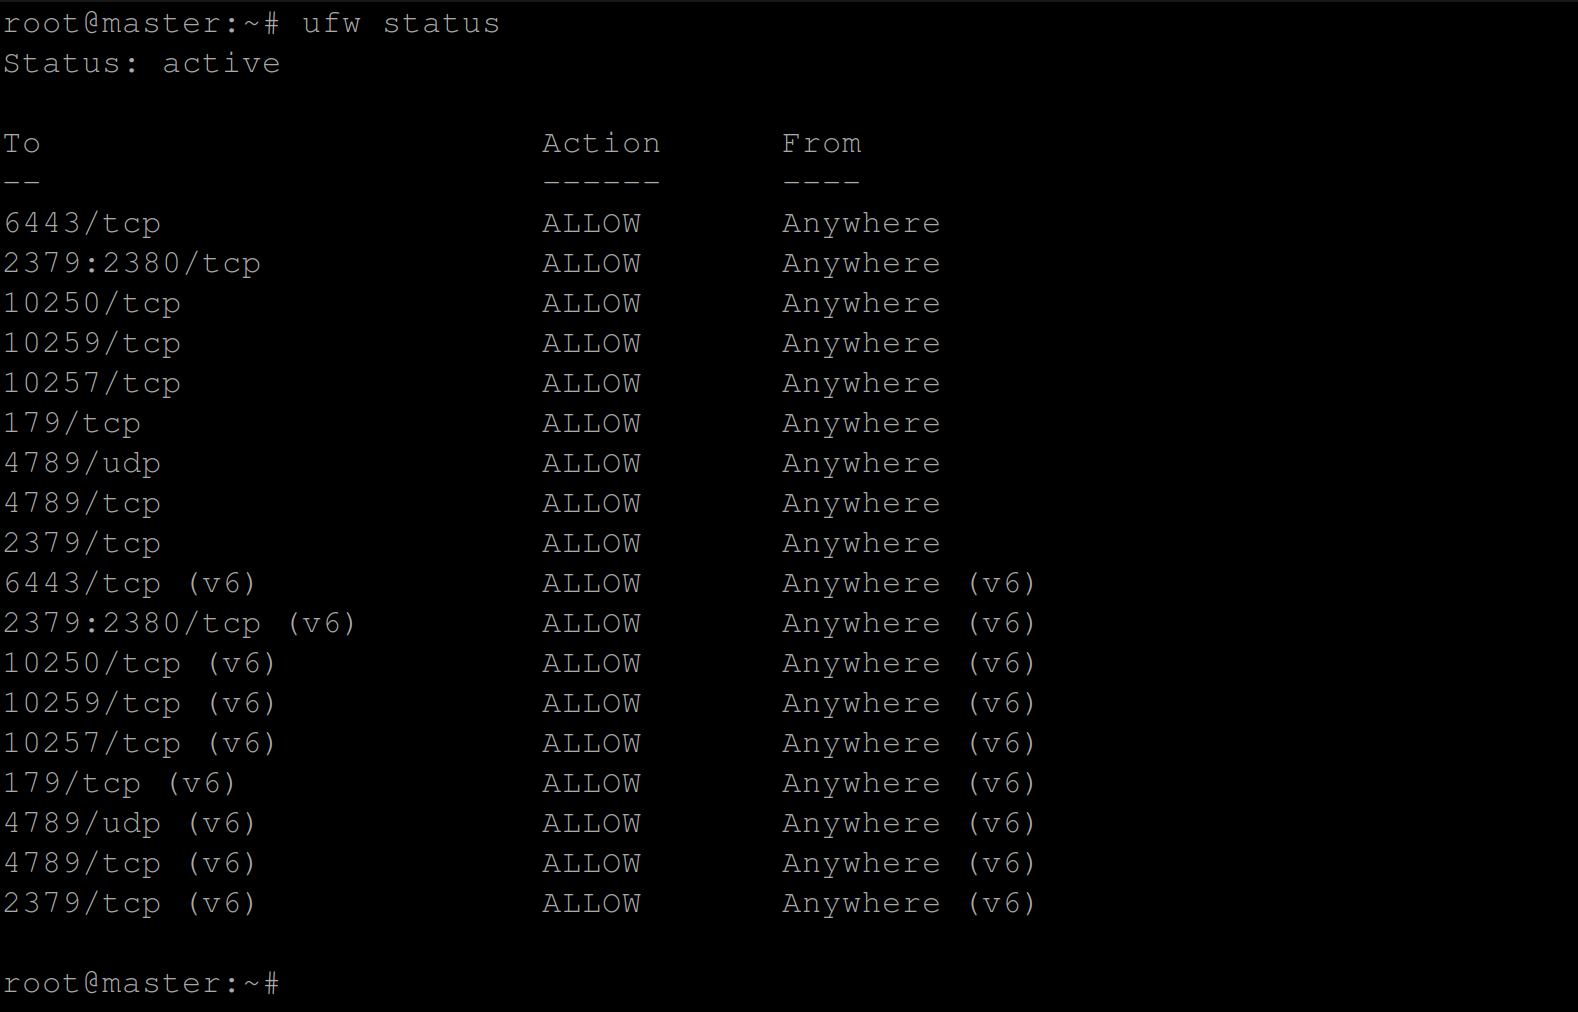
Now display the current status of the Uncomplicated Firewall (UFW) on the supposed control plane using the following command:
sudo ufw statusYou should see a list of the active firewall rules, including which ports are allowed:
Next, run the following commands on the server that will be used as a worker node. If you have multiple worker nodes, execute these commands on all of them:
# Opening ports for Worker Nodes
sudo ufw allow 10250/tcp #Kubelet API
sudo ufw allow 30000:32767/tcp #NodePort Services

# Opening ports for Calico CNI
sudo ufw allow 179/tcp
sudo ufw allow 4789/udp
sudo ufw allow 4789/tcp
sudo ufw allow 2379/tcp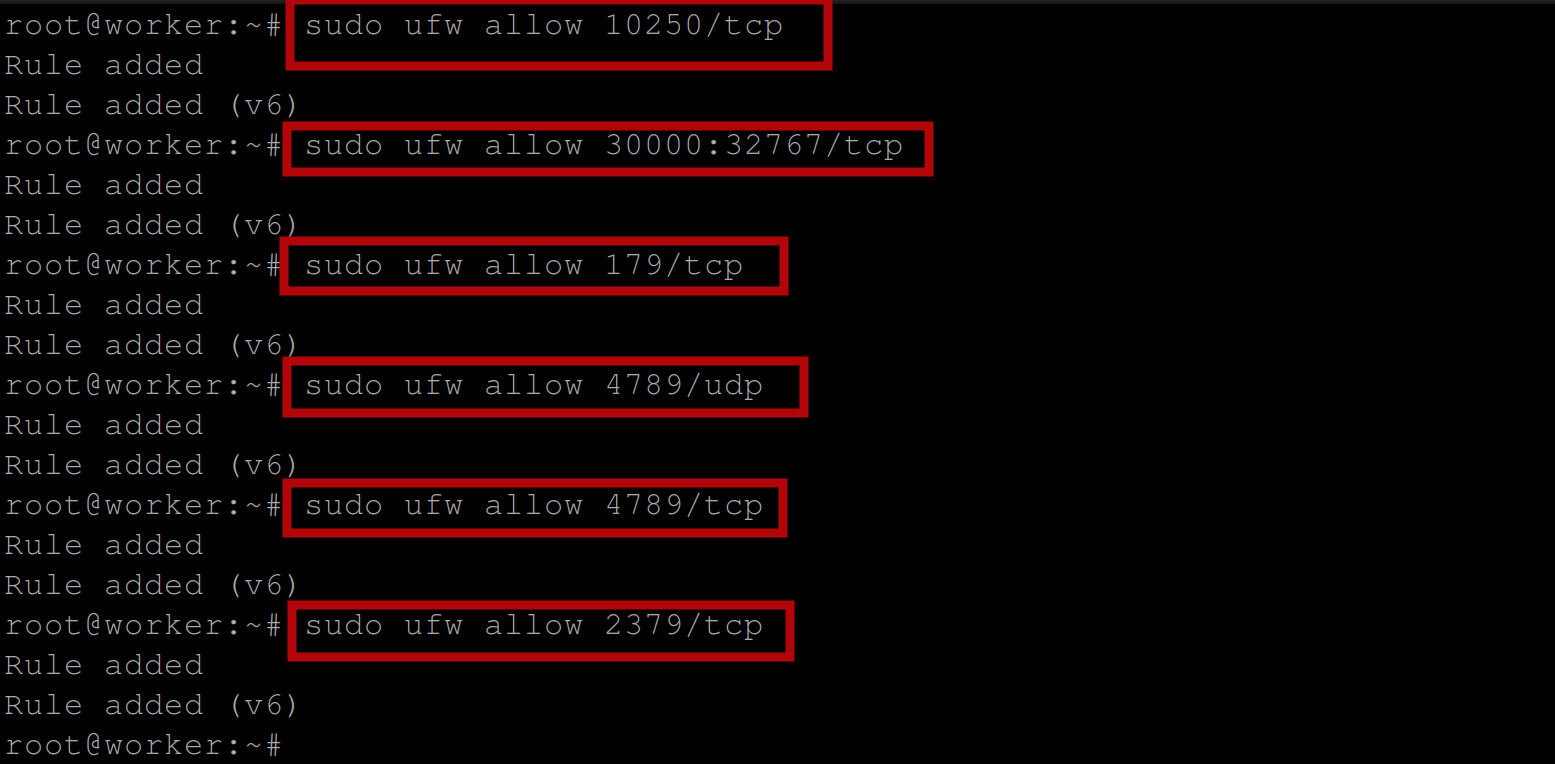
Display the current status of the Uncomplicated Firewall (UFW) on the supposed worker node(s) using the following command:
sudo ufw status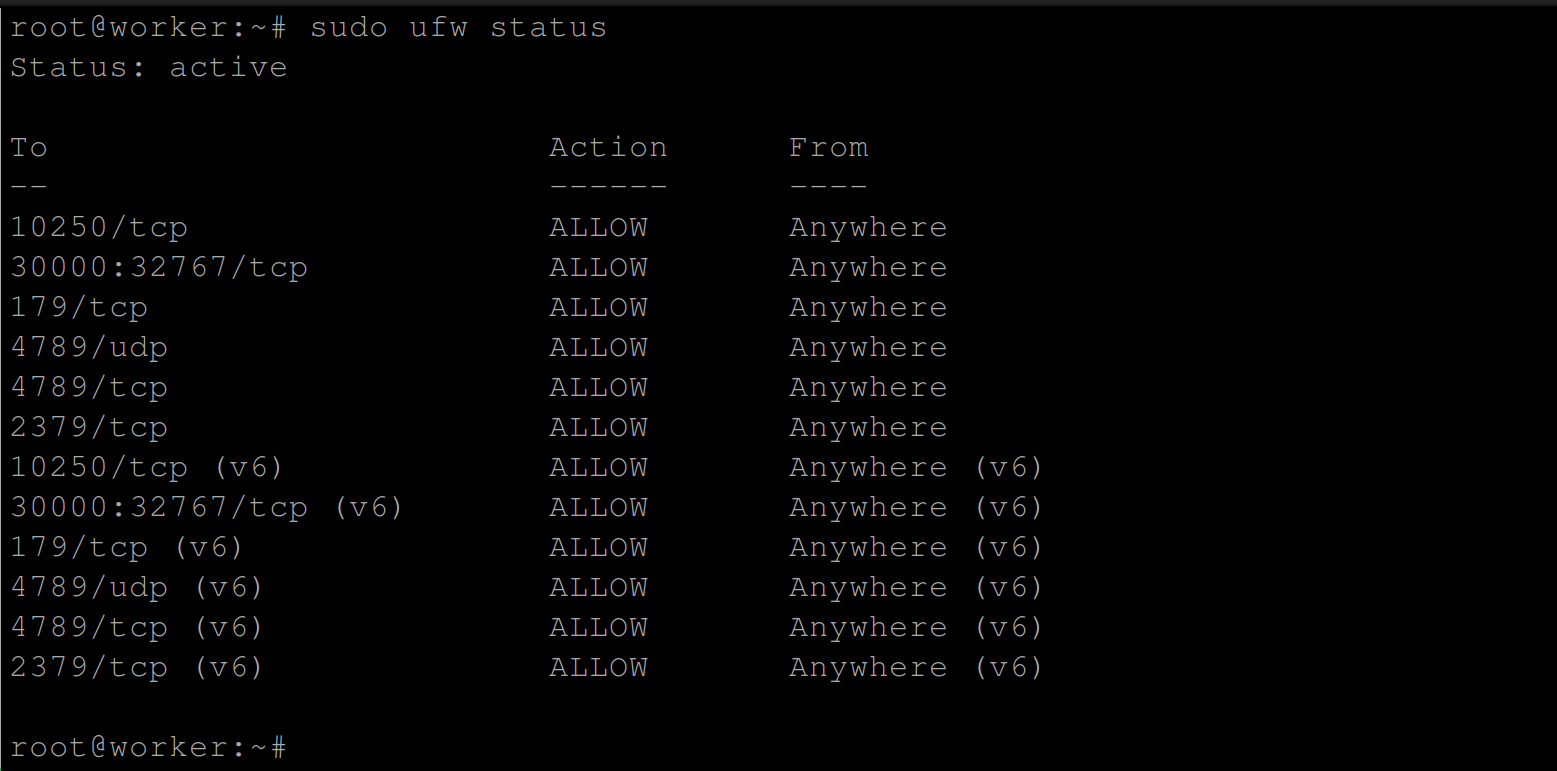
Be sure to also allow connections to your server(s) by adding the following firewall rule sudo ufw allow 22/tcp. That way, you will also have access to the server anytime.
Installing the CRI-O Container Runtime
In Kubernetes, a container runtime is responsible for managing the lifecycle of containers. It is the component that actually runs the container images and provides an interface between Kubernetes and the container. Since the container runtime we will be using is CRI-O, we’ll go ahead to install it on our two servers (master and worker nodes).
Create two environment variables OS* and CRIO-VERSION on all your servers and set them to the following values 22.04 and 1.26 using the commands below:
OS=xUbuntu_22.04
CRIO_VERSION=1.26
This ensures that the correct version of CRI-O is installed on the specific version of the operating system. The OS variable ensures that the package repository used to install the software is the one that corresponds to the operating system version, while the CRIO_VERSION variable ensures that the correct version of the software is installed.
Execute the following commands to add the cri-o repository via apt, so that the package manager can find and install the required packages:
echo "deb https://download.opensuse.org/repositories/devel:/kubic:/libcontainers:/stable/$OS/ /"|sudo tee /etc/apt/sources.list.d/devel:kubic:libcontainers:stable.list
echo "deb http://download.opensuse.org/repositories/devel:/kubic:/libcontainers:/stable:/cri-o:/$CRIO_VERSION/$OS/ /"|sudo tee /etc/apt/sources.list.d/devel:kubic:libcontainers:stable:cri-o:$CRIO_VERSION.list
Download the GPG key of the CRI-O repository via curl:
GPG (GNU Privacy Guard) is a tool used for secure communication and data encryption. A GPG key is a unique code used to verify the authenticity and integrity of a software package or repository.
In the context of the CRI-O repository, downloading the GPG key helps to ensure that the packages we are downloading are genuine and have not been tampered with. This is important for security reasons, as it helps to prevent the installation of malicious software on our system.
curl -L https://download.opensuse.org/repositories/devel:kubic:libcontainers:stable:cri-o:$CRI_VERSION/$OS/Release.key | sudo apt-key --keyring /etc/apt/trusted.gpg.d/libcontainers.gpg add -
curl -L https://download.opensuse.org/repositories/devel:/kubic:/libcontainers:/stable/$OS/Release.key | sudo apt-key --keyring /etc/apt/trusted.gpg.d/libcontainers.gpg add -
Update the package repository and install the CRI-O container runtime along with its dependencies using the following commands:
sudo apt-get update
sudo apt-get install -qq -y cri-o cri-o-runc cri-tools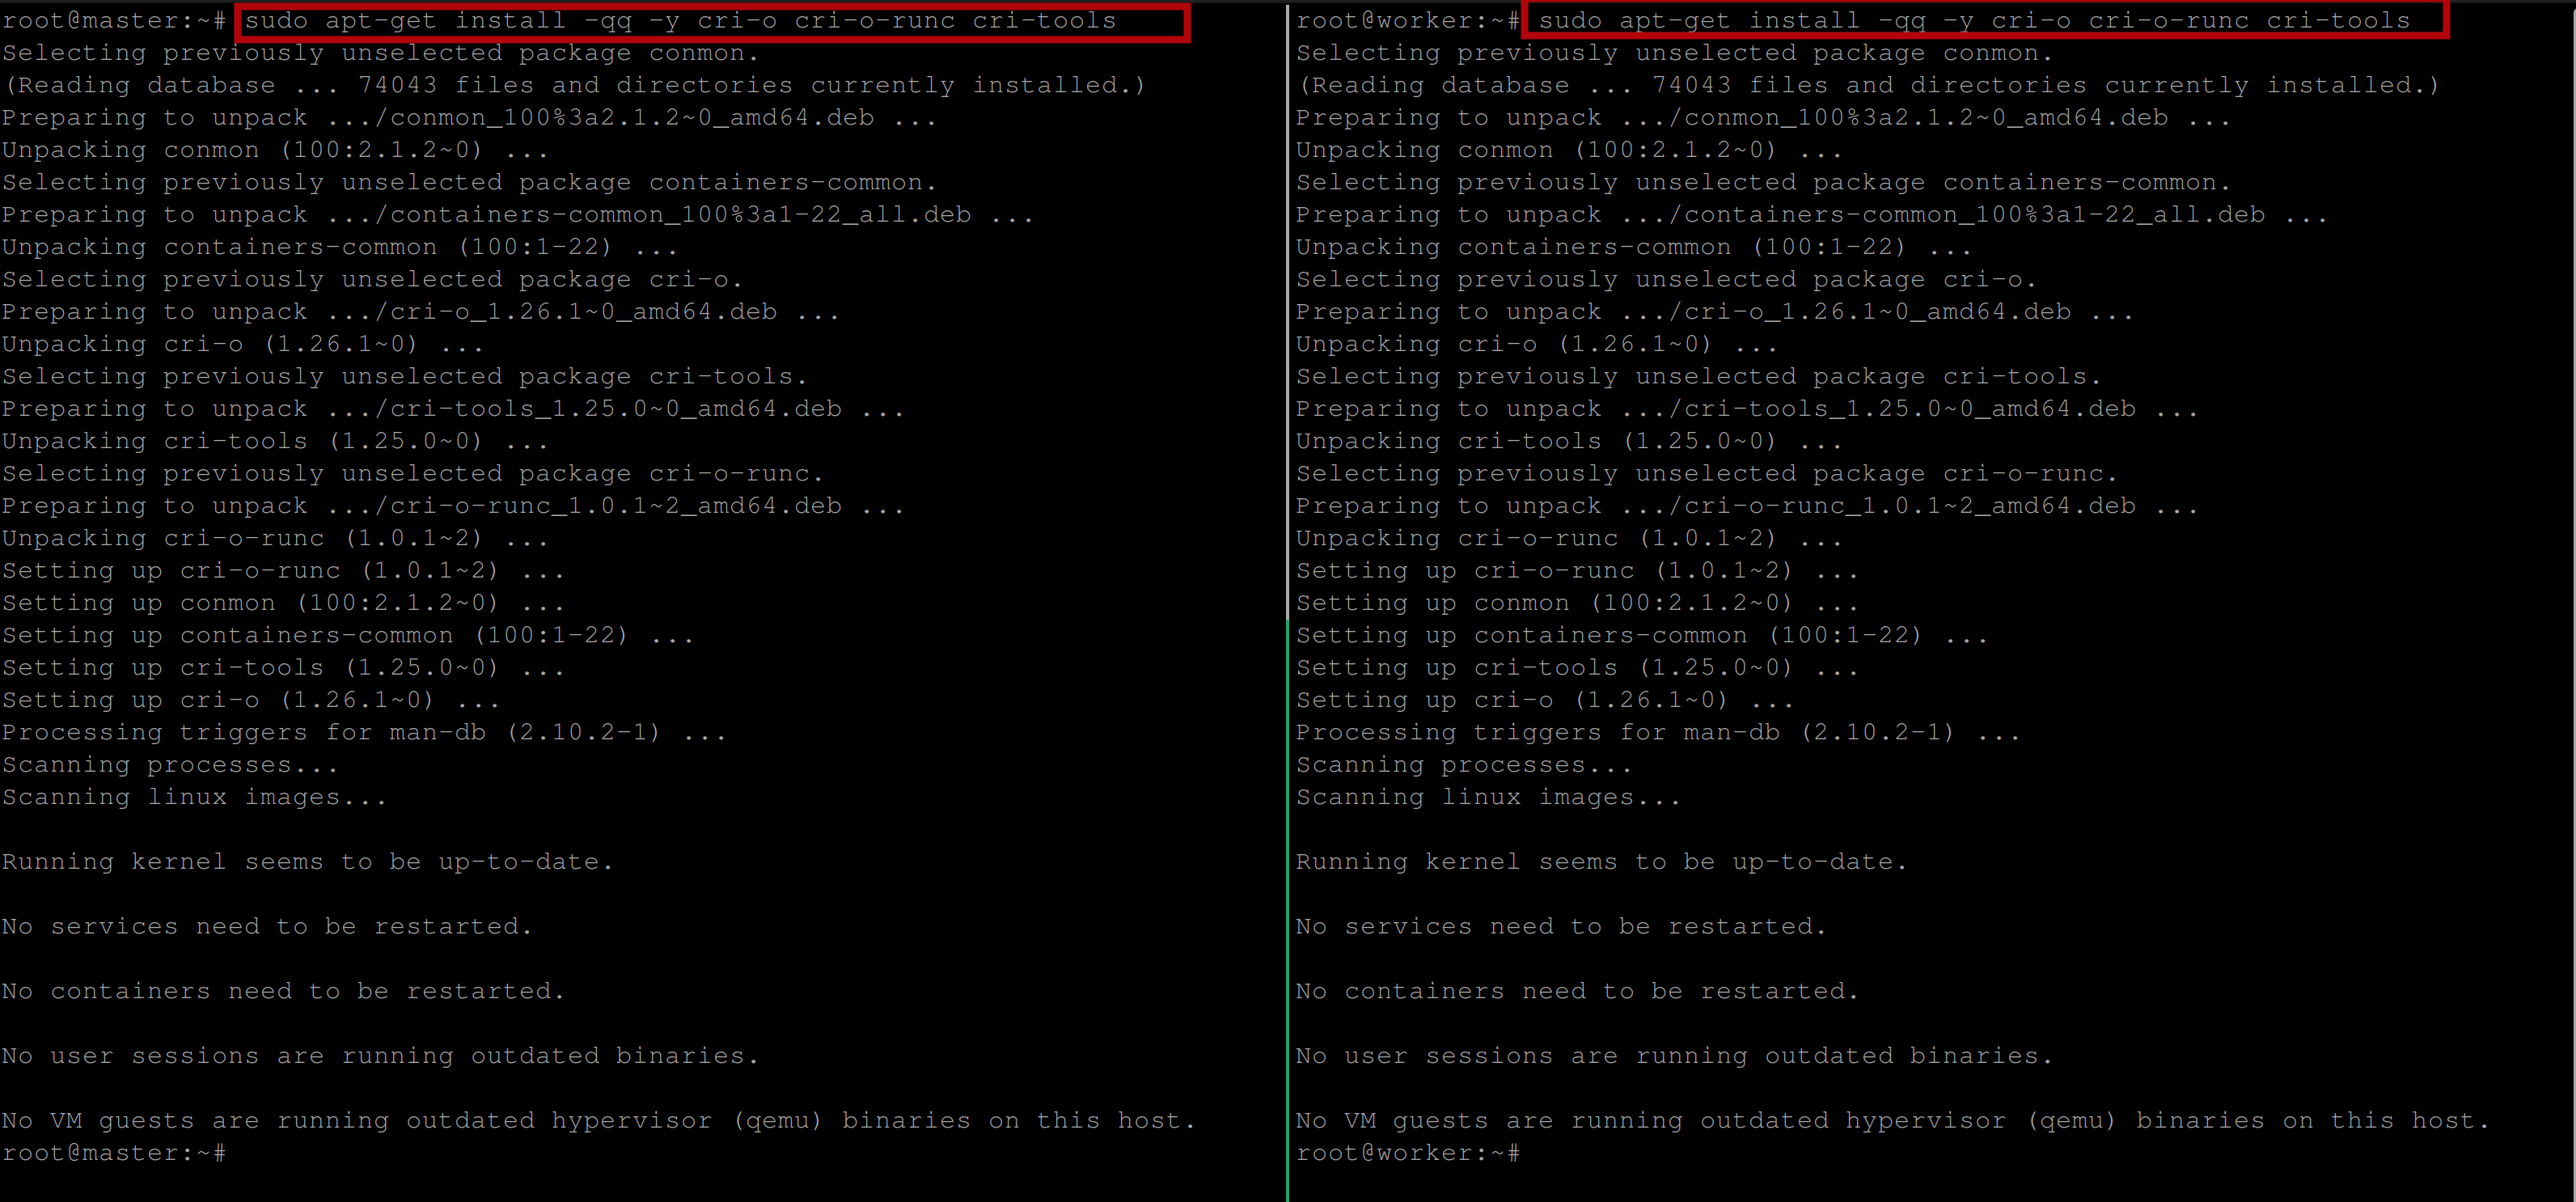
Run the following commands to reload the systemd configuration and then enable and start the CRI-O service:
systemctl daemon-reload
systemctl enable --now crio
Verify the status and configuration of the CRI-O container runtime after installation with the following command:
crictl infoYou should see the following output which implies that the CRI-O container runtime is ready for use:

You can further check the CRI-O version with the following command:
crictl version
Installing Kubernetes Components
Since you have now installed the CRI-O container runtime, the next step is to install the components for Kubernetes. These components are kubeadm, kubelet and kubectl
Add the GPG key for the Kubernetes repository, download the Kubernetes repository, and install the Kubernetes components with the following commands:
# Add GPG key for Kubernetes repository
curl -s https://packages.cloud.google.com/apt/doc/apt-key.gpg \
| apt-key add -

# Add the Kubernetes apt repository to the local apt repository
# configuration
apt-add-repository "deb http://apt.kubernetes.io/ kubernetes-xenial main"

# installs the Kubernetes components/packages
apt install -qq -y kubeadm=1.26.0-00 kubelet=1.26.0-00 kubectl=1.26.0-00 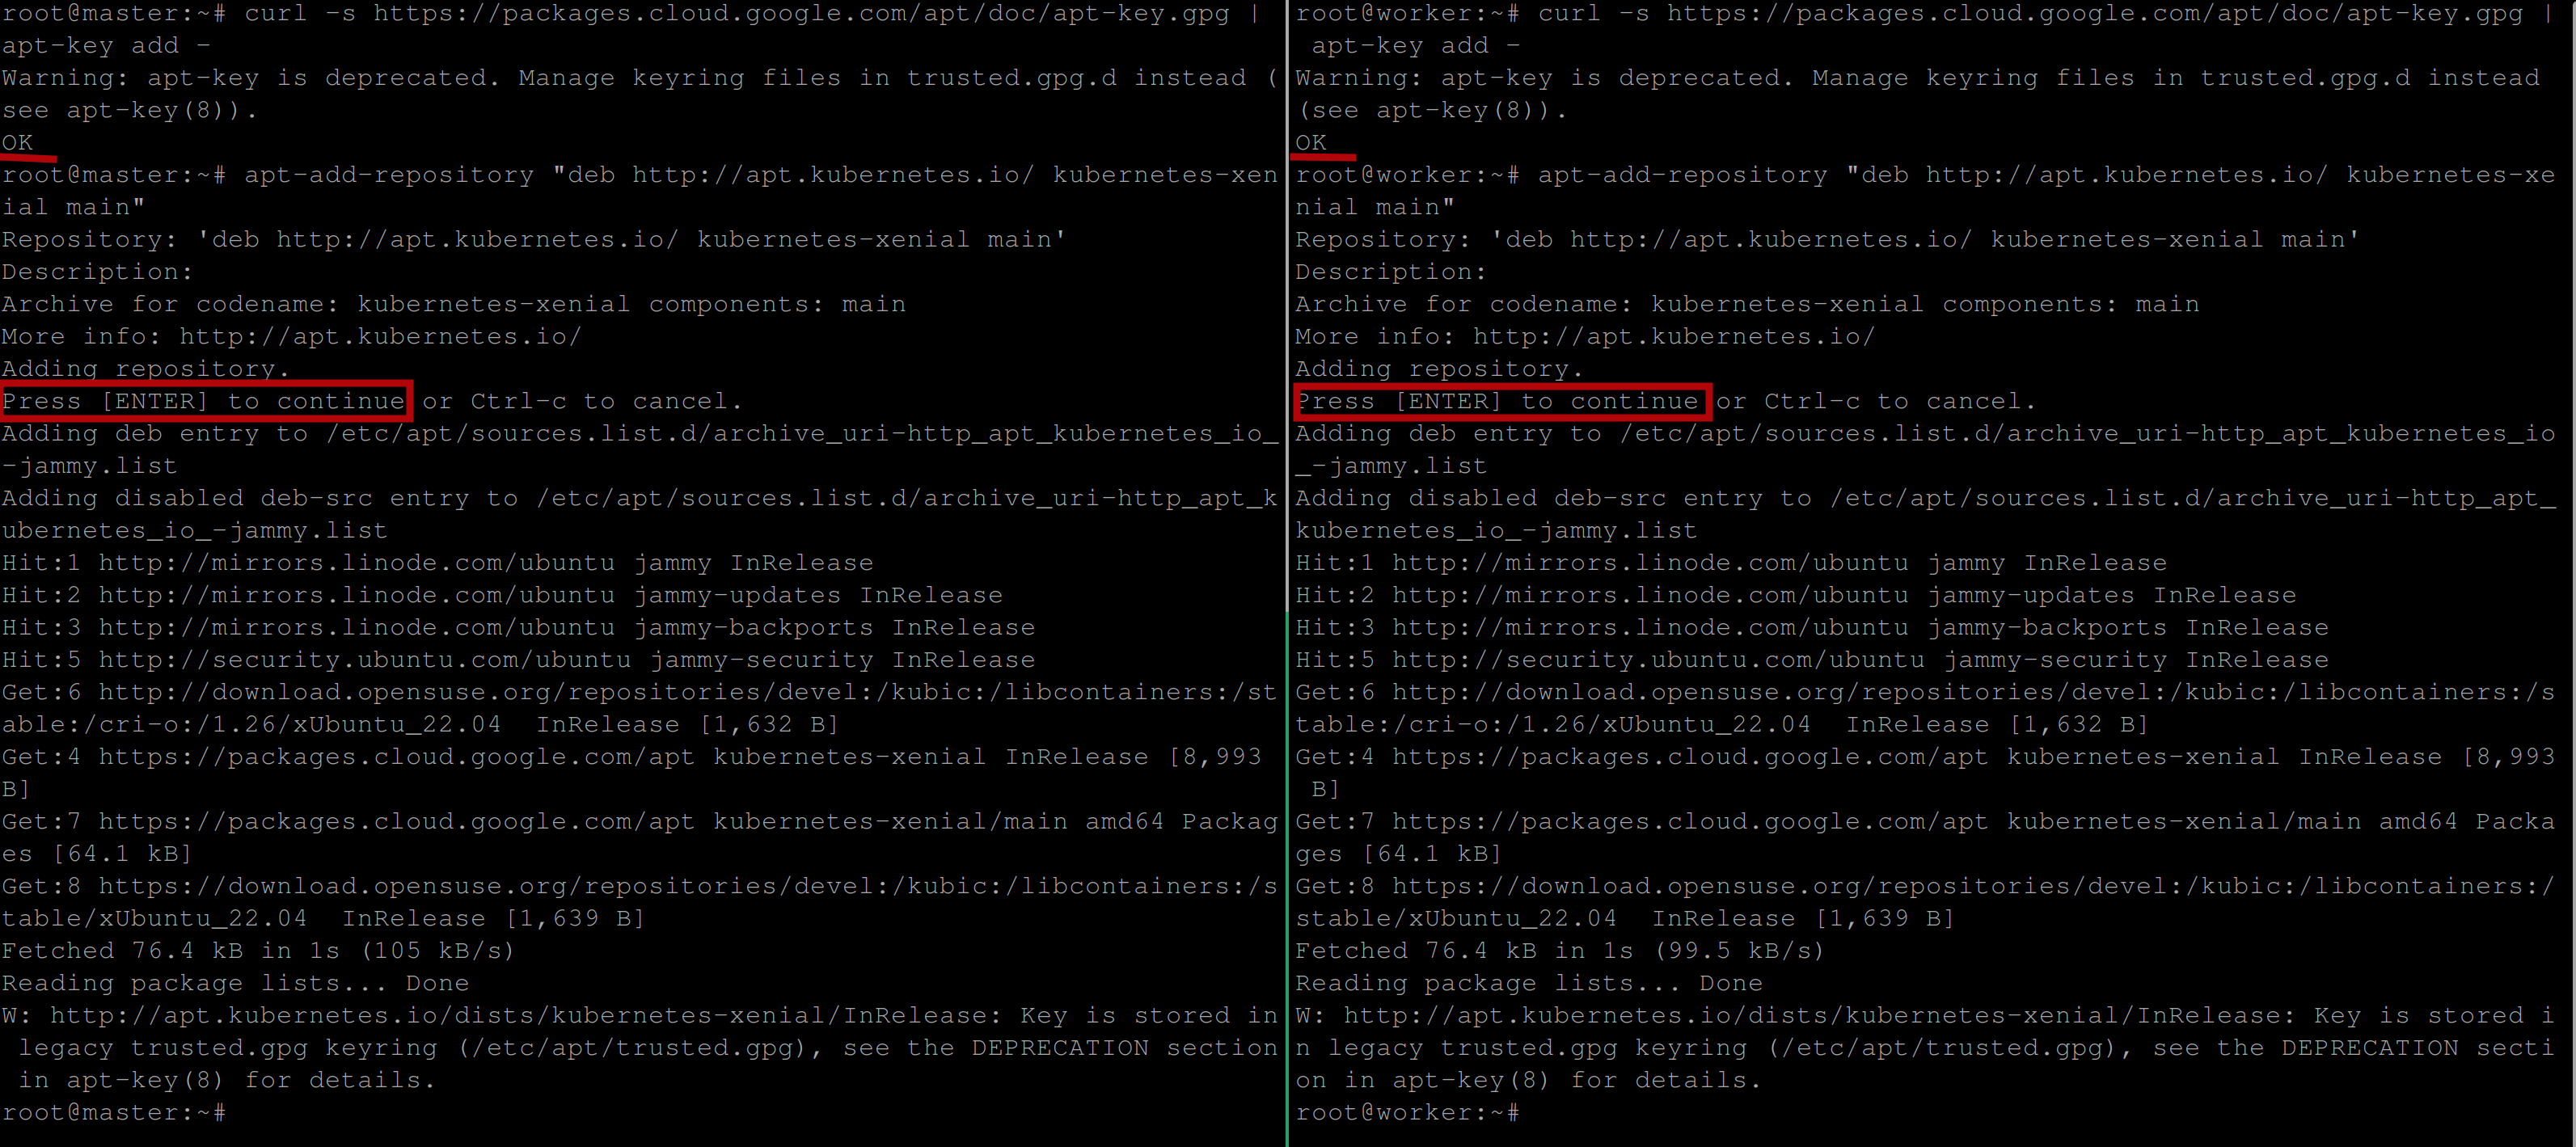
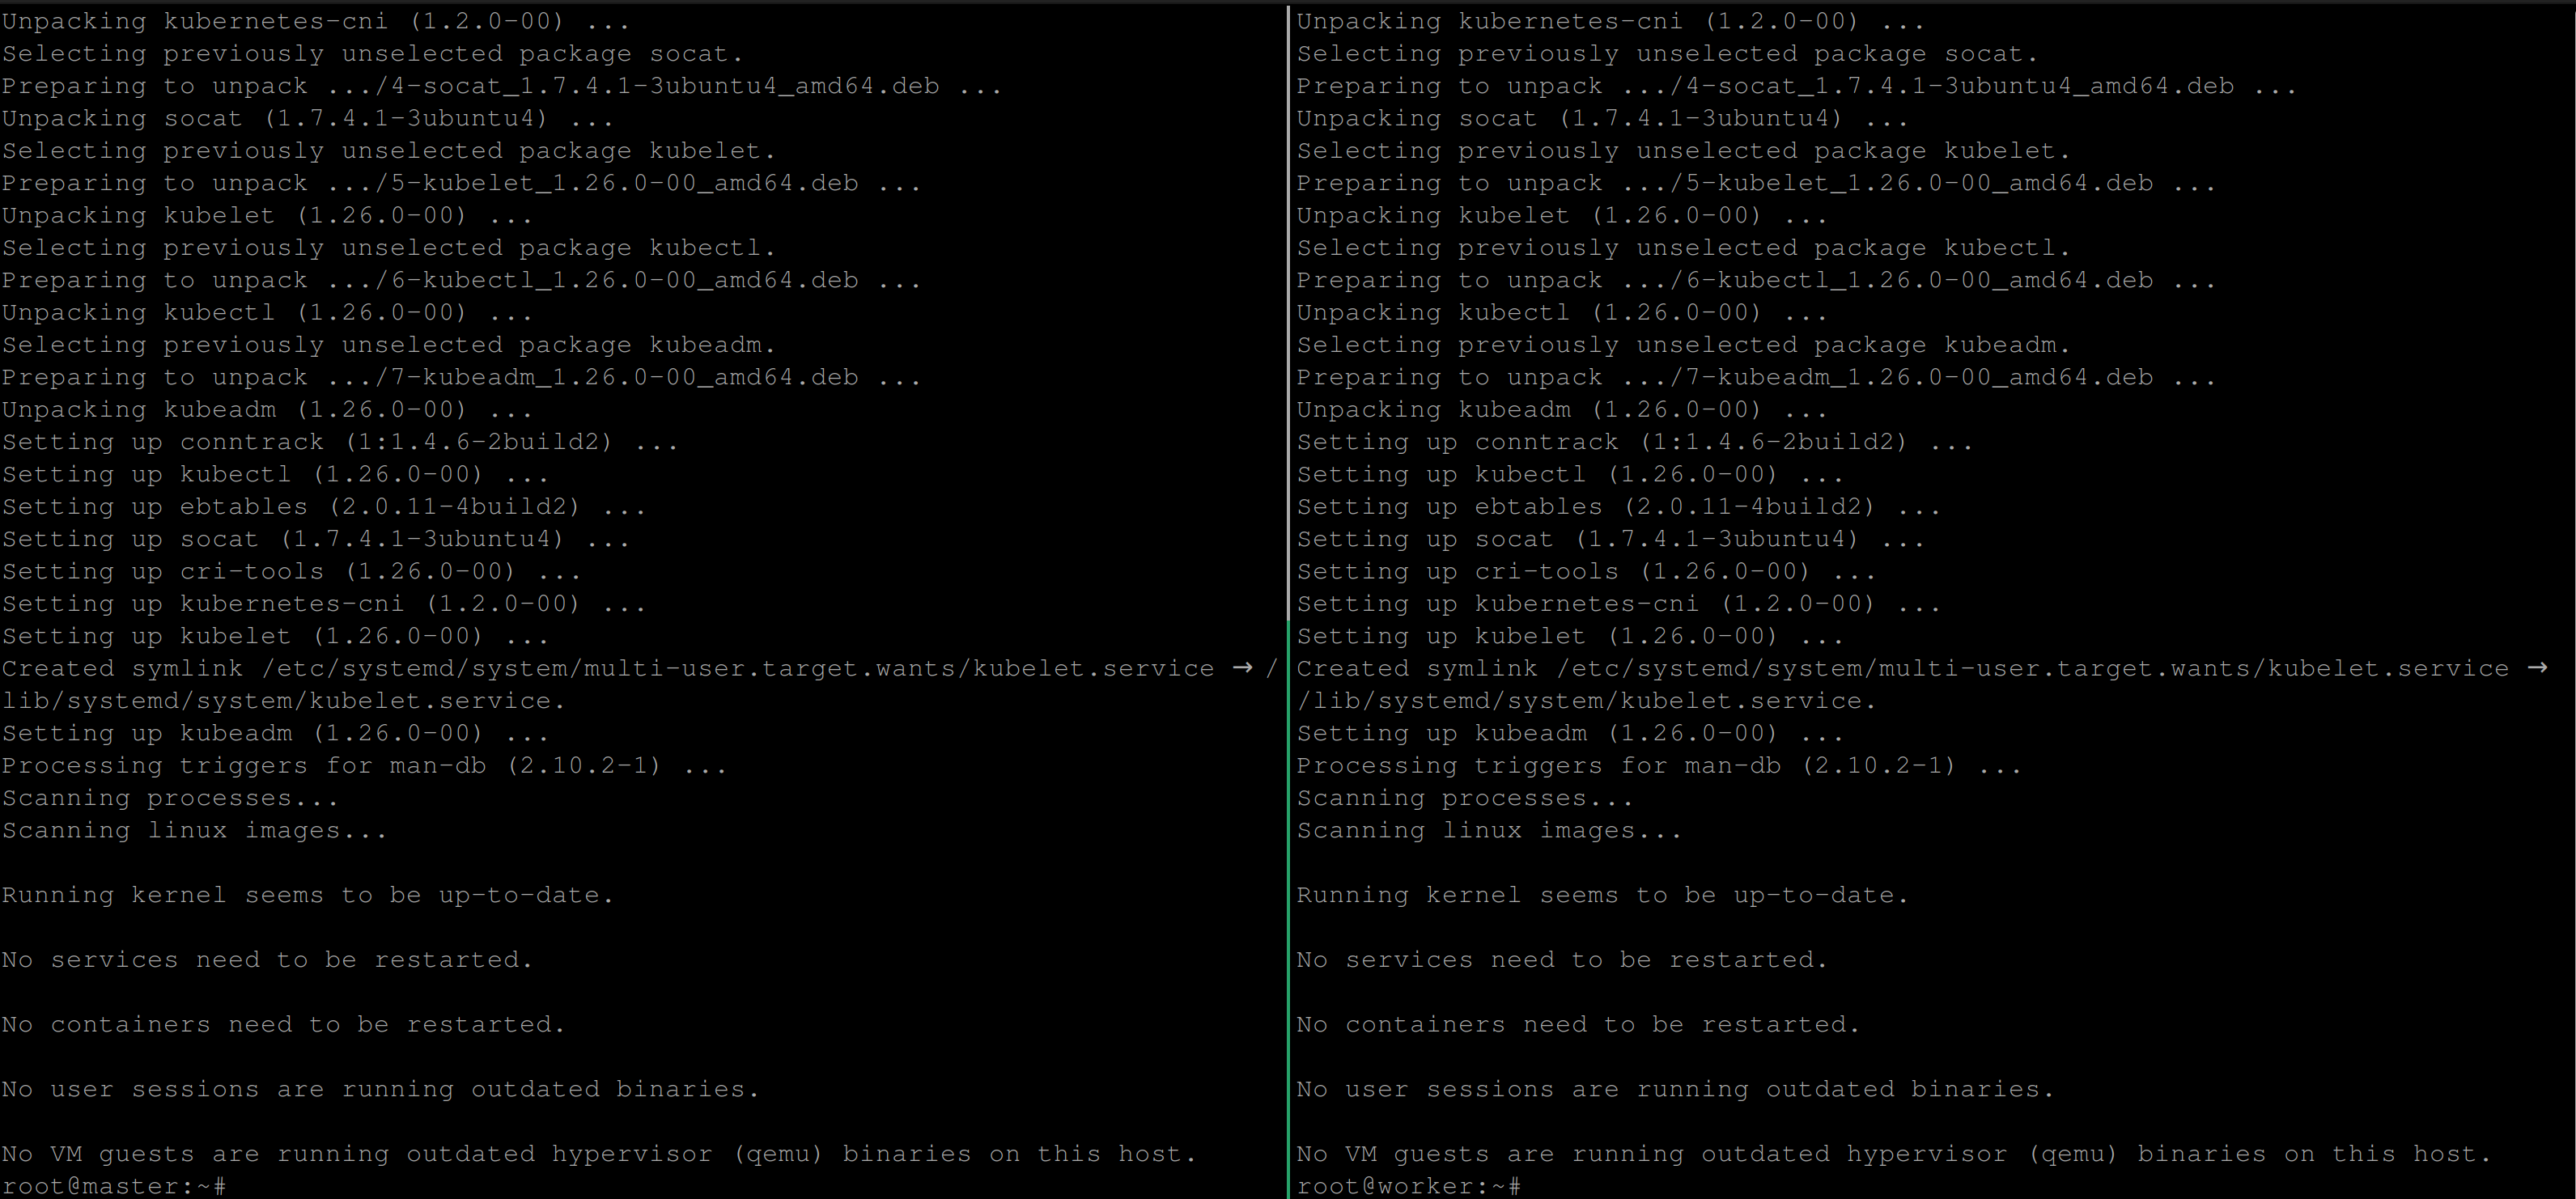
Be sure to always install the same version as the CRI-O container runtime for your Kubernetes components else you might come across some errors.
Initializing Kubernetes Cluster on Control Plane
Initializing a Kubernetes cluster on the control plane involves setting up the master node of the cluster. The master node (The server with the highest number of resources like storage, cpu etc) is responsible for managing the state of the cluster, scheduling workloads, and monitoring the overall health of the cluster.
First, run the following commands to enable the kubelet service and initialize the master node as the machine to run the control plane components (the API server, etcd, controller manager, and scheduler) :
# Enable the Kubelet service
systemctl enable kubelet
# Lists and pulls all images that Kubeadm requires \
#specified in the configuration file
kubeadm config images pull
To initialize a Kubernetes cluster on the control plane, execute the following command:
kubeadm init --pod-network-cidr=192.168.0.0/16 \
--cri-socket unix:///var/run/crio/crio.sock
This initializes a Kubernetes control plane with CRI-O as the container runtime and specifies the Pod network CIDR range as well as the CRI socket for communication with the container runtime.
The kubeadm init command creates a new Kubernetes cluster with a control plane node and generates a set of certificates and keys for secure communication within the cluster. It also writes out a kubeconfig file that provides the necessary credentials for kubectl to communicate with the cluster.
- The
-pod-network-cidrflag: Specifies the Pod network CIDR range that will be used by the cluster. The Pod network is a flat network that connects all the Pods in the cluster, and this CIDR range specifies the IP address range for this network. - The
-cri-socketflag: Specifies the CRI socket that Kubernetes should use to communicate with the container runtime. In this case, it specifies the Unix socket for CRI-O located at/var/run/crio/crio.sock.
Once the Kubernetes cluster has been initialized successfully, you should have the below output:
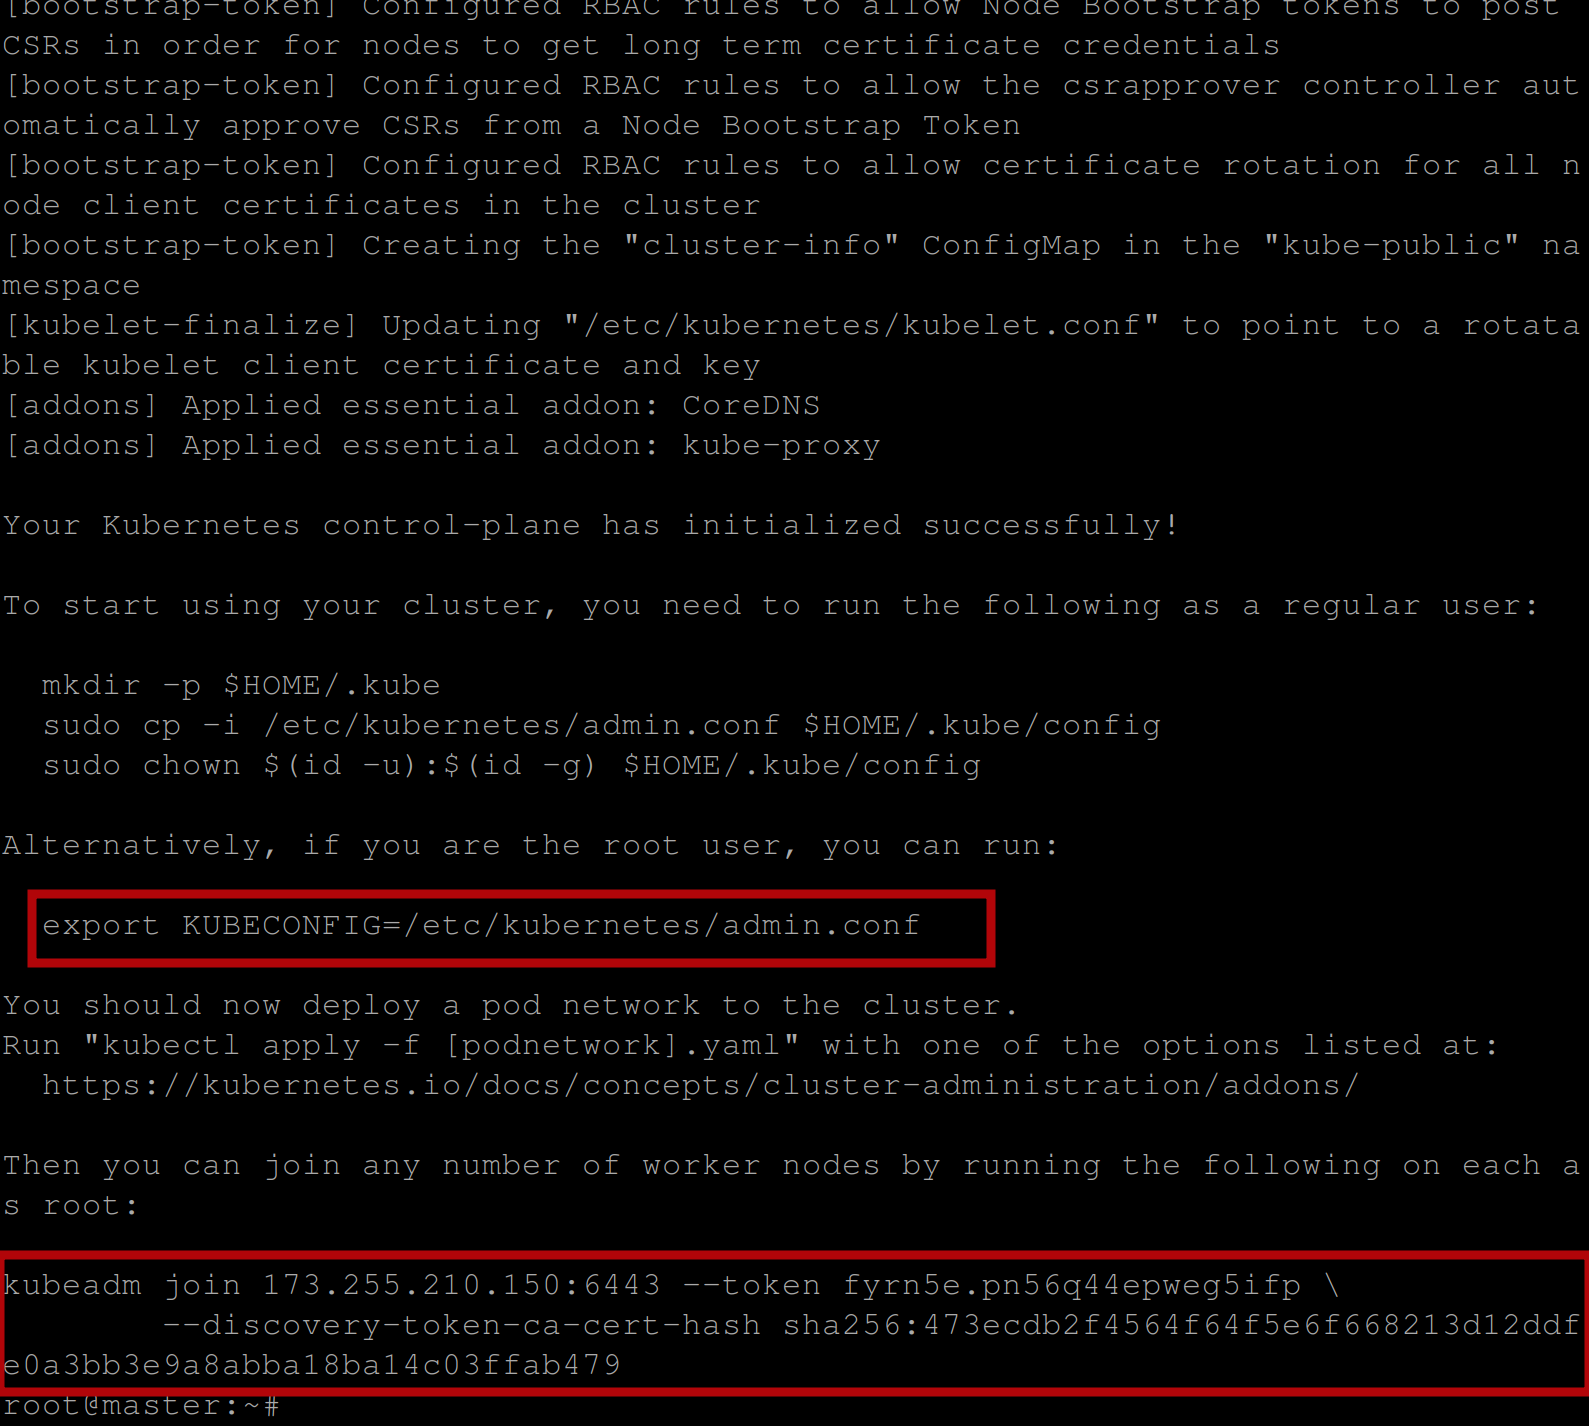
You can see in the image above the command to be used to connect and interact with the Kubernetes cluster and a token to join worker nodes to the master node which can also be regenerated.
Deploying the Calico Network for Kubernetes
Deploying Calico Network in Kubernetes means integrating the Calico network policy engine with a Kubernetes cluster to enforce network policies and provide network connectivity between containers. Calico helps in securing network communication within the cluster.
First, execute the following command, so you can use and interact with the Kubernetes cluster:
export KUBECONFIG=/etc/kubernetes/admin.confRun the command on the master node to deploy the Calico Network:
kubectl apply -f https://raw.githubusercontent.com/projectcalico/calico/v3.25.0/manifests/calico.yaml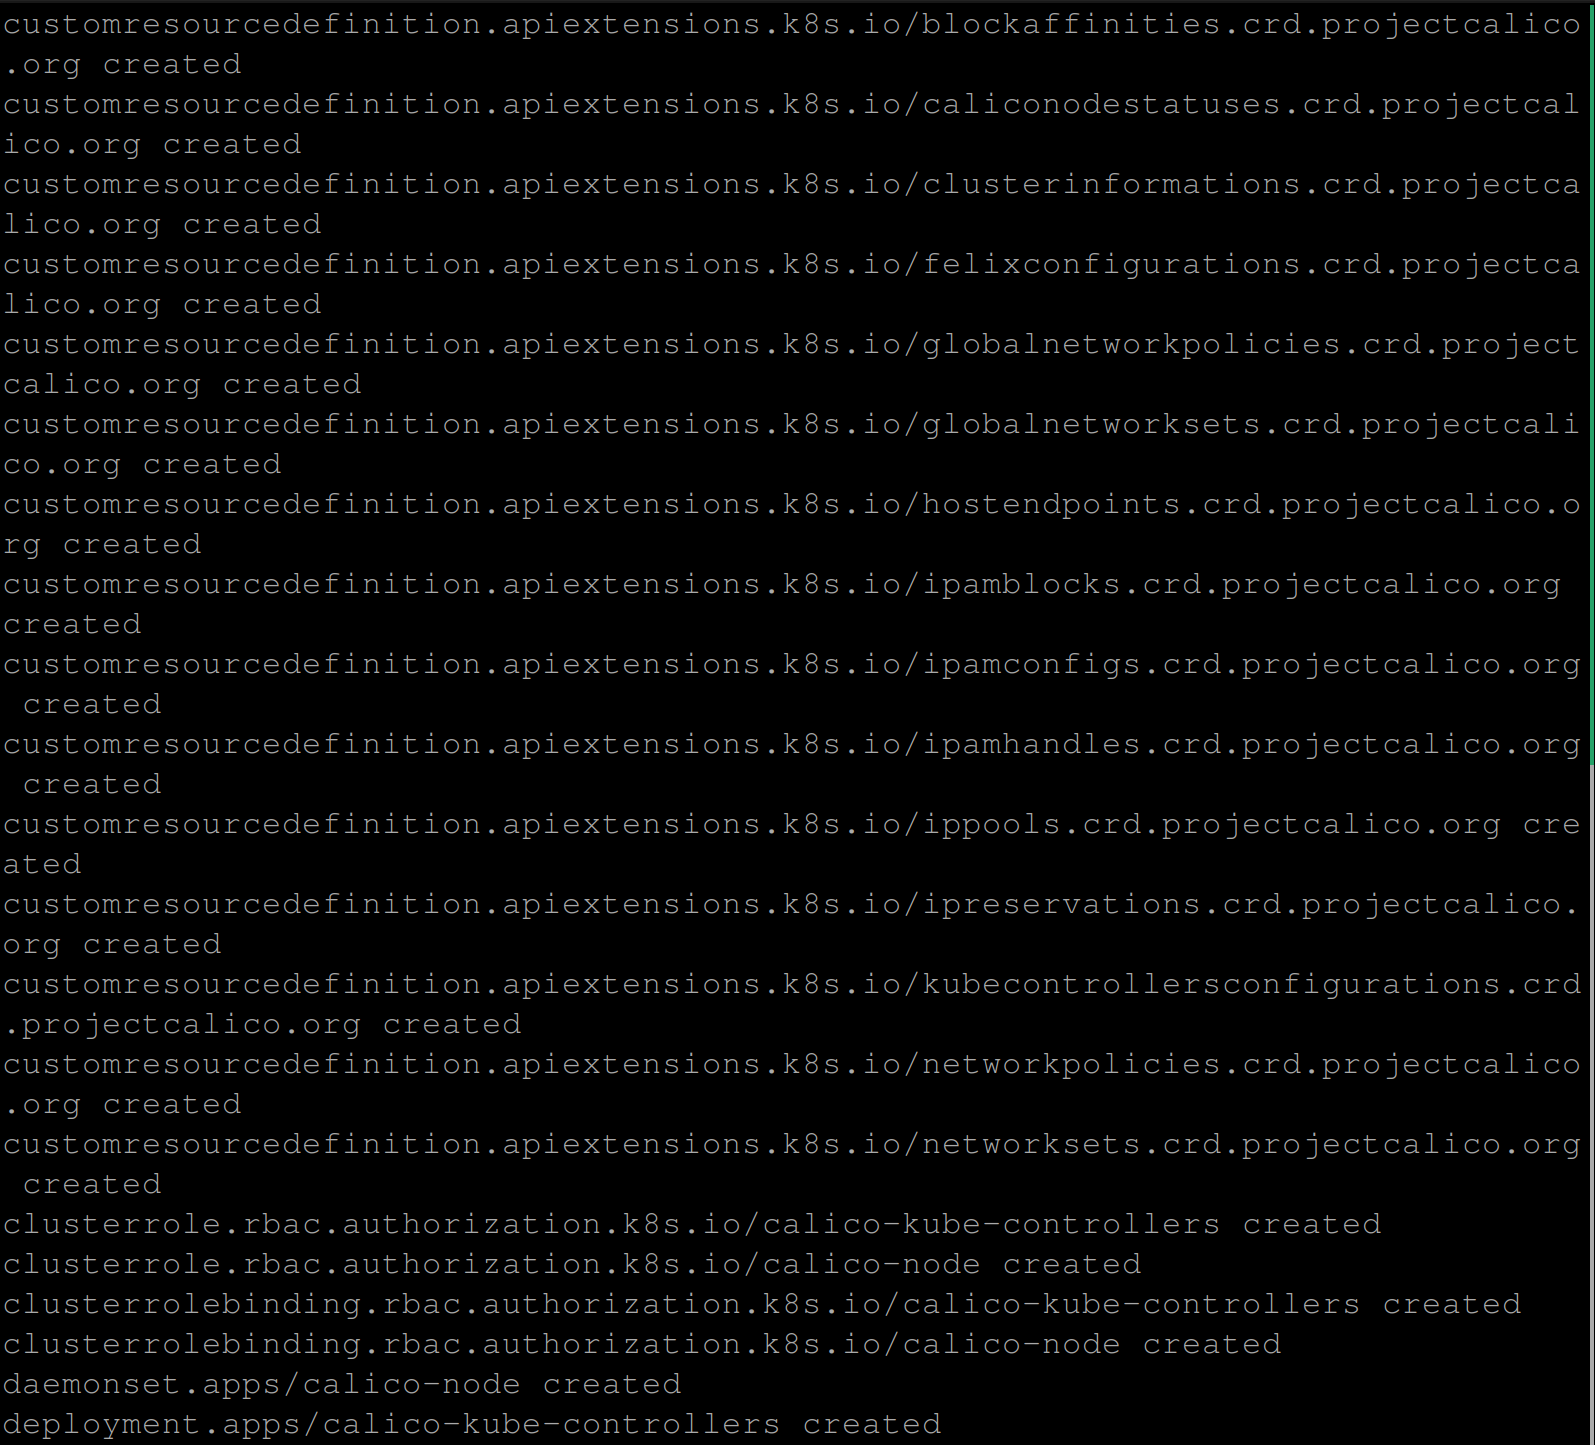
Joining Worker Nodes
Joining the worker node(s) with the master node is very important as the worker nodes run the workloads or containers in the cluster and are controlled by the master node. The master node manages the worker nodes, maintains the cluster state, and communicates with the API server. This adds more capacity to the cluster, allowing it to manage and run more containers.
Execute the below command on the control plane node to generate a join command that can be used by worker nodes to join the Kubernetes cluster:
kubeadm token create --print-join-commandThis command generates a token and prints a command that can be used by worker nodes to join the cluster. The command also includes a token and the IP address of the control plane node:
Now execute the generated token on the worker node(s) to join them to the cluster:

If the joining successful, you should have the below output:
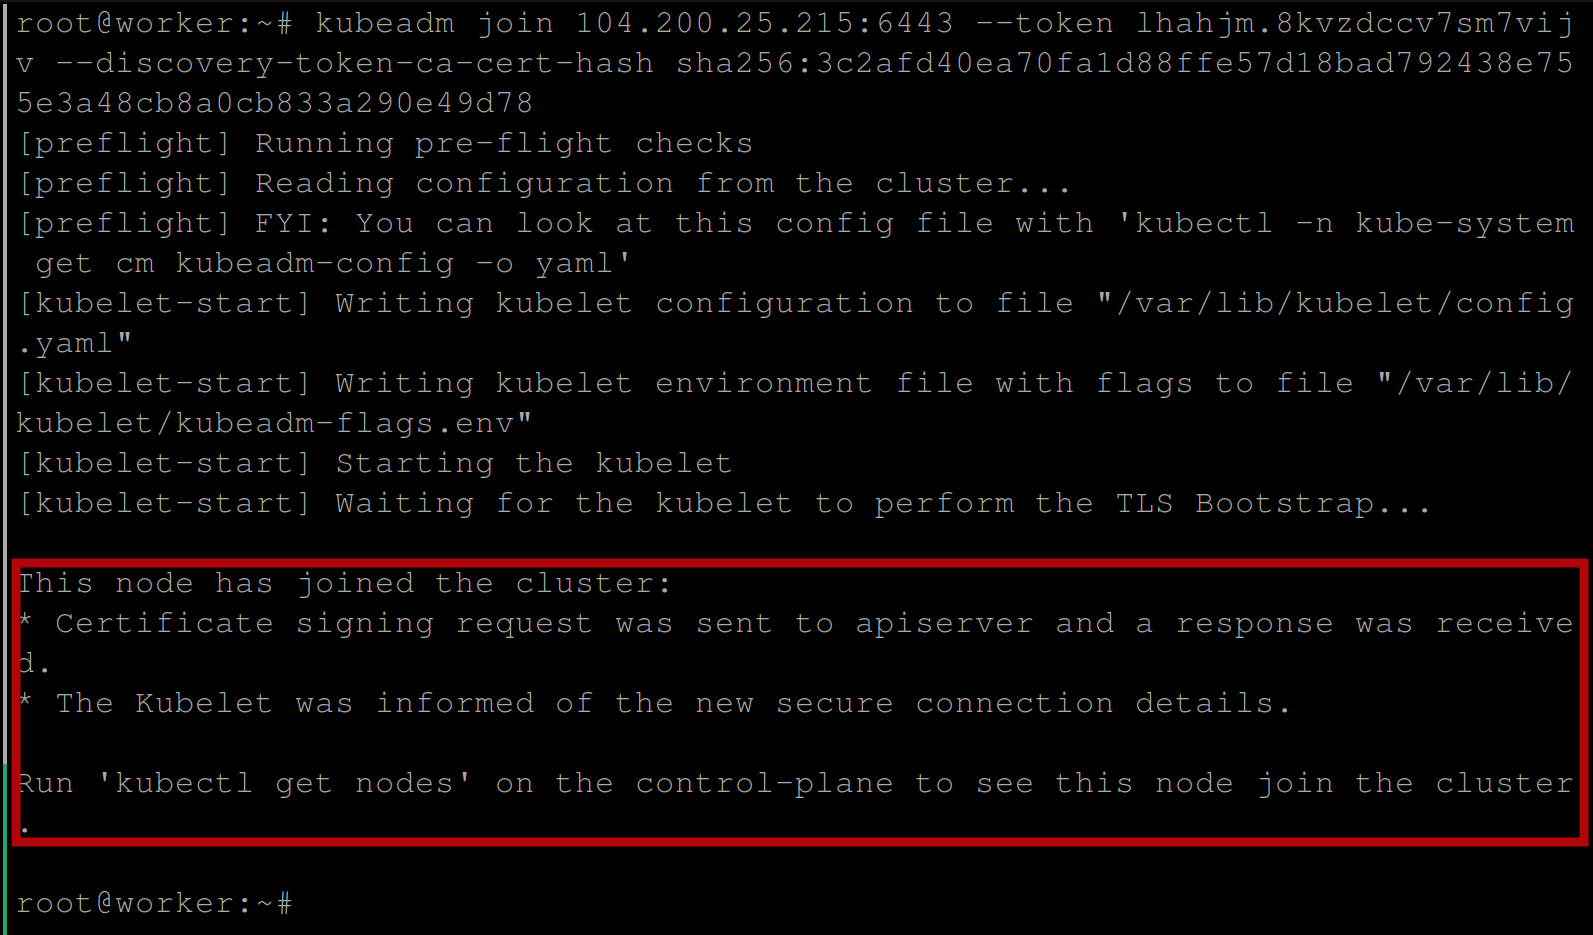
To verify, run the command on the control plane node (master node) to get the nodes available in the cluster:
kubectl get nodesIf you have the following output, then you have successfully deployed a Kubernetes cluster with the CRI-O container runtime:

Creating a Deployment for Testing
Now that you have your Kubernetes cluster up and running, it’s time to test this cluster.
First, download the Kubeconfig file of your cluster to your local machine with the following commands:
scp root@CONTROL_PLANE_IP_ADDRESS:/etc/kubernetes/admin.conf \
~/.kube/config
If you don’t do this, you won’t be able to use and interact with your cluster.

Verify the status of the cluster and its components using the following command:
kubectl cluster-infoWhen executed, it displays the URLs for the Kubernetes API server as well as the cluster DNS service IP:

Retrieve the information about the nodes in the Kubernetes cluster, including their name, status, and IP addresses, and the information about all the pods running in the cluster, including the namespace, name, status, and IP address of each pod with the following commands:
kubectl get nodes
kubectl get pods -A
Lastly, create an Nginx deployment with the following command to test the Kubernetes cluster:
kubectl create deploy nginx-web-server --image nginx
Create a NodePort service with the following command to expose the nginx-web-server deployment on a static port (port 80) on each node in the cluster, which allows external traffic to access the service:
kubectl expose deploy nginx-web-server --port 80 --type NodePort
To view the nginx web server, execute the following over your preferred web browser:
# MASTER_IP:NODEPORT_SERVICE_PORT
http://170.187.169.145:32141/

OR

# WORKER_IP:NODEPORT_SERVICE_PORT
http://170.187.169.226:32141/
Verifying Communication Between Nodes
After deploying a Kubernetes cluster, it is important to verify the communication between nodes to ensure that the nodes are able to communicate with each other properly. The reason is most times there might be network issues that may be present, such as misconfigured firewalls or incorrect network settings.
For illustration purposes, we will verify by deploying a busybox pod on the worker node and ping other nodes to see if they’d respond.
Create a new pod running a busybox container with the name busybox and attach a terminal session to it with the following command:
kubectl run -it --rm busybox --image busybox
If you open another terminal and run the following command, you will see that the busy-box pod has been created and is running :
kubectl get pods -o wide -A
You can see in the image above, that the busybox container is running on the worker node with network IP 192.168.171.66
Take note of the other network IP addresses, as we will be using them to demonstrate the network connection between them.
You can also execute the following command in the busybox shell to confirm:
hostname -iExecute the following command to check the network connectivity between the worker node running the busybox container and one of the master node network IP addresses - 10.85.0.4 for instance:
ping ANY_OF_THE_MASTER_NODE_NETWORK_IP
ping 10.85.0.4
From the image above you can see that you have outputted an error message permission denied (are you root)?.
Even if you try pinging another network IP, you should still have the same error, as shown below:
ping 170.187.169.145
Pinging master node with IP(170.187.169.145)
This error is CRI-O-specific, in the sense that some capabilities were removed to make CRI-O more secure.
Since the release of CRI-O v1.18.0, The CRI-O container runtime now runs containers without the NET_RAW capability by default. This change was made for security reasons to reduce the attack surface of containerized applications.
The NET_RAW capability is used to create and manipulate raw network packets, which could potentially be used to launch a variety of network-based attacks.
So to correct the permission denied (are you root)? error, we need to configure CRI-O to run containers with this capability enabled by default.
Firstly, delete the busybox container by simply typing the command exit and you should have the below output:

SSH into the worker node using the following command:
ssh root@WORKER_NODE_IP
ssh root@170.187.169.226
Run the following command to open up the /etc/crio/crio.conf file using the nano text editor, you can use any text editor of your choice too:
nano /etc/crio/crio.confScroll through the file, stop where you see the lists of capabilities and add the NET_RAW capability in the list as shown below, be sure to also uncomment the capabilities by simply deleting the # character before each capability:
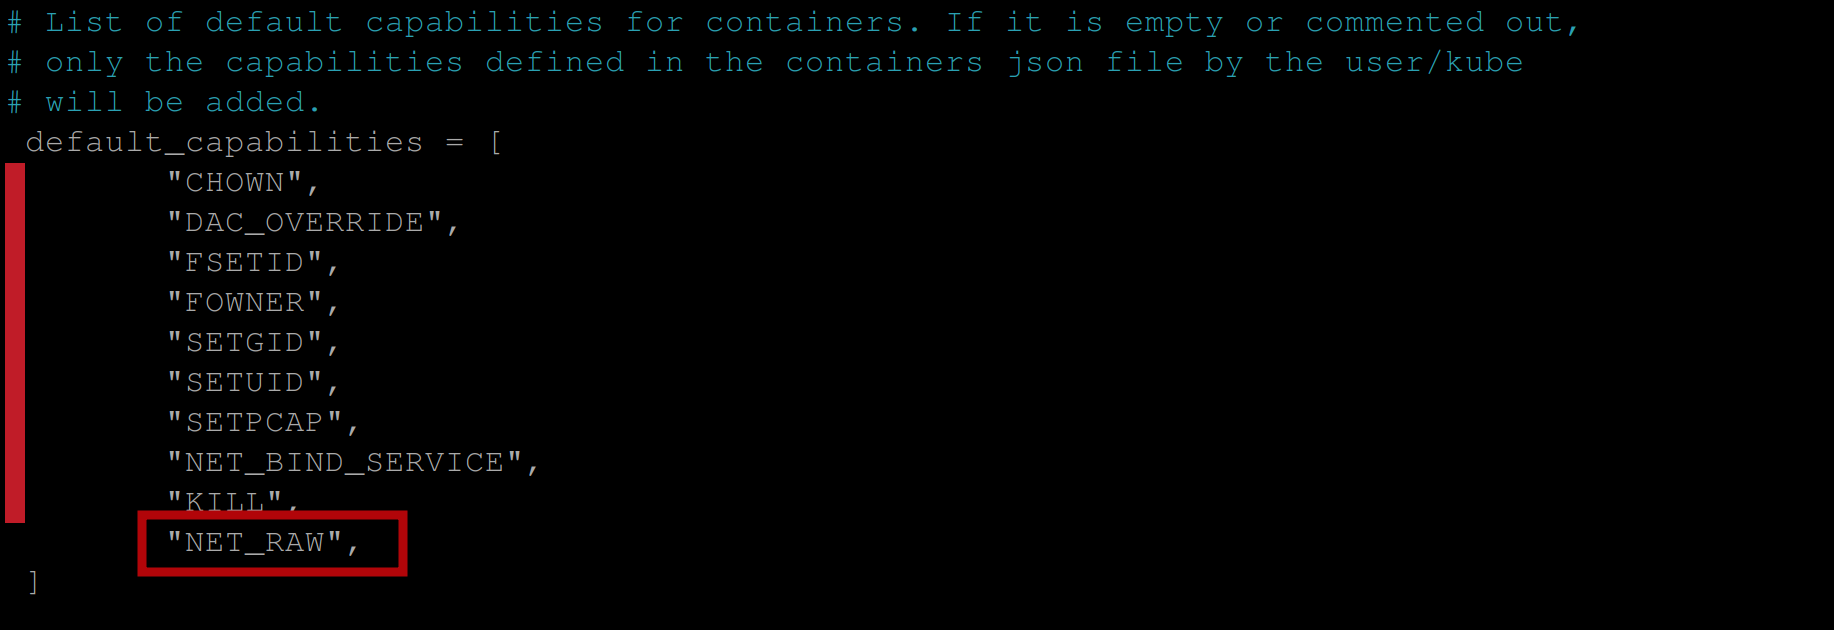
Save the file and run the systemctl restart crio command to restart CRI-O.
Now from your local machine execute the kubectl run -it --rm busybox --image busybox command again and try running the ping MASTER_NODE_IP command:
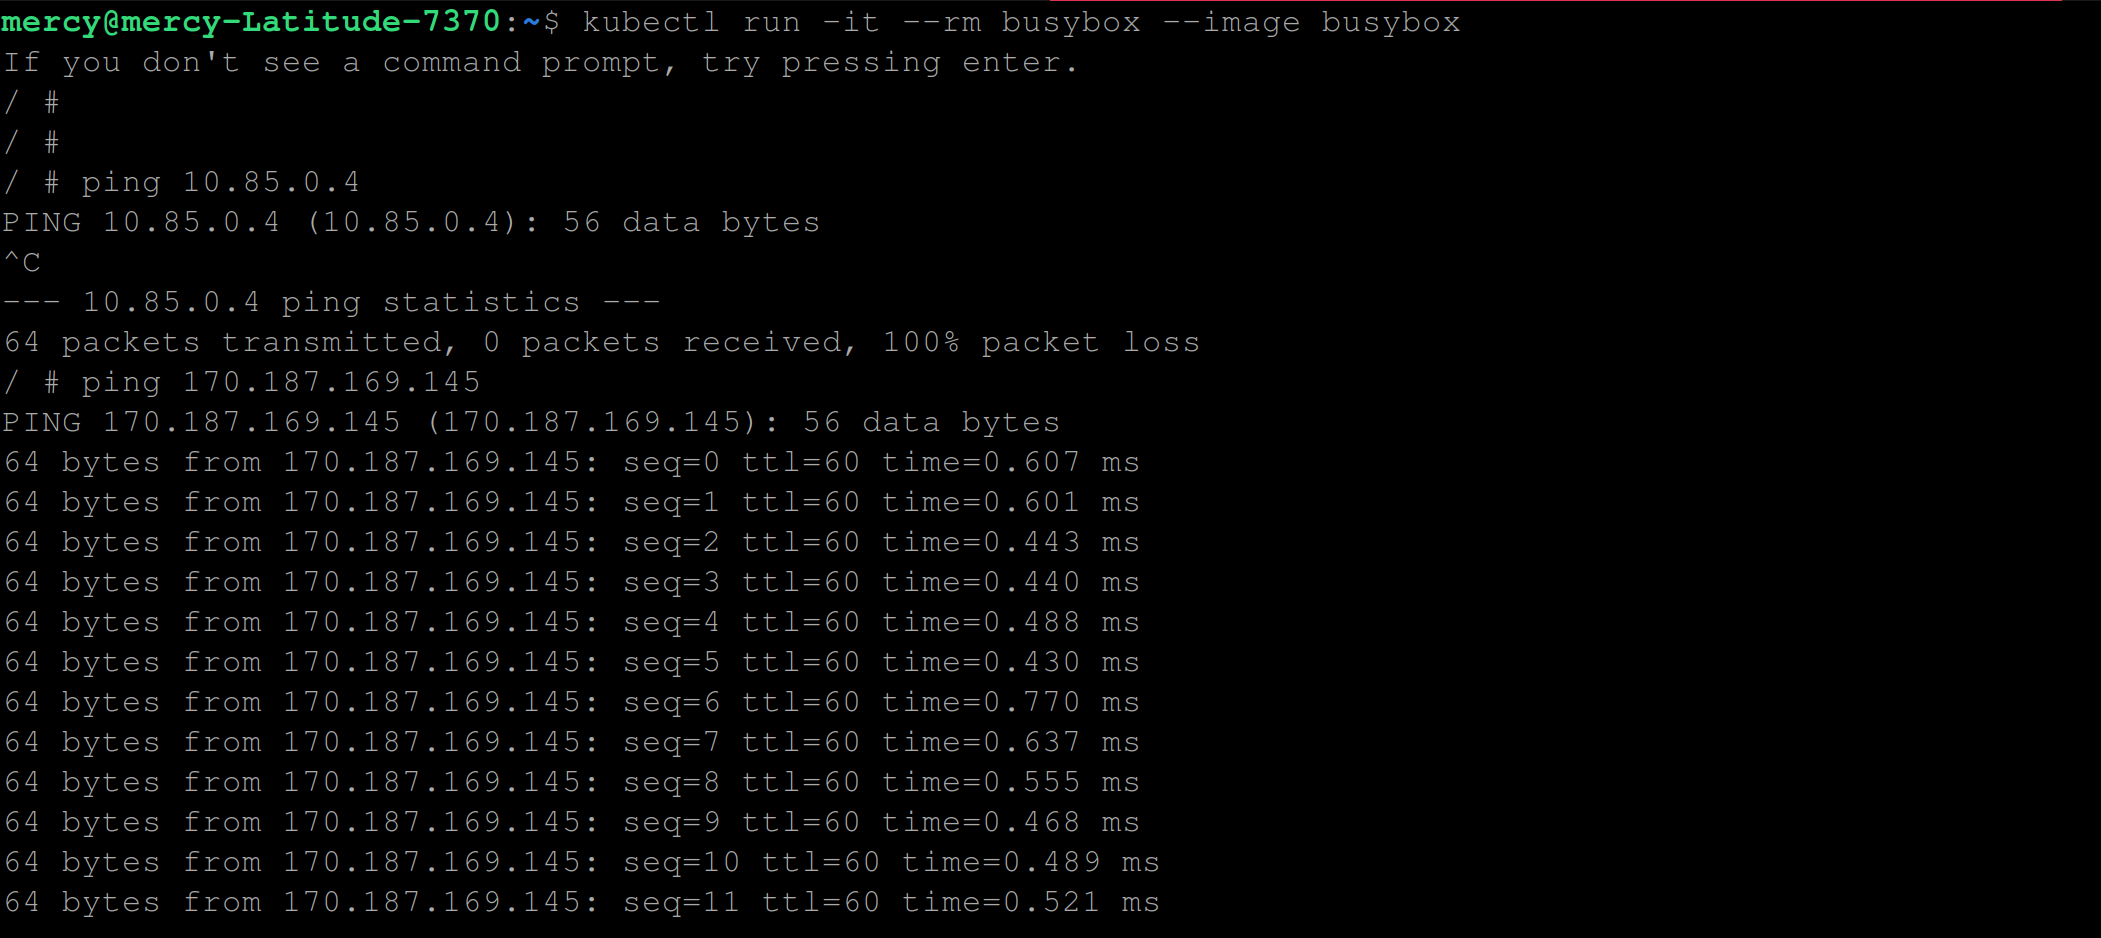
You can see from the image above that both commands ping 10.85.0.4 and ping 170.187.169.145 becomes a success.
Conclusion
In this tutorial, you’ve learned to set up and pair CRI-O with Kubernetes on an Ubuntu 22.04LTS server, initiate a Kubernetes cluster, and test an Nginx server deployment. CRI-O’s focus on performance, security, and Kubernetes compatibility make it an excellent choice for large-scale containerized application deployment.
As you continue to explore and optimize your containerized applications, you might want to streamline your build processes. For that, we recommend checking out Earthly.
Enjoyed learning about CRI-O and Kubernetes? Then you’ll definitely appreciate what Earthly has to offer.
Earthly makes CI/CD super simple
Fast, repeatable CI/CD with an instantly familiar syntax – like Dockerfile and Makefile had a baby.


